Hey everyone one, I wanted to do a little breakdown post detailing a few different stages in my process of making this image. If you guys enjoy this kind of thing please let me know and I'd be happy to do more in the future!
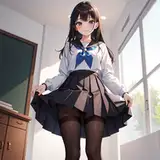
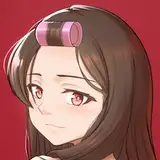
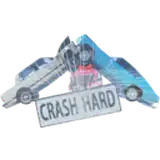
1) Base Posing- This can either be a quick process or one that takes a lot of time depending on how much you have figured out before hand. I prefer to take my time with this process because a good pose can easily carry an image by itself. I also tend to pair this with setting up the camera as well, because both tend to work in harmony together. A slightly different angle can completely change up the composition so it's important to nail both down, but don't be afraid to experiment. I struggled a bit compositionally with this one because I initially had Miyabi more to the left, and for the composition it looked great. But I knew I needed to add an element to the left (in this case it was the second character/dong that's in the final image.
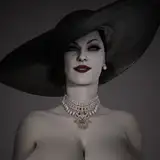
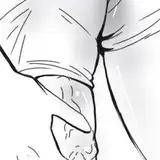
2) Sculpting - This is one of the best ways to take your image to another level and truly make it unique and appealing. I had a reference image I found that inspired this whole image, with the main focal point being the gaping hole. You can't really get that kind of shape or look with just posing on like 99% of models out there, so you have to do some heavy lifting yourself. This is involved a bit of shaping of the legs, along with her coat. Most people probably didn't pay much attention to the shape of her coat, but if I had left it as is, you can see how unappealing the shape of it is. By sculping it, it helps the flow of the image and adds a bit of implied motion. These little details add up in the overall image so it's important to look for things like this, even if you feel like the viewers won't notice or care.
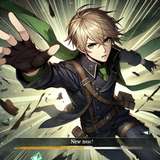
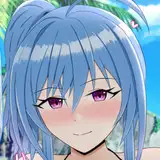
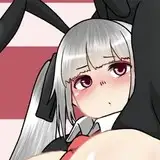
3) Lighting, Environment, & Additional Details - Lighting is obviously a very big component to art. Generally with the ZZZ models their shaders are setup in a way that you have to be pretty conscious of your lighting angles and choices. Generally I have a key light that I use to define the highlights and shadows then work my way from there. And HDRI was used with a low value to give ambient lighting, and then environment was just some buildings I put into the background from another file I had. I tried to mimic something similar to the first cutscene we see with Miyabi where she's seen fighting across buildings and debris in the hollow. Most people don't care about environments but personally I think scene dressing can be an important part of helping communicate a story.
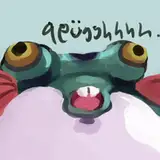
4) Post Processing - This is the final piece to help push the image over all. Depending on your skills in image editing with things like photoshop, you can completely transform anything. However my photoshop skills are pretty minimal and I like keeping things in Bender as I can since thats where my comforts lie. So everything in my post processing was done in blender but could easily have been done in photoshop, as most of what I do is color correction and just some simple effects/filters. Just making things pop a little more and adding in some more subtle stylistic changes.
Anyway thats it for this simple breakdown. I did this to reflect a little on this piece, and share some info with those that might be interested. Again let me know if you'd like to see more stuff like this in the future!