Ready to Render Scene 1
Added 2020-10-10 01:52:12 +0000 UTCHi all,
For my first Ready to Render scene, I decided to go with the basics. Oftentimes, the scenes shared by the community are set for a particular model or activity. In this post, you will find four basic scenes aiming to help you quickly creating nice portrait shoots and showcase your models with your choice of outfits.
TL;DR
Everything you need is here on Mega:
CuteSvetlana.Scene-Ready to Render Sc 1.zip
CuteSvetlana.Scene-Ready to Render Sc 1 Toolkit-Background & Textures.zip
CuteSvetlana.Scene-Ready to Render Sc 1 Toolkit-Props.zip
CuteSvetlana.Scene-Ready to Render Sc 1 Toolkit-Skyboxes.zip (2 GB)
Explanation - This submission comprises of:
Four Rooms:
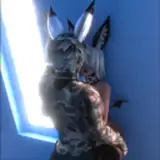
The main theme of the rooms is to present your model in front of a nice scenery.
- The Blue Room and the Pink named after their main ambient light. Both rooms have a glass pane to add some reflection effects to the scene.
- The Graffiti Room this was actually my original idea is here to showcase your model in front of some nice Street Art
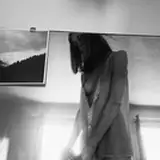
- The Abrito Room is inspired by Abrito, a known nude photographer on Deviant Art. He is a true master of beautifying the woman body in dance and in sport. I really love his work and wanted to take the opportunity to make his art known by more people.
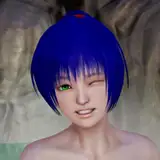
All rooms come with a preloaded model shared by the community with built-in hair and clothing to reduce external dependency.
Light rig
The main light setup is a 4 spots rig focused on the upper body of the model and one Ambient light. The 4 spots are parented to the model so they follow the models pose and move. The Ambient light is parented to an empty atom. You can rotate the Ambient light by selecting and rotating the atom Scene Ambience Light Control.
If there is too much reflection, try to change the Back Left Contour Light and Back Right Contour Light from Spot to Area.
Props, Skybox and Textures
I am also providing 21 new skyboxes and an assortment of props, textures and images to kick-start your own scenes.
Plug-ins
I did not include the common beautifier plug-ins. You can add them at your convenience and depending on the performance of your gear. Typically youll add Hunting-Succubus tessellation plug-in to the model and McGrubber postmagic to the Scene Ambience Light Control atom. You may also add Nostage3s UnityVaMifier plug-in to the props for additional control.
Tuning
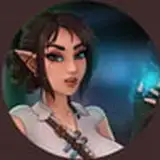
Probably the part where I spend the most time is in setting up the skin to my likings. Mostly youll need to play around with the Skin Materials 1 and 2 tabs. If something is not quite right, check the scene Lighting effect.
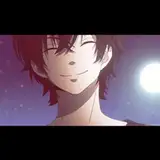
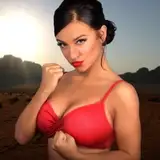
You can get lucky as well. The screenshot below only took me a few minutes to make. I changed the background image and loaded one of the Lexi presets into the example scene. I adjusted the neck angle to meet the light and then loaded the outfit.

Contents:
Since it is more a toolkit that a static scene, this is not a var package. Download the different components and unzip to your VaM folder. You can use the subfolders to save your personal scenes.
Custom\Assets\CuteSvetlana\Background
Background images for the Back Pane atom, with photo from Abrito, a choice of graffitis, a short selection of high-quality wallpapers and some textures from DA MysticArtDesign for more subtle effects
Custom\Assets\CuteSvetlana\Textures
texture resources for the floor and walls
Custom\Assets\CuteSvetlana\Props
a few Unity assets to start with. A bar stool in 3 styles, a very nice couch from Blendswap, a wood step, etc
Custom\Assets\CuteSvetlana\Skybox 21
free for use high-quality skyboxes from hdrmaps.com. Split in 4 categories for faster loading.
Saves\scene\CuteSevtlana\RRS1 Portrait
VaM scenes
End thoughts
I hope you'll find valuable that I took some time off from clothing conversion this week. If feedbacks are positive, I'll turn my sights to porting in the future some nice environments I've seen around. I look forward to your comments. XOXO
Comments
Credits & thanks Damarmau, Rich Wylder, MalMority and more for their scenes with great lightings that provided learning ground SupaRio for his continuous support and help on annything VaM and 3D (https://www.patreon.com/SupaRioAmateur/posts) Ground & wall textures from 3dtextures, https://www.patreon.com/gendo The high quality HDRI Skybox are from https://hdrmaps.com/ The high quality wallpapers are from the site https://www.wallpaperup.com/
CuteSvetlana
2020-10-10 07:31:55 +0000 UTC