[Reward | WIP] Cocoa The Coffee Rabbit
Added 2022-04-30 05:22:00 +0000 UTC
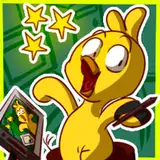
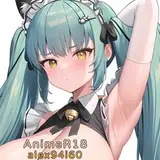
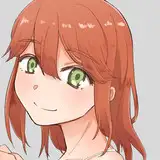
Final product post
April reward for Patreon Ether! Who just happened to offer their reward to patreon TibsCove!
This looks like a cutie for sure! And I wanted to make her shine even more by drawing her in an outfit she surely would like to wear!
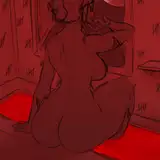
- 1- Early guidelines: This drawing is going to feature some perspective on it, since I get the chance to experiment with it! So the 1st thing I improvise is a cuadrangular prism that helps determine the overall look of the pic.
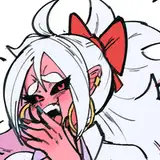
- 2- Rough early sketch: Then I start playing around with what would be the basic body for the character, I kinda don't like the turn it's taking here but I decide to keep doing some changes here and there untill it looks more presentable.
- 3- Base Sketch: After lots of tweaks, I end up having a pretty decent basic sketch for the basic body.
- 4- Clothing sketch: Then on another layer I draw the clothes on top of the character.
- 5- Final sketch: WIth both sketches in, I use a mask to safely hide the basic sketch so it's not seethrough the clothes anymore.
- 6- Lineart: Now I move on to the clean lines that are meant to be part of the final look. I detail the fur in this stage and add a couple wrinkles to the clothes.
- 7- Flat color: Later I fill in all the lines with basic colors, adding extra things here and there for the shirt.
- 8- Gradients: With the colors in, I add some extra layers now including several gradients for darker and lighter tones on each color. It is in this stage that I add several extra details to the fur! Which involves several new layers to make sure I can tweak everything in case I need to. I use a couple different brushes on this stage.
- 9- Shading: Later on I add the layered shadows and highlights with the proper settings and colors to fit the design.
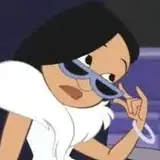
- 10- Glasses shading: In this stage I take some time to add some substance to the lenses on the glasses, I wanted them to be a little stylish and pretty so I went for some more vibrant colors.
- 11- Lighting effects: Now I add some glow effects and color corrections to accentuate everything further.
- 12- Env. Shadows: Last but not least I add a little projected shadow on the ground and blur it a little bit since I like how it looks like that better!.
![[Reward | WIP] Cocoa The Coffee Rabbit](https://img5.saketami.com/storage/9/do/jt/9a2cd0-019e8c9a-2543-7566-aa9e-73b1b57785b2.png)
![[Reward | WIP] Cocoa The Coffee Rabbit](https://img5.saketami.com/storage/12/qo/vm/9a2cd0-019e8c9a-2548-730d-8978-4d1457e29525.png)
![[Reward | WIP] Cocoa The Coffee Rabbit](https://img5.saketami.com/storage/7/td/zp/9a2cd0-019e8c9a-254a-7cf5-b5d1-8c1bc3d65435.png)
![[Reward | WIP] Cocoa The Coffee Rabbit](https://img5.saketami.com/storage/5/ph/nl/9a2cd0-019e8c9a-2554-72f7-b3fe-3144b8278aa4.png)
![[Reward | WIP] Cocoa The Coffee Rabbit](https://img5.saketami.com/storage/5/gu/gv/9a2cd0-019e8c9a-2554-7dc6-bbcf-453eee856734.png)
![[Reward | WIP] Cocoa The Coffee Rabbit](https://img5.saketami.com/storage/11/lz/hm/9a2cd0-019e8c9a-2556-7e44-a8c0-dcfc22083371.png)
![[Reward | WIP] Cocoa The Coffee Rabbit](https://img5.saketami.com/storage/3/by/ae/9a2cd0-019e8c9a-2562-756a-8010-864f110ed448.png)
![[Reward | WIP] Cocoa The Coffee Rabbit](https://img5.saketami.com/storage/8/ic/qi/9a2cd0-019e8c9a-2562-7ec3-99fe-2af6bf5f7393.png)
![[Reward | WIP] Cocoa The Coffee Rabbit](https://img5.saketami.com/storage/2/hf/id/9a2cd0-019e8c9a-2564-7183-b3f1-511e99a3f16e.png)
![[Reward | WIP] Cocoa The Coffee Rabbit](https://img5.saketami.com/storage/12/wj/zc/9a2cd0-019e8c9a-256f-726c-9fe7-f458c258df06.png)
![[Reward | WIP] Cocoa The Coffee Rabbit](https://img5.saketami.com/storage/9/xz/hv/9a2cd0-019e8c9a-2576-783f-a716-da39928b4f72.png)
![[Reward | WIP] Cocoa The Coffee Rabbit](https://img5.saketami.com/storage/12/mp/jf/9a2cd0-019e8c9a-2583-7942-b0d0-cea329c06cda.png)