![[High-res Art | WIP | Comm] Roboleaf X-ray view Step-Process](https://img5.saketami.com/storage/12/aj/lb/9a2cd0-019e8c9a-9dea-7385-bbaa-a4830f27c90d.png)
![[High-res Art | WIP | Comm] Roboleaf X-ray view Step-Process](https://img5.saketami.com/storage/10/al/da/9a2cd0-019e8c9a-9df5-78b5-802a-2bf2537e40cf.png)
![[High-res Art | WIP | Comm] Roboleaf X-ray view Step-Process](https://img5.saketami.com/storage/5/rx/nh/9a2cd0-019e8c9a-9dfc-7fcf-a5f8-87959ca96aad.png)
![[High-res Art | WIP | Comm] Roboleaf X-ray view Step-Process](https://img5.saketami.com/storage/3/km/jw/9a2cd0-019e8c9a-9e09-7456-b397-f8369bce4d6a.png)
![[High-res Art | WIP | Comm] Roboleaf X-ray view Step-Process](https://img5.saketami.com/storage/4/mc/sq/9a2cd0-019e8c9a-9e09-79b5-87e9-33e191665d39.png)
![[High-res Art | WIP | Comm] Roboleaf X-ray view Step-Process](https://img5.saketami.com/storage/11/nw/bd/9a2cd0-019e8c9a-9e1c-7179-b4d3-79e41cba3810.png)
![[High-res Art | WIP | Comm] Roboleaf X-ray view Step-Process](https://img5.saketami.com/storage/10/uq/qg/9a2cd0-019e8c9a-9e24-70cd-a304-fcd1d3ad4a5b.png)
![[High-res Art | WIP | Comm] Roboleaf X-ray view Step-Process](https://img5.saketami.com/storage/4/cn/hg/9a2cd0-019e8c9a-9e32-7f89-aa13-3b811a08a706.png)
![[High-res Art | WIP | Comm] Roboleaf X-ray view Step-Process](https://img5.saketami.com/storage/7/zv/lh/9a2cd0-019e8c9a-9e39-7576-af6c-767f984e374d.png)
![[High-res Art | WIP | Comm] Roboleaf X-ray view Step-Process](https://img5.saketami.com/storage/9/dx/mo/9a2cd0-019e8c9a-9e46-7e6b-a853-ea8332e83c53.png)
![[High-res Art | WIP | Comm] Roboleaf X-ray view Step-Process](https://img5.saketami.com/storage/9/gl/kg/9a2cd0-019e8c9a-9e50-7f03-a2f5-c1f80212ee9a.png)
![[High-res Art | WIP | Comm] Roboleaf X-ray view Step-Process](https://img5.saketami.com/storage/12/mq/al/9a2cd0-019e8c9a-9e5e-7cc1-b266-460b0ab45af1.png)
![[High-res Art | WIP | Comm] Roboleaf X-ray view Step-Process](https://img5.saketami.com/storage/3/tm/ud/9a2cd0-019e8c9a-9e63-741d-979b-be14a50fdeb2.png)
![[High-res Art | WIP | Comm] Roboleaf X-ray view Step-Process](https://img5.saketami.com/storage/5/it/xp/9a2cd0-019e8c9a-9e65-747b-9f77-c39999671010.png)
![[High-res Art | WIP | Comm] Roboleaf X-ray view Step-Process](https://img5.saketami.com/storage/7/ip/nu/9a2cd0-019e8c9a-9e6c-78b4-91c7-8c1b477928ea.png)
![[High-res Art | WIP | Comm] Roboleaf X-ray view Step-Process](https://img5.saketami.com/storage/5/dl/hb/9a2cd0-019e8c9a-9e6d-72f6-9c39-0731af507bdc.png)

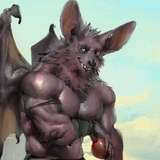
Final product version
Alternate Versions
These were all the steps taken to create the lastest comm for Leaf!
This process is a lot more convoluted and required a little more back and forth before getting a proper workflow, there were WAY too many things I had to do, and it'd be a pain to detail every step, so this is a summarized version of all the steps! (I kinda regret not recording the full progress)
1- Base head sketch: First and foremost I sketch a proper head with just the necessary details for the real drawing, I make sure to follow the references already made too.
2- Skeleton sketch: Then, I reduce the opacity of the head and in a different layer and color I sketch out the skeleton inside the creature, always looking at canine skeletons as references too.
3- Mechanisms sketch: Now the complicated part, I randomly sketch all the possible things the character could have inside them, I'm no engineer by any means so I mostly just make and erase stuff up on the go and see if it looks ok or not.
4- Outside head lineart: Finally, after all the sketches are done, I open a different layer and do the clean lines for the outside head, again, they're not that important since the real focus will be the other layers.
5- Skeleton lineart: I repeat the process for the skeleton as well by lowering the opacity of the last layer and following the sketch.
6- Mechanism lineart 1 (Ear piece): Now for the real hard part, getting all the proper details cleanly through lineart on each individual part, I decided to do each section in chunks to not make a mess and keep things organized. For the side with the "ear" thing I used several maskered layers to add details to all the portions of it. And came up with a kinda sorta decent design for an interior, adding cables and circuits.
7- Mechanism lineart 2 (Neck): I add a cable next to the spine conecting all robotic parts to the rest of the body (because Roboleaf has many more robotic parts aside from the head)
8- Neck lineart fix: After some revisions I get asked to change the position of the cable to the back of the spine, conecting with the head in a different way, I take the time to fix this issue quickly.
9- Mechanism lineart 3 (Face): Now for the face, it was really complicated here as there are way too many things you should be supposed to see/not see with xray, and I basically had to choose what to show and what not, in the end I gave priority to the eyes and the digital panel on the top, while putting some metal plates on the side as to not cover the teeth, which are really important for the final product, I specially like the horroresque concept of the eyes being connected through several cables ;).
10- Mechanism lineart 4 (Forehead): Next up, the forhead with the symbol in it, I simply put a metal plate protecting the craneum along with some cables conecting the panels on the forehead screen, I also take the time to draw how each screen panel looks below too.
11- Mechanism lineart 5 (Main ears): Now the ears, this was very time consuming as I had to figure out how to fill this much space while making it convincing, I mostly went for circuits and cables, (a LOT of cables) + some crystals and metal plates and things of the sort.
12- Mechanism lineart 6 (Secondary ears): I repeated the last process except with a simplified version.
13- Inner Filling: Finally, I design a priority to all the mechanisms, putting some on top of others so it's not too much of a mess to look at the final product, the two lines circle device being the one on the very top, while the cables of the back being the most hidden by the ears. The skeleton also has a priority which is above the little digestion door at the back of the mouth.
14- Outside filling: Finally, I just go back and fill the basic head shape I did at the beginning and lower the opacity to give the proper xray effect.
15- Final touches: As a tiny little detail, I simply add a title to make it look more formally like a ref sheet or some concept art. :)