SakeTami
dmdave
dmdave

patreon


Drow Hard: Three Levels of Sheer Adventure! | New Fifth Edition Adventure for 5th-Level

Drow Hard is a solo Fifth Edition game for one 5th-to-6th level character. If more players wish to play, they can take the parts of the opposition. A character who successfully completes this adventure should earn enough experience to gain the 6th level. Although this adventure is intended to be a stand-alone adventure, it’s possible to insert this adventure into a larger campaign with a few minor adjustments. This might work especially well on game nights where only one player and the GM can show up and they both still want to enjoy a game. If you can’t tell by the subject matter, this adventure is inspired by the classic holiday/action film Die Hard. Watching the film before you run this module may help you get a better feel for the action and how it should be run.

Get the Roll20 Version Now!

No time to plug this into a VTT yourself? No worries! We've got you covered, fam. You can get the full adventure ready to go on Roll20, now!

https://marketplace.roll20.net/browse/gameaddon/8904/drow-hard-three-levels-of-sheer-adventure 

Get the Player-Ready Maps from Tom Cartos

This is a collaboration with our pal Tom Cartos. You can get all the VTT-ready maps for FREE on his Patreon account. Note that you will need to be a patron to get the versions with the secrets hidden. Those are the maps to use for the player's version of the maps. Otherwise, everything else is there or in the attached file.

https://www.patreon.com/posts/cloning-lab-free-40275556 

Featuring Art by Dean Spencer

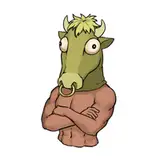
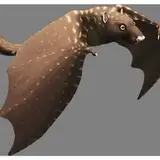
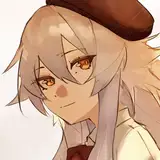
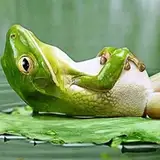
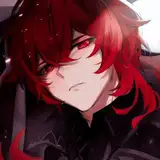
One of my favorite artists in the game and one that we use frequently, Dean Spencer, created the artwork used for both the main image as well as many of the tokens used in the Roll20 version of the game. He's got a killer patreon with tons of art that you should check out right now!

https://www.patreon.com/deanspencerart/posts 


Drow Hard: Three Levels of Sheer Adventure! | New Fifth Edition Adventure for 5th-Level

Comments

If running this adventure with players taking on drow, I strongly recommend following changes to the roll 20 setup. Make individual characters copies for the drow being controlled. that then allows you to put just those drow under their control. Make srue you have setup the tokens for new dynamic lighting, as the drow won't be blinded when the lights go out. Also don't enable Explorer Mode, as the NPC player can see sections of the map being revealed by the hero. Give the player controlling the lab level a reason to break up the squad of 4. all other elements fall into place quite nicely. PS. Any hero who does not have dwarven resistance will easily face some problems with the poison being flung about. if they do fall unconscious, then throw them into the holding cell with the collapsed tunnel and let them have another try... I did not get to use that tactic, but that would have been my backup plan to a bad saving throw early in the game. PPS. Fairy fire kinda works in any player's advantage that does not have darkvision once the lights go out, as they would have disadvantage on all throws unless there was a light source, which fairy fire actually provides (10ft.). adding the "emits 10 feet of ligtht" feature to the player token also makes the scary part of the blackout less daunting...

Alex Dean

For the second player I did following changes: 1) He controlled 4 drow on the lab level, not the roof top. A dozen party goers were still on Level 2 which needed to be herded down to the basement. He had to set charges and find and herd the commoners. a single drow could herd 4, 2 drow could herd 10 commoners. Toni, the leader of the pack was in the corridor approaching the hero, stumbling upon several guests on the privvy (as described in the primer), some doing hanky panky in one of the dorms and another grabbing grub in the kitchen. Those keeping her busy the hero had some time to think of what to do. Entering the air ducts was a disaster (natural 1) but plan B was presented upon a very successful perception check. Heading to the main lab via the secret door, all but one drow remained which through some very lucky dice ended up being disarmed and put unconcious by it's own poison (very unlucky dice) A swift decision to enter the airducts provided the needed mobility to continue without encountering too many drow at once. First heading to the roof provided no useful vantage point, so he headed down to the basement where another very lucky set of dice let him overpower the guard protecting the hostages. He then sent a dozen hostages to their doom on the roof, as at the same time fighting broke out on the roof with the local militia. While in the basement they heard some faint explosions (militia being attacked with fireballs) and he faced a squad of drow who were alerted by the lack of response via their telepathic link. Luckily he found his squire (knight background) who was part of the hostages, thurst a sword into his hand that he had looted of one of the drow and together they took on the drow warriors. Having survived several rounds (very unlucky dice by the player controlling the drow) and taking out two more drow, while losing his squire, the the lights went out. in roll 20 I had set him up with 1ft dark vision which provided a great effect when I switched off daylight mode :-) now being blind he struggled with the incoming poinsonous crossbolts but thanks to several lucky con saving throws managed to barricade himself in the room with the secret tunnel, which the hostages in that room had cleared out by now themselves. Finding the hostages further down the tunnel he rallied them to join while the remaining hostages were being herded to the roof. By the time he managed to get to Hanna tohugh she had rallied four of her drow around her and took out our hero in a very short and bloody final battle before blowing up the building and escaping through the portal... Muhmend McLaine was buried under the rubble.

Alex Dean


More Creators