I realized I never really talked about the new panoramic backgrounds, and since Update 11 will have two new ones, I guess now is as good a time as any to just talk through the process I used to make them. Attachment pictures are numbered and I'll number the sections here as well, so you know which parts I'm talking about.
1. I assume there might be easier ways, but I ended up settling on using Twinmotion for a really easy way to get some pretty high-quality light into the scene. I know my way around some basic 3D stuff, but it's certainly not where I feel at home. So Twinmotion feels enough like I'm playing with sliders I understand for it to work. Also, of course, I've not made the model myself, but I just bought it some months ago. (I feel like she should have had some open sail options, but I guess maybe not. It's a bit annoying now since I needed the sails open, but eh, it'll work for now, and maybe in the future, I'll switch them out for BGs with the sails extended.)
2. Next up, we'll pick where the scene is set (up in the sails in this case) and take the screenshots needed. Twinmotion can spit out renders with some better quality lighting, but honestly their real-time render is doing magic, so even this is plenty enough for my need.
So yeh, I basically go from one side to the other, trying to make sure the horizon is always aligned the same. These were taken quickly just for this, so the horizon between them is all messed up, but for the actual pictures I make sure to align them as well as I can.
3. After that, we'll get them over to Photoshop and align them. Here you can see how I messed up the horizon alignment. The mid and right one actually work decently enough, but the left one is all out of whack. Avoid that.
But yes, the perspective will never align perfectly, so just find what works best and use some tools like the warp tool that lets you refine it further until it all aligns "perfectly."
In Photoshop, in particular, you can also take the content aware fill and just quickly get rid of some of the icons or areas where the clouds don't quite align or whatever else might stick out about the seams. Again, this quick demonstration here isn't very high quality in its alignment, but it is just more of a way to show how to align them roughly.
4. These two are the actual pre-blurred panoramas for the two backgrounds. The one up in the sails is more around 180 degrees, but I assume I'll only need the character looking left and right, rather than all the way to the back. So I just left it like this rather than doing the whole 360-degree like the other one has.
Here you can also see that, especially with a lot of lines, it's really difficult to align them perfectly. Some just get wonky and bend in weird ways but whatever. It's good enough for our purposes because...
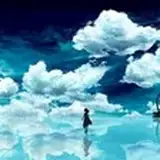
5. ... We blur the background, of course. There are several reasons for it, one of them being the aforementioned wonkiness that we can easily mask this way.
It also just lets the picture look more realistic. In the sharp version, you can pretty easily tell it's a render but add some blur to it, and all of a sudden it's not as clear anymore.
Naturally, it's also just a style I tend to use in my paintings, so continuing that here in the game makes sense, and it does help put the focus on the characters first and foremost.
So yeah, plenty of advantages to the blurred aesthetic, I think.
I hope you enjoyed this little walkthrough for them, and of course thank you all so much for your support! :)
Nomax
2024-05-02 08:04:24 +0000 UTCAlden
2024-05-02 03:55:34 +0000 UTCNomax
2024-01-26 08:32:24 +0000 UTCNomax
2024-01-26 08:30:16 +0000 UTCAlden
2024-01-26 02:49:37 +0000 UTCpictuspixels
2024-01-25 17:46:22 +0000 UTC