As promised (my apologies for the delay), I am going to go through the workflow of creating one of the scenes in the animation.
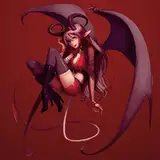
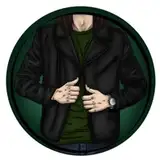
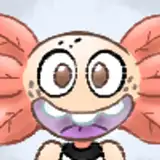
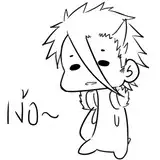
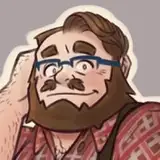
The first step after figuring out what I want the scene in question to accomplish, I generate a run of images using Stable Diffusion. In this case, I needed to show the main character standing backstage. Eventually, I would like her to be showing some kind of frustrated emotion. The emotion doesn't necessarily have to be present in the initial image, but it can help to have something close. (If you have a very specific expression or pose you need, then you definitely have to generate the exact frame that you will need. I will explain this more later.)
Additionally, I need to generate the setting. Sometimes you can get lucky and get the full composition in one go. Most often though, I need to generate the character and setting separately. Given that the background above does not really look like a backstage area, I had to do that for this scene. 
Once I have both of these parts, I find it best to upscale them to a more usable resolution. Generally, the initial images will be 768x768. The ideal for animating in Kling is 2048x2048 in my experience. To get the initial images up to what I need, I use img2img. Additionally, I will often go back and do inpainting for areas like the face.

Once everything is upscaled, I use photoshop to composite the pieces together. This is also a good stage to do some preliminary color grading and contrast correcting. I'm not an expert in either regard, but I do my best to make things look appealing. 
Once I have the image composited, I run it over to Kling and set up a prompt describing what I want the character to do. Generally, I find being as straightforward as I can be with the prompt helps. Things tend to not work as well if the prompt gets too wordy. Additionally, using a negative prompt can help as well. I usually use the same negative prompt regardless of what I am trying to make. (Blurry face, cartoon, jump transition). Beyond that, I might add 'slow motion' to the negative prompt if I need the movement to be faster.

The final part is iterating. Most often, the first clip generated will not be what is needed, so I will adjust the prompt or other parameters until I get something that fits. It will rarely be perfect, but this is still a relatively new technology, so I'm not expecting it to be. That being said, it is definitely possible to get results that are quite good.
The final result of all of this is attached to this post (it was the sixth result). Also, I will make another walkthrough for a clip that uses an end frame.
Doll
2024-11-02 03:09:43 +0000 UTCsith2618
2024-10-31 02:47:50 +0000 UTC