![[making process] Blue Archive Ogata kanna swim suit ver. Process & tips2](https://img5.saketami.com/storage/10/qb/vy/9a2cd0-019e8e83-9481-7914-bb1c-636374dd1c4a.png)

In this post I will summarize the painting of the swimsuit and eye paint.
This canna has a simple modeling and division, so there is no need to worry about painting.
Swimsuits are stress-free because there is no need to mask the skin. However, the gap will be noticeable if the parts are not tightly fitted.
Since the modeling was simple, no materials for coloring were created for this project. Since the color scheme is not complicated, I think the work will progress if you are able to mix the necessary colors by looking at the materials carefully.
This is the color used in Kanna's swimsuit, but you can get close by painting the following colors, adjusting them a little at a time.
┃ Swimsuit color scheme
 Navy and yellow can be painted almost solidly without any problem, but in the white and violet areas, it is better to apply multiple coats of color to achieve depth.
The order of painting should be white, yellow, navy, and violet to minimize masking.
┃ Specific swimsuit painting procedures
The white areas are first painted with a solid coat of white surfacer, then shadowed with a wind-blue color.

Why bother painting the parts white since they are white?
However, there is a difference between the white of resin and the white of paint. Resin white is transparent to light, so it looks different depending on the color of the surrounding area and the light. Therefore, I personally feel that it is better to use the white expression of paint as much as possible because it is not affected by the environment.
Once the white base and shadow areas are painted, masking is done and the yellow areas are painted.

Masking off the yellow painted area and painting the navy part.
 A darker solid coat is fine.
 Then the navy part is also masked off and the violet part is painted next. Since texture will be added here, silver paint is prepared first.
Net (stretched tights fibers) is adhered to the parts and sprayed with silver.
 If the net is floating, it will result in a blurry paint job, so if you want to get an edge, you need to adhere the net to the curved surface. (In the photo above, the net was not adhered to the part, so it failed.)
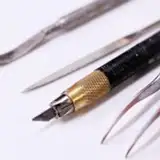
The curved surface inevitably floated, so we used a color mixing stick to prevent floating and painted it, and it worked well.

 Isn't there a smarter way to do this... and then just paint a violet clear paint over this and you're good to go.
 After the paint has cured and the masking has been removed, adjust the white part one last time.

 Apply a thin layer of skin color to the areas where the cloth will be thinned. It is no problem to do this work at the beginning.
Usually these swimming suits are not transparent, but when it comes to figures, they are usually transparent, so we do so. Do not think about it.
If you apply too much skin color, it will become a transparent swimsuit, so use moderation. After that, clear coat the entire piece and apply decals to the chest area. (Don't forget to clear coat the decal before you start the work.)

After applying decals, apply a thick clear coat and use a #4000 to #10000 sponge file to remove any bumps.

Be careful about the thickness of the clear coat, as a thin clear coat may peel off the decal or even scrape off the underlying color.
 It is OK when the steps disappear. This process is for those who want to complete the work quickly, so those who want to do it quickly may skip it.
We recommend that you coat it with semi-gloss clear at the end to give it a moderately shiny, swimsuit-like texture.
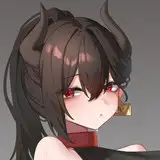
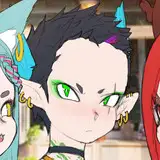
As for the eye painting, I did not make any documentation for this as well, since it was a simple. The entire eye painting process took roughly 10 hours.
 Finish the preliminary drawing quickly. It will be more stable if you keep in mind the angles of the eye and the neck. I temporarily assemble the figure as needed, check the whole picture, and proceed with the work.
We want to reduce the number of clear coats as much as possible (to prevent yellowing and excessive thickness caused by too many layers), so we proceed to the limit of the work that can be done without coating before coating.
Next, mask off and mix enamel smoke and black and paint with lighter fluid. Wipe off with a Tsun Tsun S brush or Finish Master to give the lashes shape.

After the eyelashes, the color is applied to the eyes. It will be easier to work after the clear coat if the underpainting can be applied at a density that is transparent, but it does not matter if it disappears.
 After the eyes are painted, the whites of the eyes are painted.
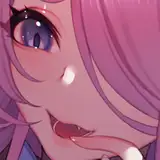
 Finally, the shadow color is applied over the whites of the eyes, and finally, highlights are drawn into the eyes to complete the eye painting process.
 Once you have done this, we recommend that you clear coat the pupil thickly and polish it with a #4000-#10000 sponge file so that the bumps will not be visible.
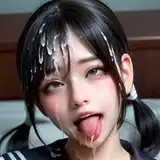
After that, as you can see in the video, I put a blush line on the blush, apply eyebrows, and skin color, and in between, I have to mask the eyes a few times.
At this time, there is no problem using Good Smile's mask sol, but I recommend using Gaia's vinyl sol instead of Good Smile's sol only before the final matting process.

The reason is that the masking cannot be removed cleanly.
With rubber-based sol, the edge of the masking cannot be protected properly, and when the masking is removed, the matte finish on the boundary may peel off.
Therefore, it is preferable to use a vinyl type sol such as Gaia mentioned above as much as possible.

It takes a lot of processes and work time to create beautiful face parts, but I think this is the part where your hard work will be reflected in the degree of perfection. Personally, I believe that those who are seeking a higher level of perfection will not lose anything by trying their best!

SUKIMA SANGYO
2025-03-15 00:48:17 +0000 UTCDavid Yu
2025-03-14 19:09:38 +0000 UTC