


+⌒o⌒+WIP We will make the proper atmosphere and fine-tune the motion at a later date!
I feel like adjusting my hat is a good practice.
https://mega.nz/folder/ZdQCXTzS#Z7ZNfhwtySKp2QNdUWxmZg
I'd like to gradually leave behind articles with things to remember about MMD. If you have any ideas that you think would be better in this day and age, I'd be happy if you let me know in the comments.
Just like video editing software, if you move the file structure around too much, you won't be able to load the project file, so be careful.
Koikatsu is really kind in this regard. The CC and SD functions are
2025/06/11~
[Essential basic equipment]
1.MikuMikuDance_v932x64←MMEffect_x64_v037
2.PmxEditor_0273←SemiStandardBones(_plugin→User)
3.MikuMikuShading_v100
Personally, I thought it would be better to save the models, effects, save files, stages, and shaders in the [user file] of the MMD main body, so I did that. I'll store the motions separately, as I'll also use them in Koikatsu.
・The first model ritual.
1. Download the model
2. Add SemiStandardBones in PmxEditor
Then, to make the eyes emit light, set the pupils to 000 reflection color, 100 reflection strength, copy (X) the arrow index, morph, create new morph, and go to material
Create a new morph and give it a name of your choice.
Right-click on the white square, click Copy, then Add, then click Edit, and confirm [Add], [All 0], and [Reflection strength 10].
3. Create an fx file with MikuMikuShading_v100 to apply HgToonShader_v001, etc.
・Other basic points to remember
Front lighting X-0.0 Y-0.0 Z+1.0
For back lighting, set Z to -1.0 to -0.1
To adjust the camera Y axis, use the camera position frame angle correction, and adjust the 0.0 side of 1.0+0.0 as appropriate. Ideally, you should use the original model to make various adjustments, but I hadn't thought about that, so I went all out to make it look like that.
For walls and floors, loosen the X-axis rotation for floors. For walls, reduce the distance and increase the viewing angle. (Turn off automatic settings for interpolation curve operations)
Or use video editing software to fake it with blur + mirror, or force it with zoom-up and linear movement (easing 12)
=
・
Si is simply the numerical value of the effect.
If you make it larger, it becomes the ocean.
By the way, Tr is the strength and transparency of the effect.
XYZ is the movement of the effect.
XYZ with an R is the rotation of the effect.
I tried modifying the motion in the same way as Koikatsu, but it ended up being quite different from the original motion, but I managed to get it to work, so I'll share it here.
It's better to calculate the breakdown of the movement properly. I also thought it was good to use MMM.
I also realized that the order of filters is very important.
When I have some time off, I'll try playing around with MMM next, and try to correct the MMD motion of a short-haired character like Sakuya without breaking my arm. While Koikatsu is mostly completed in the studio, I'm busy going back and forth between software!
Next I want to make that song with Remiria.
I will also continue to provide R18 content at the same time, so please rest assured.
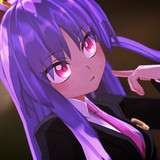
This model is too cute, which is not good.
Miy's model matches the atmosphere of the original work very well.
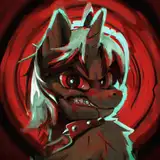
For example, for the Crimson Demons it's a red mist, for the Imperishable Night group it's crazy noise, for Fuujinroku it's a mysterious atmosphere, and for Reimu and Yukari it's added horror elements... it's fun thinking about different things.
I also made the Sakuya video with the image of around th06 in mind.
・Future tasks 2025/06/13
Dance while holding objects (Reimu's exorcism rod, Yuyuko's fan, etc...)
Tweak facial expressions
Use a fixed camera? (like in the Remilia song)
Start by learning to use light effects (the first two were a mess)
Watch out for eye contact
Work hard on adjusting foot motions
Focus on classroom learning
*IK for both arms → Multiplex shoulder bones and eye line bones.
As for sizing... I think I'll try controlling it without using it. For now.
Then, at the end of the video, I'll make general motion corrections by borrowing poses to get a feel for it.
*
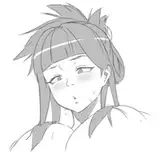
I thought it was pretty difficult to recreate expressions like impatience or disappointment in MMD.
There are already expressions that are often used in Koikatsu, but should I rethink it again...? I'm thinking that, but I remember the commonly used expressions.
By the way, in Koikatsu,
I express joy, anger, sadness, and happiness with the default, disappointment, seriousness, and surprise. The wink has the eyes open too wide!
I was also a little surprised that the sweat setting is not the default. Also, the cheek level is too uneven, so I want to do something about
that too...
Before trying to modify, I'll first get a grasp on the basics of MMD. iwara is easy and good. I'll continue to work secretly without making it public.
I use donations for PC maintenance and MEGA secure storage, so I'll post R-18 content from time to time!
For now, Inaba! Sakuya! Remiria, Reimu, Yukari, Suwako, Sanae? Cirno, Marisa, about 7 more videos. After that, I'll also be looking at R18 models.
It'll be so much fun when the effects and motion adjustments are done properly!
I spent a lot of time setting up the environment, but adjusting Reimu's sleeves was so difficult that I cried. What's going on!?
The cause was that I had "IK for both arms" enabled!
It was useful, but I think I'll use something else.
Today's MMD playtime was over 12 hours.
It seems like there's no problem if you use normal multi-bones.
I'll go with standard bones. Give me back my 12 hours.
I also learned that when using the camera tracking effect, the eye glow is lost.
Well, Reimu is human, so it can't be helped lol
However, it looks like the texture on the back is glowing, so maybe there's a way to fix it.
I thought the work was difficult, but then I realized it was because I was using two shaders, one for the character and one for the map.
Too expensive to learn
I think I'll use PowerShader, which makes it easier to adjust the shadow color, when I make it lightly.
Today I couldn't fix the motion, I lost.
Anyway, today's results
2025-06-15
I'm confused by the effects and shaders.
I was thinking of making the stages realistic and the models anime-style, but that would be crazy.
I'm also thinking of making a template soon.
It's too difficult!
*
PAToon
Localshadow
!
Today's result
I decided to use shaders together.
I used a power shader for the background, and the shadow color can be changed with the controller. It's nice and sparkly.
I used something that can apply Localshadow to the model (is it done from the beginning?) and set it for PAtoon, and then used HgToonshader to make it look good.
I think this is it. I overworked my PC again today...
I'm going to make a video now.
2025-06-16
First, I decided to properly set up effects and other settings to make the characters look cute.
Placed the appropriate effects, and then just went with the flow.
I decided to use different shaders for the background buildings and models.
And it turns out I could use local shadows without doing anything with those shaders...!
And I was able to change the shadow color there, too.
But then a problem occurred.
The color of the inside of the mouth!
I was able to get around this by expanding the subset and assigning a different shader just to the inside of the mouth.
This will take care of the shadow problem.
Now I just need to do something about the slightly scary blown-out highlight problem.
I'll add a skydome!
Just as I was thinking that, a problem occurred
Oh, by the way, I used the same shader on the skydome lol
I had to adjust it separately
I spent the whole day today setting up my environment.
I'm slowly starting to understand the advantages and disadvantages of filters with the same effect, and I'm also starting to understand how to make corrections.
The first work I made is now a black box.
Also, I'm thinking of rounding off the edges to make iwara more realistic than toons, and creating a fluffy feel, the opposite of my previous style.
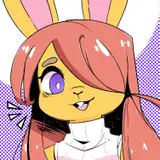
And this model... actually!
It doesn't really fit the PV I'm making now, so I'll think about it a little later.
I couldn't get started on the motion today either... but I'm starting to understand how to do it.
This is a check to see if there is really a need for complete pouring (sorry) and motion blur.
This time, I completed the screen without using any filter-type effects, so I think it turned out to be a straightforward creation.
I should have completed this foundation first, then applied post-effects!
By the way, this is my favorite texture. I somehow prefer the jagged edges over the top with no edges + careful sharpening.
+⌒o⌒+
2025-06-17+⌒o⌒+
I'm adjusting the coordinate axis map and effects and building a basic map.
It's easy to see where the effect is, how the shadows are, etc.
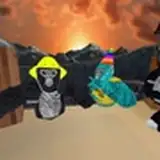
Also, I'm crying a lot now that I'm trying to make a video with Suwako
She has this hat, so it's really difficult.
I'm not used to making adjustments, so it's going to take quite a while...!
Also, I'm rethinking how I make my own Koikatsu models, maybe because I've become more discerning after seeing the Miy method.
I'm rethinking the parameters from scratch, so it's very risky! Rushia will be released in July.
Once I start using MMD, I can't stop for a day, so I'm going to focus on classroom learning and slowly make my own until mid-July.
I'm glad to see there's demand for it.
- Motion editing
- Correcting existing motions
- Adding effects
Etc...I find myself stopping and researching and trying things too often, so I'm going to watch a lot of courses for now.
Suwako-sama's motions have had to be significantly revised thanks to her hat, so it's been a good learning experience.
When it comes to adding facial expressions, Koikatsu actually allows you to compile commonly used templates that are easier to see, so it's really worth learning from.


