Video 86 Let's Draw Female Semi Realistic Part 3
Added 2025-07-08 18:28:47 +0000 UTC✍️ (Intermediate to Advanced) Practice: Let’s Draw Female (Semi-Realistic) – Part 3
By Pogzart
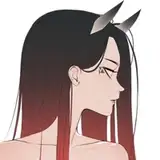
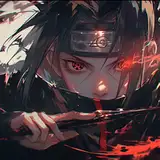
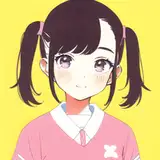
In Part 3, we bring hair and form integration into focus — completing the female portrait by adding a hairstyle that flows with the head’s structure and enhances the overall character. This is where volume, rhythm, and stylization meet the solid anatomy you’ve already built.
🎯 Objective
Draw and render semi-realistic female hair that fits the portrait’s structure, personality, and light direction.
Refine mastery of:
Hair shape and silhouette over the skull
Clump logic and directional flow
Hair volume and stylized texture
Light logic across strands and layers
🧱 Step-by-Step Hair Construction
Step 1: Block Out the Hair Mass
Sketch the general shape of the hairstyle based on your character’s mood — soft and flowing, neat and sharp, or wild and loose.
Let the hair rise naturally from the scalp — place the crown or parting carefully.
Use long, curved lines to define the direction and mass. Don’t draw strands yet — think form first.
Step 2: Build Hair Clumps with Flow
Break the overall shape into major clumps using smooth S- or C-curves.
Hair should flow from root to tip — down the sides, over the shoulders, or around the face.
Taper the ends and vary the width of the clumps for a natural feel.
Let some strands frame the face and softly overlap the forehead, ear, or neck.
Step 3: Hatch the Hair with Light and Depth
Follow the flow direction when hatching each clump.
Shade darker near the roots and between overlapping layers.
Leave highlight bands along the hair’s curve to suggest shine (especially for straighter or wavy styles).
Add subtle flyaways or broken lines near the edges to soften the silhouette.
💡 Form and Integration Tips
Hair must sit on the skull — not float above it. Use the forehead and temples as anchors.
Allow light from the face to affect the hair — share shadows and edges.
Use fewer strokes for light hair, more layering for dark or dense styles.
✔️ Tips:
Don’t over-detail — focus on shape clarity before strands.
Make clumps curve around the head to keep volume believable.
For softer styles, avoid sharp corners in the silhouette.
Show gravity — where the hair falls, clumps compress or stretch depending on movement.
🎨 Stylization Guidelines
For semi-realistic anime:
Use bold, elegant shapes with refined inner texture.
Highlights can be graphic (broad curved bands) or softly built through hatching.
Avoid heavy outlines — use light contrast and shape clarity.
🧠 Optional Challenge Ideas
Draw 3 hairstyles on the same head: ponytail, loose wavy, tied bun.
Try drawing windblown hair with direction and tension.
Re-render the hair with reversed light to test your highlight logic.
🔁 Practice
Fill a sketch page with 3–5 clump flow studies from reference.
Practice connecting hair to the scalp correctly (fringe, crown, behind ear).
Redraw the portrait twice with completely different hair silhouettes.
This stage brings the gesture, style, and energy into your portrait.
Hair isn’t an accessory — it’s a flow of shape and shadow that breathes life into the character.
Let it move with form, light, and design.
– Pogzart