Work Steps: Bigger inside~ ('goia eats durg)
Added 2024-03-27 20:15:43 +0000 UTCHere are the 10 work steps for the last painting! I numbered the frames and added my explanations and thoughts here as text this time :>
1: I started with a soft under sketch again and did an actual sketch on top. I tried to stay more grey this time, because I thought the sketch to either multiply/linear burn/color burn it will blend nicer with the colors underneath.
2: Added the base colors and just "free styled" the background. I am beginning to think I should freestyle more with the character bases too. Some days ago I started some art classes (finally) and figured out that adding specific colors as an underpaint can already look pretty finished, which is what I always do in backgrounds but somehow never for character underpaints (see bottom scene). It's an unnecessary shyness I'd say.
3: I made the fatal mistake of thinking "hey, what if I shade the character nicely and then add colors on top, they should look nice if the values are nice". Obviously it's not the case haha, lemme explain what I learnt afterwards and what went wrong: Every chroma has a corresponding value and if someone like me just slaps a single color on top of 256 values, this happens. The things I said in #2 about underpainting applies here, too. I think starting with colors will be my go-to approach from now on.
4: Luckily I went back to my old approach here. I think I should have added more underpaint colors before adding the shading (it's linear burn), but what worked nicely is that the lineart indeed blends with the colors underneath. I used color burn here.
5+6: Starting to "render", which is really just overpainting everything. Since I pick the colors that are there, but the underpainting doesn't have as many, I also have a hard time adding colors here. For the lights though I used a soft-light and overlay layer with blueish tones, which worked here.
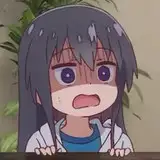
7: Now repeating the same steps in the bottom scene: Adding shading with a light grey linear burn layer.
8+9: Once I was happy, I rendered like in the scene above. When it comes to slimes though, I use a multiply layer, erase the parts that get lit and emphasize them with a lighting layer, like screen or overlay. Adding a highlight on the dark side gives it a nice effect, as you'll see
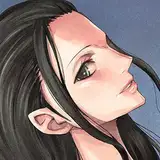
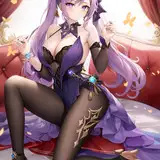
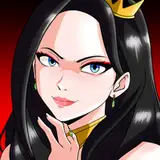
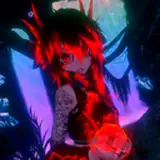
10: Since her royal majesty Rashan is a fancy jewelry durgoness, I added some props that help the scene and its storytelling <3
Note the subtle change on the back of the goia: I used the liquify tool here to make it properly touch the ground. Done ♥
Feel free to reach out to me for any questions, as always! My personal take-away from this picture is, that trying out new things and reflecting on mistakes is normal in art learning and should be positively embraced. This picture was difficult because I tried out things, but they helped me understand some things better for the future :>