


Intro (@Cross_Aii)
How are y’all doing, today we are going to be looking at Sakazuki post-EB01. Based on the current tops it seems like the deck has remained mostly the same. And I actually didn’t change my decklist at all. But after doing some more testing this week, there is a new card I’m considering, I believe I have reached a near-complete consensus on stage vs. non-stage, and there is a new matchup that we must be aware of.
If you want to see the reasoning for the majority of my card choices, check out my original Sakazuki guide: https://www.patreon.com/posts/op06-in-depth-103088419?utm_medium=clipboard_copy&utm_source=copyLink&utm_campaign=postshare_creator&utm_content=join_link . I will only be discussing the new cards in this post.
Let’s go ahead and get into it!
| The top of it’s class |
Sakazuki is indisputably the best deck in the game, and it’s not even close. In my Moria phase, I was CONSISTENTLY beating Sakazuki as Moria, so it almost made me believe that Moria could be slightly better than Sakazuki. But after testing Sakazuki personally, and seeing players like Yonas(shoutout the goat) piloting the deck, there’s no other deck that matches it. The sky is really the limits with Sakazuki.
I think in Japan’s meta, back when they were on 4 Borsalino & 0 Kuzan, it would have been very possible for other decks to pop off, and Moria could have arguably been better than Sakazuki.
But thanks to the addition of Kuzans, and 2+ Murakumos to the deck, this deck can now do anything, and everything.
This deck only worries about Yamato, and Red/Purple Law at best. Yamato is basically deciding on whether we draw blockers or not, and I personally consistently beat RP Law, but it seems like a deck that most Sakazuki players struggle with defeating…
Kuzan allows limitlessly possibilities for removal, and even if they clear it, we still drew a card. Murakumo also allows us to clear two units in a way that was previously never possible. Just think back to literally not having enough don to clear two units against Purple Luffy in OP05(and it’s searchable).
Now let’s look at the EB01 Sakazuki decks:
The Standard EB01 List
| Cookiecutter Sakazuki |
This is the same Sakazuki list from pre-EB01, except a second Murakumo has been deemed necessary, due to RP Law.
There’s not much to say too be honest, I would just 100% play at least 2 Murakumo, now that RP Law is a thing.
CrossAi’s Standard for EB01 (Shoutout impact for convincing me on 3 Eruption, 1 Stage!)
| Link to Impact’s winning list: https://x.com/OrangeSamuraiD/status/1789440114726150318
|
I personally think this is the stronger of the two versions for EB01. Yonas is still trying to convince me to remove stage, but imo the 1-Of stage allowing for late-game Moria + RebHinaHelmeppo + Murakumo combos is so insane. And it hypothetically gives us more Moria clears than the opponent, because all they have is 2 ice ages, while we have Ice Age + MoriaMurakumo combos!
Stage also happens to be very strong against RP Law (allows us to ALWAYS clear a 4-drop, and turns on MoriaLucciHelmeppo on 8-Don of going second), it’s also strong against Moria for the same reason, and it can allow our Borsalino to hit 6-drops.
I’m also a huge fan of 3 Murakumo. The standard is 4 hound blaze, 2 Murakumo, so choose that if you like it. But Murakumo has been consistently so strong for me. It’s one of the greatest punish cards in the mirror match, and it’s a godly card in both the Moria & the RP Law matchups, because it is an additional(and searchable) double clear.
Brook Sakazuki
| Is Brook strong? |
This Sakazuki is like the other two lists, except we’ve added in Brook. And I think Brook has a lot of potential to be strong. Tl;dr, our best 5-don play in the mirror-match is normally eruption + Lucci, but now we have access to eruption + Brook! It’s also an extremely strong play on 3-don in mirror m
Aside from mirror matches, I also think it’s an insane game-changer against RP Law. In the early-game being able to clear a body, while producing one is very strong. Specifically, if we play this on our 3-don turn going first, they have to have Gordon + 3-Drop + 4-drop, or they’re set behind. And when going second, if they play a unit on their 3-don, we can clear it, and stop them from playing a 5-drop on 5, unless they want to avoid Brook!
This card also makes the Moria matchup 10x more difficult for them. Contrary to popular belief, I believe establishing a body while clearing a body, takes higher priority than botdecking units(obvioulsy if you can do both, do both). “But what about Perona?” If you establish a body, they are forced to resort to clearing the body, or we’re up a body for the rest of the game, which is really bad for them.
Outside of that a common combo was MoriaRebHina + Hound Blaze. But instead of that we now have access to MoriaRebBrook combos, so even if we are missing hound blaze, we get access to Eruption/IceAges as alternatives.
There’s a lot of other various strong combos with Brook, and I’m still exploring them myself, so please explore.
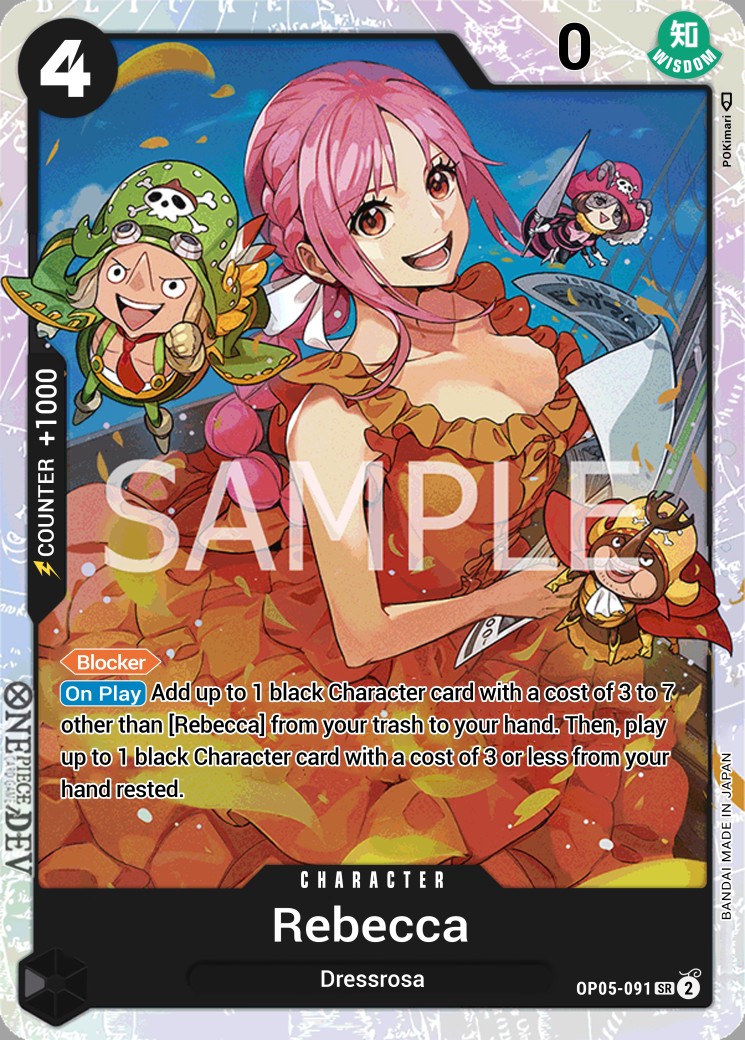
| Referring to this card: https://onepiece-cardgame.dev/images/cards/OP05-091_5693ab_jp.jpg |
People seem to severely underestimate Rebecca in the mirror match. Funnily enough, part of the reason I beat Deep Patel in our money match, is because he ALSO underestimated Rebecca. Had he answered the Rebecca, I would’ve had way less cards than him that game, and likely would have lost…
Rebecca’s ability to absorb an attack is way too strong, being able to grab a card from trash, while also being a blocker, is absolutely insane. This is why plays like “Rebecca play Brannew,” are kind of broken in the mirror match. And people ALWAYS ignore Rebecca, so it’s like we have a free extra card in our hand to defend with.
And I get that if you choose to play Hina from hand, it’s not a literal +1, but that has value in itself, because now clearing Rebecca isn’t even an option anymore, and we get a block off, which conserves handsize.
Imagine how many MORE cards you end up having in hand, if you played a Rebecca, instead of playing a Hina. Then try to tell me that the Rebecca isn’t at least a +1.
Don’t get me wrong, I would almost always play Kuzan on 4-don. But if I didn’t have Kuzan, I would 100% being open to Rebecca (assuming I can grab something from trash), and as the game goes later and later, Rebecca simply becomes a more broken Kuzan, due to it’s ability to conserve our hand. This is why I rate MoriaRebecca combos so strongly, it’s actually so insane. You clear board, and Rebecca saves our hand.
As for how you should respond to Rebecca.
A) If we’re in the early-early game, and all they did was play Rebecca. It’s fine to play Kuzan into it, they plussed, and we plussed too.
B) If they play a body off Rebecca, always prioritize clearing the body over Rebecca
C) If we’re in the mid-game, and all the opponent does is play a Rebecca, clear it(ideally while playing a blocker), and send a big swing at face
D) If we’re in the late-game, we pretty much have ti ignore it, unless we’re setting up lethal
Rebecca too strong.
Now let’s look at matchups:
Clearly Advantageous for whoever goes Second.
Attack Selection: Second Attack - The ability to earn extra cards from going second, and from advantage cards like Kuzan/Rebecca is too strong.
Mulligan:
First Attack - Tashigi
Second Attack - Brannew or Tashigi
General Guidelines
This mirror match is a constant battle of resources. The going second player naturally has the advantage, thanks to drawing an extra card, and being able to play Kuzan first. But cards like 7Borsalino can help change the pace of the game!
I would be conscious of how fast we choose to play Moria. I generally try to wait until 10-Don to establish a Moria. Moria on 8-Don is also strong, if the opponent’s trash is lacking Lucci & Helmeppo.
The reason for this is the strongest way to clear opposing Morias, is generally with our own Morias. But once we’ve reached 10-Don our Hina/Luccis become susceptible to Helmeppos, so I typically would like to launch multiple Morias, instead of playing chicken.
When at 8+ Don, if you aren’t using Morias, use Rebecca when responding to the board, in order to conserve resources
If your hand is strong enough, I would defend the first life. If we get aggro’d to 1-life early by hound blazes, we will be on the back foot for the rest of the game, or allow our opponent to pivot if they’re losing the Moria war, and go for a 1-2 turn hound blaze lethal
For this reason I like to keep my life at about 3, until the opponent has reached their 8-don or 9-don turn
Going First Curve:
1: Tashigi
3:
Brannew + Tashigi (Ideal play)
Hound Blaze (if opponent played Brannew, and we are missing Brannew this is alright) Swing 5K twice
Attach all 3-don and swing 5K with Tashigi and Leader
5:
Stage/Eruption + Lucci - I believe this is the ideal play, because it forces the opponenet to play Hina/Lucci on their 6-don turn, which will then get botdecked on our 7-Don turn! But it may not be worth the risk if we don’t have a second Lucci
Stage/Eruption + Hound Blaze, swing 5K with Tashigi, Brannew, and Leader
7:
4Borsalino/4Kuzan/5Sabo(only if there’s stage) + Hound Blaze/Murakumo - This is strong when we don’t have 7Borsalino, or if the opponent has 2 life, and we have IceAge + MoraLucciHelmeppo prepared for our 9-don turn
7Borsalino - This is the strongest play. It offsets the opponent from playing Moria on their 8-don, and forces them to make a play like RebHina, which can get tooken by Murakumo
9:
Ice Age + 8Moria - The most common line to answer an opposing Moria played on 8-Don
RebHina + Murakumo + Whatever - Best response to opponent’s HinaLucci, forces them to have another HinaLucci. Remaining don can be used to play Brannew/Tashigi, or to swing at face
RebeccaHinaLucci - Used to respond to the opponent’s RebeccaHinaLucci
RebHina + Hina + Murakumo - This clears a 8-drop & a 4-drop. This play used to be risky, but thanks to the readdition of Ice Age and 4 Lucci, we can still fight strongly, even if both our Hina’s get botdecked!
10:
IceAge + Moria - Most common
Moria + Stage + RebHinaHelmeppo + Murakumo - The strongest 10-Don turn play made possible by Stage (clears 8-drop and 4-drop, and Rebecca conserves our hand)
RebHina + Kuzan + StageEffect + Murakumo - Another powerful play made possible by stage. We get to delay our need for 8Cost Moria, while getting additional draws from Kuzan!
RebHina + Hina + Murakumo - Consumes a lot of cards, but is another way to remove a 8-Drop & a 4-Drop
(When Stage is live) Eruption + Eruption/Stage/Tsuru + MoriaHelmeppoLucci
From here just continue to throw Moria’s back and forth, and once we start running out of Moria’s, we have to resort to aggro pushes, with cards like hound blaze, in order to close out the game.
Going Second Curve:
2:
Brannew (Fills up trash and searches for Navy)
Tashigi (Best play, because there are higher chances of getting Kuzan on turn 2)
Tashigi + Stage (I like conserving stage, just in case I need stage + Lucci for my 6-don turn, but most people don’t play Brook, so stage could be played on this turn)
4:
Kuzan - Generally the best play. We get to draw cards while forcing the opponent to answer
Borsalino(Currently not included in my decklists) - Second best play. It prevents the opponeent from having the option to do Stage + Lucci, and it forces them to have an answer! If I have both Kuzan and Borsalino in hand, I would like to play Kuzan first
Brannew + Brannew/Tashigi or Brannew + Swing 5K with Brannew from 2-don
6:
RebHina + Blaze - Thiswill typically be the best play, if Lucci was played on the opposing player’s F3/5-Don Turn
Stage/Eruption + Lucci
Kuzan + Murakumo - If Stage was established on turn 1, this is a strong option, as we secure more resources while getting rid of their 4-drop & Tashigi! It’s also strong that we don’t risk one of our Hina/Lucci’s getting botdecked, like in the above combo
Kuzan/Sabo - This will be the strongest option if all the going first player did is use hound blaze. Kuzan eats us another card, and Sabo can get us closer to Moria, while giving us a free block (assuming opponent is doing 7Bors)
8):
RebHina + Eruption + Blaze - Aggressive play that doesn’t expose our Lucci to getting botdecked
RebeccaHinaLucci - If we only have one Moria in our hand, I believe this is a strong combo to delay how fast we need to use our Morias
Kuzan/Rebecca + Stage/Eruption + Stage/Eruption + Blaze/Murakumo - This is another aggressive play
Kuzan + Lucci (stage must be active). This is another strong punish to when the opponent plays a destructible 4-drop unit on their 7-don turn
10:
IceAge + Moria - Most common
Moria + Stage + RebHinaHelmeppo + Murakumo - The strongest 10-Don turn play made possible by Stage (clears 8-drop and 4-drop, and Rebecca conserves our hand)
RebHina + Kuzan + StageEffect + Murakumo - Another powerful play made possible by stage. We get to delay our need for 8Cost Moria, while getting additional draws from Kuzan!
RebHina + Hina + Murakumo - Consumes a lot of cards, but is another way to remove a 8-Drop & a 4-Drop
(When Stage is live) Eruption + Eruption/Stage/Tsuru + MoriaHelmeppoLucci
From here just continue to throw Moria’s back and forth, and once we start running out of Moria’s, we have to resort to aggro pushes, with cards like hound blaze, in order to close out the game.
Yellow Katakuri (This matchup is no longer common, and pretty much the same, so it will be the same as the previous article)
Advantageous for whoever goes second.
Attack Selection: Second Attack - Value Moria or Removal Moria is really strong against Black Gecko Moria on curve, and a Kuzan played on our 4-don turn can win the game if it’s not dealt with!
Mulligan:
First Attack - Tashigi
Second Attack - Brannew/Tashigi
General Guidelines
In this matchup you can’t make a discarding mistake, or you will lose to very good Moria players. Make sure you have your turns carefully planned out
It’s stronger to play a unit that clears a body like Lucci, than doing hound blaze and swinging a bunch
This is why I believe stage lists with 2 Lucci aren’t very strong against Gecko Moria
Hina + Murakumo + Stage/Eruption is extremely powerful on the 6-don turn going second
Most Moria players are bad, and will swing with the unit from their 3-don turn of going first. In that case save Murakumo to combo with Moria later on, and use RebHina + hound blaze to bottom deck their standing unit, and attack into their rested one
On 8-Don turn of going second, Moria is unable to answer both Moria & Kuzan, so this is an extremely strong combo!
I like to guard out of the first 6K swing of Gecko Moria (when we are second and they are first), with a 2K if possible, because this turns off subsequent Perona’s
If you already have Kuzan in your hand, then you can take the attack instead. Because they will be forced to answer Kuzan on the next-turn, or risk losing the game on the spot
If Kuzan played on the 4-don turn of going second lives, we can almost have a free win
7 Cost Borsalino is typically the strongest when going first, but Lucci or Murakumo may be more reliable against MoriaHina decks
Sample Curve
Going First
1:
Tashigi (Priority is to find stage or hound blaze depending on what’s already in hand)
3:
Brannew + Tashigi
5:
Stage/Eruption + Lucci (Priority, unless we don’t have another Lucci/Murakimo - This is preparation for our 7-don turn)
Hound Blaze, swing 5K three times
7:
Hina + Lucci + Stage(Effect)
Lucci + Cost Reduction
7Borsalino (Priority if the Opponenet only has 1 unit)
Kuzan/RebHina/Sabo(if stage is live) + Cost Reduction(if using a 4-drop instead of Sabo) + Hound Blaze/Murakumo
9:
IceAge + Moria
RebeccaHinaLucci
Hina + Hina + Murakumo
Hina + Murakumo/Blaze + Kuzan
10:
Ice Age + MoriaHelmeppoLucci
(When Stage is live) Eruption + Eruption/Stage/Tsuru + MoriaHelmeppoLucci
Moria + RebHinaHelmeppo + Murakumo
RebHina + Hina + Murakumo
RebHina + Kuzan + Stage + Murakumo
The going first curve is very solid. I believe the going second curve is a bit stronger, but HinaLucci on 7-Don can create an interestingly greater resource difference than 7Borsalino.
Going Second
2:
Brannew or Tashigi (search for Kuzan) + Stage (if we have eruption in hand)
4:
Kuzan
If we are missing a double clear for 6-don. Then Eruption + Hound Blaze is the best play
6:
Hina + Stage/Eruption + Murakumo
If Kuzan stuck, then Blocker + Murakumo, or a second Kuzan + Murakumo/Blaze is very strong
8:
Value Moria - Moria + Kuzan + Brannew/Tashigi
Removal Moria - Moria + Lucci + Helmeppo + (Stage effect if possible). Priority to Value Moria, if there is no cost reduction unit on the opponent’s 7-don
HinaLucci + Stage/Eruption
RebHina + Stage/Eruption + Murakumo
10:
Ice Age + MoriaHelmeppoLucci
(When Stage is live) Eruption + Eruption/Stage/Tsuru + MoriaHelmeppoLucci
Moria + RebHinaHelmeppo + Murakumo
RebHina + Hina + Murakumo
RebHina + Kuzan + StageEffect + Murakumo
In my current testing, and in theory, the going second curve seems disgustingly more effective than the going first curve. Both our 4-don turns & 8-don turns can be completely back-breaking for Moria if not contested pro
Extremely advantageous regardless of going second, if you are playing Kuzan, Sabo & Murakumos. It’s only slightly advantageous ~ advantageous if you are playing no Sabos, but there is Kuzan. And it’s closer to 50/50 ~ Slightly Advantageous if there are no Kuzans.
Attack Selection: Second Attack - Kuzan is much easier to establish when going second, and Moria has more potential to be played on 8-Don and 10-Don, depending on how the opponent reacts
Mulligan:
First Attack - Tashigi
Second Attack - Brannew or Tashigi, or Kuzan + Kuzan/Borsalino
General Guidelines
There are three ways to fight against Katakuri. A complete control plan, an aggro plan, or a hybrid of the two.
The complete control plan involves establishing Kuzan on key turns, and sometimes not attacking in order to make sure we can always end our turn with 0 units. The limitation too this strategy is if we attack too slowly, while also not drawing Sabo, we risk losing the gaming to Reject + Amaru.
And if we attack even slower than too slowly, we risk losing the game if we don’t draw a second Amaru
The aggro plan is a plan that focuses on establishing units and praying the opponent doesn’t hit too many triggers, or willing our way through the triggers. This involves always attacking every turn, and rather than ever establishing Kuzan, we focus on combos like Hina + Murakumo on 6-don, RebeccaHinaLucci on 8-Don, and Moria + Murakumo combos on 10-don! In this plan we tend to run out of resources quicker, and if our opponent triggers too well or too conveniently, it becomes easier to lose
The last plan is a hybrid plan. Where we make sure to attack Kuzan, but we almost ALWAYS attack the opponent. This ensures that we won’t get stalled out by multiple 10Moms, and we won’t need to hard draw multiple Sabos. This plan is the most reliable, but we remain susceptible to getting sacked by triggers.
Each of these plans will have sample curves described below, but first let’s go over more general tips.
The most important thing when fighting Katakuri is life management. There’s multiple benefits or concerns we have at various life counts.
When our life is 0, our opponent can no longer reduce their life to 1 with Reject, which means leaving them at 2 life generally prevents us randomly losing the game to Amaru (some people are adopting Tbolt and/or Hiyori now though, so it may be safer to leave them at 3-life in certain situations, my apologies.)
When our life is at 2+ and we are at 8+ don, we get to conveniently establish 8 Cost Moria. The ultimate punish for our opponent not attacking us for their Gedatsu effect to be live, is the ability for us to establish a Moria with no consequence
When our life is at 1, we are in risk of getting rejected, so make sure to establish a Rebecca/Borsalino in the mid-game, unless we have enough counter to protect against it
In general when our life is at 1, and we’re scared of Reject, or when our life is at 0 and we’re scared to reduce our opponent’s life to 1 or less because of Amaru. We can use Sabo strongly to protect ourselves for the turn, while going for a super aggressive turn!
One thing I do differently than most Sakazuki players (except for Noel Lim), is that I will defend the first 5K attack from Katakuri. Defending the first 5K attack makes it easier to have 2+ life by our 8 or 9 don turn, which makes it easy to establish 8 Cost Moria!
Defending life like this early also gives us more time to draw into Sabos
Now y’all are probably thinking, “But wait! How do I play Kuzan on my 4 or 5-don turn then?
Another thing I do differently than other Sakazuki players is that unless I already have two 4-drop Kuzans, I won’t establish Kuzan until my 6-don turn going second, or my 7-don turn going first
It’s hard to understand this unless you completely understand the matchup from Katakuri’s perspective, but if we play Kuzan on 6-don and the opponent rejects on their 7-don turn, or we play Kuzan on our 7-don turn, and the opponent rejects on their 8-don turn, they become disastrously far behind.
The reason for this is they missed out on their heal from 7Mom, and due to no real threat being established, we can establish Moria for free and summon the Kuzan they just destroyed
From Katakuri’s perspective, I would rather play 7Mom in response to 4Kuzan, and hope to grind them out, or get a convenient lethal with Thunderbolt, Reject, and Amarus
It’s easier for Kata to play for the Sakazuki having no Sabos, or a vulnerable Sabo(as in it can be destroyed by Tbolt/Amary, because it lasted more than one turn), than kill the Kuzan just for it to get revived from Moria
So instead of playing Kuzan on my 4-don turn, I will either play 4 Cost Borsalino, or I will hound blaze Perospero, or a trigger unit that comes from life
Instead of playing Kuzan on my 5-don turn, I will either play Borsalino, Lucci, or Sabo!
Try to establish blockers while doing removal once we get past 8+ don. This will help us make the decision to keep our life at 2, until Big Mom comes down, or we can have multiple blockers leading into the late-game!
Biggest thing to remember against Katakuri, is don’t take a risk you don’t need to take. A lot of people do unfortunately get sacked in weird scenarios, but a lot of the times, they should have never given their opponent the opportunity to sack in the first place, because they could have easily won on the following turn.
East players suggest discarding Moria in this matchup, but if you are playing the Kuzan version of the deck, I think you should keep your Moria’s, as they are incredible extenders
Save Moria for 10-Don turns as they can easily handle 10-Drop Moms, and in combination with Kuzan, can handle a trigger unit along with it as well
Once a trigger unit is checked, we tend to avoid attacking life, until the board is completely clean. And going into our 7-Don turn, if we don’t have Hina + Murakumo, deal with the current board, and don’t bother attacking.
Going First
F1(1 Don):
Tashigi (Top priority to search is Kuzan)
F2(3 Don):
Swing 5K leader, Play Brannew/Tashigi
F3(5 Don):
Swing 5K Leader, Hina + Murakumo if a trigger unit came out, or Stage + Lucci, or Borsalino/Sabo if only one unit is on the opponent’s board
F4(7 Don): This is the turn I tend to do differently than most Sakazuki players
Kuzan + Stage + Hound Blaze (Swing into a rested trigger unit if possible, and specifically don’t swing into life, so we don’t push their life too low too fast, and so we don’t risk a trigger unit)
F5(9 Don):
Kuzan combos while setting up a blocker
If Kuzan was destroyed by Reject, and we have 2+ life, or a stupid amount of counter in hand, then we can play Moria and revive Kuzan and a Brannew/Tashigi!
F6(10 Don):
Kuzan combos while setting up blocker and/or second Kuzan
Moria + RebeccaBrannew to dig for Sabo. Then we can use Hina from hand, Kuzan, and Murakumo/blaze to handle the board
The main thing to pay attention to is that we choose to establish Kuzan on 7-Don turn, and we choose not to attack in the early game depending on how many units are on the opponent’s board.
In the late-game, we should try to keep our opponent’s life to 2 maximum, unless we are establishing a Sabo that turn, or are hand is too weak. So we are forced to make an aggressive push.
If the opponent hits a trigger unit, just answer their big unit and their trigger unit, and pass the turn, unless we are playing Sabo and going aggro for the turn.
It’s also important to not blank play stage. Because on our 7-don turn we will have no way to answer Gedatsu, unless we use both of it’s effects on the same turn.
Going Second
S1(2 Don):
Brannew/Tashigi (Priority is to find Kuzan) + Stage(if possible)
S2(4 Don):
Borsalino or Hound blaze on Perospero. If they played Perospero on their 3-don turn, then don’t attack. And if they swung 5K while establishing their Perospero, remember to counter out.
S3(6 Don):
Our goal is to establish a Kuzan this turn, while leaving the opponent with 1 unit on the board MAXIMUM. So if stage is established and the opponent has a unit on the board. We do:
Swing leader -1 to the character, stage -1 to the character, then Kuzan + Murakumo/blaze
If the opponent’s board is clean, then I wouldn’t bother attacking the opponent again, and just wait for next turn
S4(8 Don):
Kuzan combos while setting up blocker
If Kuzan was rejected then use 8Moria to revive it and a Brannew/Tashigi
S5(10 Don):
Kuzan combos while setting up blocker and/or second Kuzan
Moria + RebeccaBrannew to dig for Sabo. Then we can use Hina from hand, Kuzan, and Murakumo/blaze to handle the board
Same rules apply as when going first, just play it safe
The Aggro Curve
In the aggro curve we are going to want to attack the opponenet every single turn, while dealing with as much of their board as we can.
Going First
F1(1 Don):
Tashigi (Top priority is Hina)
F2(3 Don):
Brannew + Tashigi
F3(5 Don):
On our opponent’s 4-don turn, if they hit no trigger unit, and will only play 1 unit. Then we can defend the life if we have Sabo/Borsalino in our hand.
But if don’t have Sabo/Borsalino and/or they hit a trigger unit, we should always take the attack, and do Lucci combo or Hina + Murakumo
F4(7 Don):
Hina + Lucci (My favorite play)
7Borsalino
Kuzan + Hound Blaze
F5(9 Don):
RebeccaHina + Murakumo/Lucci
Better to establish a blocker on this turn while doing removal, so we are confident in living
If we have 2+ life and Sabo in our hand, then it may be possible to do IceAge + Moria on this turn
F6(10 Don):
Sabo + Kuzan removal combos
On this curve we typically want to attack every turn, regardless of what triggers come out of life. We aim to aggro through, and got for a Sabo push while answering board towards the end of the game!
Going Second
S1(2 Don):
Brannew/Tashigi (Top priority is Hina)
S2(4 Don):
Defend the first 5K and play Borsalino
Take the first 5K and play Kuzan/Lucci
If the opponent played Perospero on 3-Don, I think it’s fine not to attack, even though we are being aggressive.
S3(6 Don):
RebeccaHina + Murakumo or Hina + Murakumo + Stage
Lucci
S4(8 Don):
RebeccaHina + Lucci/Murakumo/Blaze
S5(10 Don):
Blocker + Removal
Then we aim to close out the game the following turn our do Sabo + removal while going for a big push!
The Hybrid Curve
This will be the exact same curve as the “complete control curve,” except on turns where we cleared their board in the early-game, we are still willing to attack and risk another trigger unit! If they don't hit a trigger the upside is huge, and even if they do, we can handle the trigger unit plus whatever they play the following turn.
The only concern with this strategy, is if their triggers are too strong, we need to draw Sabo quickly.
Slightly Advantageous - 90% of Yamato builds
50/50 - Yamato decks that have Reject and rush face (50/50 dependent on whether we draw blockers or not)
Slightly Disadvantageous - Yamato decks with a lot of rest + 10Cost Doflamingo
Every Yamato deck is basically fought the same way.
Attack Selection: First Attack - Going first we need to see a blocker by our 5-don turn, instead of our 4-don turn, which is amazing, because that gives us an additional turn to dig, and access to Sabo as an option. Sabo is also the strongest blocker in this matchup, as it filters out counterless, and can’t be rested except by Hody and straw sword!
Mulligan:
First Attack - Any Blocker
Second Attack - Any Blocker
General Guidelines
Playing against Yamato is a game of playing blockers on back-to-back turns and eventually stabilizing
Even if a blocker sticks, I would still play another blocker in case of Reject/Rest card + swing all don.
The ultimate goal is to call Hina off Rebecca to apply pressure, and to revive a blocker from 8Moria to apply even more pressure
Sabo is the strongest blocker, since it can filter our hand
Stage + 2 Cost events are very effective, because we can respond to board, while establishing blockers!
If we only have 4 cost blockers established, then keep all blockers standing so we don’t get cheesed by a card like Sugar
Even if we have Sabo, may be more beneficial to wait until we get a Moria or a Hina to attack with, due to the risk of Straw Sword
It’s generally fine to go down to 1-life from a non-double attack unit, depending on the board state.
Slightly Advantageous for whoever goes second
Attack Selection: Second Attack - Law can’t play 2 units at once on their 4-don turn
Mulligan:
First Attack - Tashigi(or 3Brook if you run it)
Second Attack - Brannew or Tashigi
General Guidelines
The goal is to double clear as much as possible in the early-game and then stabilize in the late-game.
I would rather play eruption + eruption + Murakumo than do a Lucci or Hound Blaze!
Counter out of every possible attack, unless it’s a card we need’
If I can’t double clear on 8-Don, I’m fine with Moria + Kuzan + Brannew/Tashigi or Moria + Lucci + Helmeppo
The real golden play is Leaderswing + StageEff + Lucci + Helmeppo
Sample Curve
Going FIrst
1: Tashigi
3:
3Brook (Priority if run)
Brannew + Tashigi
Brannew/Tashigi + Stage
5:
Hina + Murakumo + StageEff
Eruption + Eruption + Murakumo
Lucci or HoundBlaze if nothing else
7:
Hina + Lucci + StageEff
RebHina + Eruption + Murakumo
Eruption + Eruption/Stage + Lucci
9:
Moria + RebBrook + Cost Reduction(Helmeppo/Tsuru from trash or Eruption/Stage)
Moria + Lucci + Helmeppo/Tsuru + Cost Reduction
10:
Moria + RebHina + Murakumo
RebHina + Lucci + Cost Reduction
RebHina + Cost Reduction + Murakumo
Going Second
2: Brannew/Tashigi
4:
Kuzan - If nothing played on 3-don
3Brook(If played and is priority) - If something played on 3 don
Brannew/Tashigi + HoundBlaze - If something played on 3-Don
6:
Hina + Eruption/Stage + Murakumo
Eruption + Eruption/Stage/IceAge + Lucci
Eruption + Eruption + Murakumo
Lucci/Brook/HoundBlaze if no double clear
8:
Moria + Tsuru/Helmeppo + Lucci
Moria + Helmeppo + Lucci + StageEff
Moria + Kuzan + Tashigi/Brannew
HinaLucci + Cost Reduction
RebHina + Cost Reduction + Murakumo
10:
Moria + RebHina + Murakumo
RebHina + Lucci + Cost Reduction
RebHina + Cost Reduction + Murakumo
A very long matchup, but also very free. Super Advantageous regardless of first/second.
Unlike the BY Luffy matchup, it is very possible and easy to lose to Enel if you don't play properly. But Enel should almost never win if you got the matchup on lock.
Attack Selection: Second Attack - Kuzan and Moria on curve is strong
Mulligan:
First Attack - Tashigi
Second Attack - Brannew or Tashigi
General Guidelines
This matchup can easily be won by using Moria strongly
Play Kuzan on 6-don instead of 4-don to prevent 7Enel from being played on curve
When going first Sabo takes priority over 4-cost Kuzan on 5-don, and 7Borsalino takes priority over Kuzan on 7-don
Don’t attack until at least one Moria/7Bors has stuck
This will prevent us from getting trigger sacked in the early-game, turns off 5Ace, and makes Raigo incredibly weak
If you didn’t read anything else, just don’t attack bro.
Hold on to multiple Blaze/Kumo/Lucci in order to double-pop 7Enel.
Remember that Hina + Eruption reaches 8Cost, add leader skill in there, and we’ve reached 9-cost
StageEff + Hina + Leaderskill also reaches 8Cost, but not 9
Sample Curve
Going FIrst
1: Tashigi
3:
3Brook(if ran)
Brannew + Tashigi
Brannew/Tashigi
5:
Sabo
Eruption/IceAge + Lucci
I’d save Hinas for the late-game, so don’t use it on this turn
7:
7Borsalino (Priority)
Kuzan (Prevents/Punishes rush character chrome coming next turn)
Rebecca/Sabo - Defensive play if our life dropped quickly
9:
If 7Borsalino stuck, and they played 7Enel, then use RebHina/IceAge + Blaze to clear the 7 Enel
If 7Borsalino got Kata’d, then do a value Moria for MoriaKuzan + Brannew/Tashigi (Don’t worry, thanks to Murakumo we have very strong double clears)
Or the safest play is to clear 8CostKata with a RebHina play, and then use MoriaRebHina + 2-Cost event to clear the next unit the following turn
10:
Moria + RebHina + Murakumo
RebHina + Lucci + Cost Reduction
RebHina + Cost Reduction + Murakumo
Infinite other options tbh
Going Second
2: Brannew/Tashigi
4: Brannew/Tashigi or Brook or Kuzan (if there's a second one in hand
6: Kuzan + Brannew/Tashigi
8:
ValueMoria (Typically play either Rebecca or Kuzan (Priority to Kuzan unless life is low)
If 7Enel was established, then try to double clear while establishing Rebecca
10:
Moria + RebHina + Murakumo
RebHina + Lucci + Cost Reduction
RebHina + Cost Reduction + Murakumo
Infinite other options tbh
FREE THIS MATCHUP IS ACTUALLY A BYE. Extremely Advatageous regardless of FIrst/Second.
Attack Selection: Second Attack - Kuzan and Moria on curve is strong
Mulligan:
First Attack - Tashigi/Brannew
Second Attack - Brannew/Tashigi or Kuzan
General Guidelines
Only way we lose is if they aggro us down, so guard every attack you can in the early game, and abuse Rebecca in the late-game
Kuzan on curve is very strong, and if they don't have 5Sabo to answer it, the game might end on the spot.
Always establish Moria on curve, it's statline is too strong, and reviving Rebecca/Kuzan is also goated
Don't attack until we have more attacks than our opponenet does life + blockers. And if our opponent defends, and we no longer have more attacks than their life + blockers, just stop attacking.
Murakumo extremely goated in this matchup. Even if Luffy highrolls and hits back-to-back turns of 2-units(that involve indestructible Sabo), we can still easily clear both!
Sample Curve
Going FIrst
1: Tashigi
3:
Brannew + Tashigi
Brannew/Tashigi
5:
Kuzan (Priority)
Sabo/Rebecca
I’d save Hinas for the late-game, so don’t use it on this turn
7:
7Borsalino (Priority)
Kuzan + Eruption + Blaze
RebeccaHina + Blaze
9:
Value Moria if possible (Play either Rebecca/Kuzan dependent on board state)
Removal Moria if possible (Higher priority than Value Moria)
RebHina + Botdeck
10:
Moria + RebHina + Murakumo/Blaze
Value Moria
If destruction is invalid, and we have no botdeck, just focus on maintaining defense while pressuring
Going Second
2: Brannew/Tashigi
4:
Kuzan(Priority)
Brannew/Tashigi
6:
RebHina + Blaze (Highest Priority)
Lucci combo if possible
Or else Sabo
8:
ValueMoria (Typically play either Rebecca or Kuzan (Priority to Kuzan unless life is low)
RemovalMoria (If Possible)
10:
Moria + RebHina + Murakumo/Blaze
Value Moria
If destruction is invalid, and we have no botdeck, just focus on maintaining defense while pressuring
---------------------------------------------------------------------------
This is it for the updated EB01 Sakazuki guide! If this article helped please like it, as this helps provide a bit of feedback for articles.
Sakazuki on top, I fr should’ve played this the whole format man, but I’ll catch y’all in the next one, PEACE.


