Along with some drastic changes to my lower body, I also packed on some serious upper body mass, and I love it. You probably noticed I also got a bit of winter coat since I made the plunge.
Modeling and animating hair growth has been the biggest challenge I've had to face in my workflow, and it really made getting my first video done a chore. More of a nightmare, actually.
What might have helped, though, was to use the right tool. Maya is my weapon of choice, and it includes XGen for hair, which got me better results than I expected. But it came with a whole lot of difficulty. I spent two months completing my first project before I found out I had learned from older tutorials and that the XGen toolset I was using was actually outdated. Maya has two XGen toolsets, basically, an old one and a new one, and some early research misled me into thinking that the new toolset wasn't going to do what I needed. Oh, was I wrong. So wrong.
Why was this a problem? Because the old toolset is slow and buggy, and apparently Autodesk doesn't do much to update it. The first problem I encountered was having to wait several seconds for the hair to reposition itself any time that I moved to a new point in the animation, which meant I had to disable XGen to get any work done. But I encountered more serious bugs, leading to hundreds of crashes, dozens of instances of lost data, and also a few occasions of permanently losing the entire hair composition for my project and having to start over. I questioned many times how Maya could be considered an industry standard when it crashes so easily once you try to do anything remotely interesting.
Well, after I discovered that the new XGen toolset could replace the old one and that it's far more stable and a couple orders of magnitude faster, I started using it for Vince. Initially I had used the old toolset for Vince, but then I learned I could transfer the hair to the new toolset, so I tried it out. This scored a couple of immediate benefits. It made animating Vince's hair shrinkage a cinch... instead of a pain. I also determined that I could transfer his hair seamlessly from one mesh to the next as he went through each stage of his transformation. This particular feature is quite peculiar to me... almost as though transformation animations are the perfect use for it!
Today, though, I did something new, and started with the new toolset on some hair composition, rather than transferring it from the old one. Wow, does it do a fine job... and I think it looks a lot better. I have finer control of shape, density, length and width, down to individual hairs. And, well, I can do it without Maya falling apart, crashing, or losing my work!
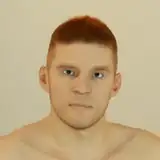
I've posted an example above which compares the old method and new method on the same model. You can see some patterns and patchiness in the old method the is completely gone with the new method. It's quite an improvement, and great for close-up shots.
This is exciting. I can't wait to use it with my current project.
Thanks everyone!
Paul
J
2021-04-29 01:16:09 +0000 UTCPaul Strong
2021-04-28 21:43:45 +0000 UTCJ
2021-04-28 05:31:00 +0000 UTCCock69
2021-04-28 04:53:55 +0000 UTC