Heya Everyone!
The featured sticker this month (November 2021) will be a Blue Dragon! I thought I would include a breakdown of the steps involved in coloring it.
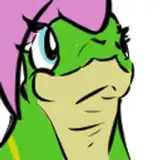
First was drawing and inking the drawing, then dropping it into Photoshop for coloring. At this point, I prepped the linework for clarity by taking the art layer and making sure it's on a separate layer from the background layer, then going to the menu bar and choosing Image, then Adjustments, then selecting Threshold. This brings up a sliding scale to adjust what will be absolutely Black and White, so we are just dealing with Black and White pixels. Then I selected the white pixels on that layer and deleted them. This left me with two layers. One that had the black inked line work, and a Background layer that was all white.

Next, I wanted to make the flat colors of the dragon. So I selected the area around the dragon, and in between its wings, so I just had the BG selected, expanded that selection by 2 pixels, and inverted the selection, so I just had the dragon selected. I created a new layer I called Flats and dropped in the flat color of the dragon on a new layer with the Paint Bucket Tool. Then selecting that base color, I started adding different colors for the different parts of the dragon (horns, inner ear, belly and jaw scales, etc.).

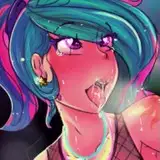
Then I created a new Multiply layer I labeled Shadows. I made sure I selected the flats, by command clicking (I'm on a Mac) the Flats layer, then started adding flat shadows with a light purple color and the Pencil Tool. Selecting the Flats allows me to keep my shadows within the line work and over the flat colors, I added previously. I did this with two multiply layers to show 2 levels of darkness in the shadows.

Next, I created a new Overlay Layer and labeled it Highlights. I Comand+Shift clicked the Shadows layer, unselecting the areas I added the shadows to so that I only had the areas of the dragon that weren't shaded selected. Using a light yellow color I began adding highlights to the dragon. Again, I did this with 2 Highlight layers to make multiple levels of highlights.

Next, I created a new layer for the underlighting and added a yellow color to the areas I wanted to add rim-light to the underside of the dragon. And then I deselected the dragon and made a new layer under the dragon's colors for the background base gradients, that make the background fade from Purple to Orange to Yellow.

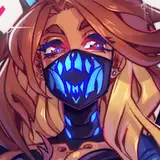
Next, I added a few new layers on top of the Background Gradient Layer to paint the flame textures in the background. I did this with multiple layers with the Paint Brush Tool, copying some of the layers I painted and adding a motion blur with filters (go to the top menu bar, click Filter, then Blur, then Motion Blur, and adjust as needed).

Next, I added a new set of layers on top of the dragon's layers and painted some fire effects that were in the foreground, to really make it look like the dragon is sitting in the middle of the flames.
And finally, I added an additional Overlay Layer on top of everything and added a color gradient to tie all the colors together better.

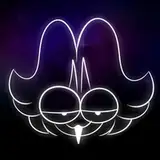
Taking this image I created a border using the Circle Selection Tool, holding Shift to keep the circle symmetrical, and then on a new layer clicked on Edit in the Menu Bar, then Stroke. Making a copy of all the art layers, then flattening the artwork copy layers into 1 layer. Turning off the visibility of all other layers, except for this new single layer that is a flattened copy of the art, I erased the parts of the Artwork that I didn't want for the sticker. This can be performed fairly easily by toggling between selecting different parts of the Art layers (selecting just the Flats and Inks layers for instance to select only the dragon and not the Background Flames).
Then by going to the sticker border layer and erasing key bits of the border that the dragon should overlap (the dragon's ears and wings) you get this look of the dragon fitting through a circular window!

I hope this little breakdown gives you guys a good idea of how I color up my drawings. Let me know if you liked it, and if you want me to do stuff like this more often.
I will be dropping the PSD file into a separate post for my awesome patrons who are in the $5 tier or higher, so keep an eye out for that post!
More to come soon!
~Chris