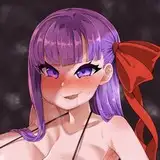
Hot Mess BODIES! FULL PROCESS
Added 2025-04-07 21:14:24 +0000 UTCI'm writing this as a 17lb cat crawls all over me, please excuse any typos. Let's get into it
I start off by wrapping the midsection of my skeleton in yarn waste from brushing out doll hair (or polyfil if I have no yarn waste, but that's rare)
I eyeball and cut out a decent sized rectangle- this will be our base torso. Vertically, it's roughly the same height from the skeletons crotch to neck. I cut notches seen here where the small of the waist will be
Wrapping this around the skeleton, I sew the small of the waist together
Then I head upwards- first cutting off wedges of excess fabric- I just pinch the back together, see what looks right, and then chop. I keep stitching up to the neck, and keep cutting off any excess as necessary 
Once we're up the the shoulders, I stitch the front and back around the neck wire, leaving the shoulders open for stuffing

I stuffed the chest and a bit of the back until I was happy, then stitched the shoulders up. 
Similar process down to the crotch- this time I cut the excess fleece down to a nice round shape for the butt. Looks like too much in the trunk here, but once connected at the crotch, it'll look proportional.

I stitch down that center line, stuff the butt and stomach, sew the front and back of the crotch together, and stuff some more. I get a lot of help with moving stuffing around these tight areas from small forceps and a felting needle!
From the center to the leg wires, I stitch up the torso, and that's it!
For the neck, I simply cut a strip of fleece and wrap it around the neck wire with the help of some hot glue. For this one I also stitched it to the torso for a seamless look.
Now for our dry fit! There's a lot of back and forth of snipping wire, sliding the sculpted bits on, snipping some more, etc, until everything looks even. Eyeballing it mostly. I then use a paint marker to mark the wire, so that I know how far down the limbs actually need to go.
Arms! I keep it very simple with arms. I cut out a long rectangle of fleece, the width being the exact length of the arm, glue one end in place, then just wrap it around to the desired thickness (better pic of the start of this down below for her legs) the trick here is that I pull the fleece tighter around the wrist before glueing it down with hot glue, making it thinner and the same width as the sculpted wrist (not glued on yet here)
Repeat for the other side, stitch the shoulders to the torso, and she's armed. Sometimes I don't stitch the shoulders to the torso- depends on how much I plan on covering up later

Legs! These will be more intensive. Once again, I start by wrapping the wire in fleece cut to the same length as the legs, just wrapped around to be straight tubes- these are a base.


Using some scrap paper (gross old sticky note) I whip up a pattern piece for a thigh! I cut it out of my fleece twice, then stitch it up in the center before turning it out and putting it on the dolls leg
Here you can see I stitched one up around the knee and hip, but the backside is open for me to stuff. Looking a bit flat now.
Once again using my handy forceps, I shove the little yarn bits where they need to go, just whatever looks right
And there's her lovely hips! But she needs some calves to back all of it up

Same basic idea (and the same paper!) except the seam will be in the back, rather than between the legs.
Once again, same process, with a little bit of stuffing in the back of the calf before stitching her all the way down.
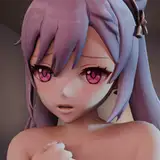
I think she needs bigger boobs. I'm gonna give them to her
Fixing up the bodies this way is basically just sewing on patches and stuffing them. I took a chunk of fleece and pinned where I'm gonna start stitching- I'll just trim any excess fabric as I need
I stitch around the bottom of my patch, leaving the top open for stuffing. Felting needle helped pack it in.
Trim, stitch, trim, stitch, and there we go!
And that's our first body! The rest of the 4 will be a bit more simple. Let's go.

Same torso process as before, just much thinner and straighter, with a longer neck.
My dry fit. Girl will be tall and lanky.
I plan on this doll being pretty covered up- lots of form-hiding clothes, which means it gets a formless base. No extra padding on the arms and legs, just a simple wrap

Boobs needed though. This time they're little pompoms I trimmed to have a flat side. No stuffing necessary here- but the same patch method as before.
EASY PEASY. yellow is done
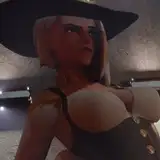
Onto the teal doll (though her body is much bluer. Close enough.) this gal is a lot more pear shaped- but again, same method for the base torso.
Her dry fit
Arms are done, base for legs on

Back to making curvy legs, I make my quick pattern piece for thighs and calves- same as dark blue before!
While I did stuff her thighs and calves a little bit, the fleece is thick enough that I didn't need to worry about stuffing in some places to get the thickness I needed
The body shape is cute, but I want her to match the set better, so I'm adding some boobage and thickening her upper torso a bit.

Another boob patch, but this time it wraps around the back to give her ribs some volume as well. I cut a large pompom in half for her boobs, then stitched it all up.

Wasn't quite enough fabric to cover the stuffing, so I just glued little circles of fleece down to bridge the gap. No one needs to know.
And that's teals body! One more-
Slightly different here- for a more masculine body form, I made the small of the waist sit lower, and stuffed the sides and chest more for a broad shape.

The torso
Dry fit
Like yellow, I plan on this guy being pretty covered up, so simple legs and arms for him
He doesn't get boobs, but don't fret, he gets a pompom patched to his crotch so that he doesn't look too flat up front
There he is!
And there they are!! This post is so long that Patreon is lagging out so I gotta post this before it explodes. Hope you had fun!!!
Comments
If it'll be exposed, I leave just a little bit of extra fabric when I trim and stitch it down! If I know I'll be covering the limb, I just cut right down to the glue because the only thing that matters in that case is taking off the bulk :)
Cricket Gutz
2025-09-28 20:42:18 +0000 UTCI love your dolls they are always special, I have just a question : how do you make it clean from behind with the glue (for the arms) ?
Eva Taieb
2025-09-28 20:13:59 +0000 UTC