This tutorial introduces Photoshop's mixer brush.
To fully understand this tool we should know a little bit about traditional media.
If you've played with paint as a child then that's enough to start, but we'll see in upcoming tutorials how this tool can simulate many types of traditional media, wet and dry.
Despite being around since CS5, the mixer brush has most digital artist's stumped. Brief experiments leave us confused and not quite achieving our desired effects.
This tutorial hopes to provide some answers, beginning with a detailed explanation of the options bar, followed by examples in subsequent tutorials.
This is a lot of information. To get the best results go slow. Follow up what you read here and apply in photoshop, in small steps.
You will get confused, that's certain, but totally normal, I promise!
How to find the mixer brush
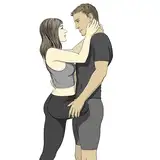
First, be sure to have the mixer brush selected by clicking and holding on the brush tool and selecting the mixer brush. The mixer brush icon looks like a brush with a drop in the corner (see top left corner of the tutorial image).
The options bar explained...
Brush presets and brush panel
Brush load
A swatch showing the current paint load on the brush.
Photoshop divides this swatch into two wells, the "reservoir well" and the "pickup well". Understanding this concept is key to working with the mixer brush properly.
Note, in the tutorial image, the swatch is pink with a faint image of a brush. The pink area is the reservoir well, the brush is the pickup well.
The swatch is like a preview of the paint on our brush before we apply a stroke. The swatch (brush load) can be:
Brush load drop down menu (manual control)
Clicking the drop down menu gives two options, "load brush" and "clean brush" and a third option which toggles a "load solid colors" only function.
Load brush /clean brush (automatic control)
These options when activated will do exactly the same as the controls in the drop down menu, only repeatedly after each stroke. Here's a short description of the 4 combinations of these controls:
The brush acts like a blender by turning off the reservoir well (the supply of fresh paint). The stroke blends colors on the canvas and is cleaned after each stroke. This brush only blends what is on the canvas.
The brush receives paint from the reservoir well and also blends with the paint on the canvas. The brush is then cleaned and reloaded with fresh paint after each stroke.
When we finish applying a stroke to the canvas, the last color that is picked up by the brush will stick to the brush tip and be applied and mixed into the next stroke. There won't be any paint loaded from the reservoir well mixing in with our strokes.
Paint from the reservoir well is loaded onto the brush and applied with each new stroke but also picks up paint from the canvas and mixes that into the reservoir well, so our brush becomes contaminated with color from the canvas.
Mixer brush combos
These are combinations of the wet, load, mix and flow controls previously set by photoshop to mimic various brush and canvas scenarios. These presets will usually yield the kind of results we're looking for without too much effort we can then tweak the variables with percentage controls.
Brush and canvas control
The higher the setting, the more paint added to the pickup well.
The effect is a stroke that picks up whatever colors it contacts on the canvas and mixes as the stroke continues.
Set to 0% and our mixer brush won't be effected by the contents on the canvas, painting with fully opaque paint.
In action, the difference between 1% and 100% is so subtle it's barely noticeable.
Set at 1% and our reservoir well quickly runs out of supply, leaving a dry brush.
Set to 100% means our supply is constant, so our brush doesn't dry out at all through the life of each stroke.
At 100% mix, our stroke is focused on the wet value and ignores the load.
The effect is a stroke that only uses paint picked up from the canvas ignoring the reservoir well.
At lower values, mix will combine the two wells.
At a value of 0% the reservoir well is the source of paint.
Airbrush
Turning on this button mimics the way an airbrush behaves. This means when we click and hold the brush in place the color will build and build until we let go. This gives us some opactiy/flow control useful if we want to make subtle strokes. A fast stroke gives a very light application of paint, a slow stroke gives us a heavier application of paint, just like a real airbrush.
All layers
Turning on this button allows the brush to pickup paint from all layer, not just the active layer. The brush treats the stroke as if the layers were flattened.
Pressure-size override
This switch might be familiar to us already. It overrides any pressure settings in the brush panel. The harder you press, the larger the brush.
In upcoming tutorials we'll see some examples of these functions.
Nathan Aardvark
2016-06-13 08:54:40 +0000 UTC