10/25/18: Something went right today
Added 2018-10-11 20:26:03 +0000 UTC-----10/26/18: Something went right today
(Not able to work today after picking up my sis at 1am from the airport. Zero energy, but I snuck this in tonight)
So after getting the physics to look ok enough, I found that the front of the skirt would easily clip through Bowsette's leg. My approach was to use a shape key to fix that and for any instances where she raises her leg. First problem was that I dragged the rest of her stomach and breasts while raising her skirt with a smooth edge adjustment. There was no other way around doing it or I'd have to adjust each vertex of the skirt. No thanks.
I looked online for how to remove vertexes from a shape key. Which would've seriously helped when editing Bowsette's face for a week due to everything affecting her mouth and breasts for no reason.
I found this extremely helpful add-on: https://developer.blender.org/T41841
It allows you to select a bunch of vertices and reset them within a shape key in a button press! I LOVE IT!

With that solved, Blender handed me a miracle. The shape keys work while the physics are on the skirt! It doesn't screw up the physics much at all when activating! That's awesome!
But I think I'll still have to turn off physics for when Bowsette leans down. The skirt doesn't like that at all. I can make shape keys for that. Having a shape key while leaning down won't work because it's not exactly the skirt messing up. It's a low poly mesh cage that's binded to the skirt that's messing up. So! Turn off physics for that moment, turn them back on as she stands up. Easy peasy!
I'm so glad the physics have at least gone well since I figured out that the size needs to be Blender's normal. I'm also super glad that exporting to 10x the size works fine in UE4 and matches up perfectly! It's been a long and hard fought year of problems to be solved left and right. I think I'm starting to come out of the bottom where I can get a full workflow going through Blender and be back to my MMM speeds of animating. The LAST thing that's truly in the way after physics and destruction is making the model higher poly for UE4. (This includes facial animations using a lattice to make the face more animated) Only then will things become truly cinematic (Monsters vs. Aliens quality is my goal) using the exact same models as everyone else. In other words, higher quality waifus no matter where they come from!
The tutorial series for transferring mmd models to Blender/UE4 is going to be insane! Especially describing my workflow and stuff to avoid. So much stuff to go over.
The funny part is that it will all be legit tutorials and problem solving, but it's all gts related. So whoever needs the info is just going to have to deal with it. Honestly is more fun a subject than other usual tutorials without it! The reason why I haven't started a series yet is because there can still be problems in my workflow that may stem from the beginning. For example, the UE4 and Blender size difference messing up physics. I don't want to teach mistakes.
-----10/25/18: Physics
For hours I was trying to get the skirt physics to work. Looked online for the problem. The model is far too big for physics to work correctly. (Not because of gts animations though)
It's because UE4's scale setup is far larger than Blender's settings.
After pouring through info on how to convert, I thought up a theory. The conversion setting for Blender is settings its scale to 0.001. I can also export at 10 scale from Blender but not import.
So I scaled the city import to 0.1 and all current things, which made the physics work PRETTY WELL! I Now I can export at 10x the size and things will line up in UE4 all the same but with working physics animations!
----10/24/18:
Now to get to every side thing that's going on in this video.


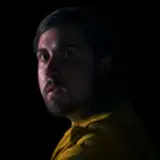
I wonder if this will look better if I put a small flashlight pointing at her face?

Sittin' all cute-like
-----10/19/18: Putting it All Together
First of all, we're in the home stretch. The $15 early access vid is next!
With Bowsette's basic animation complete, it's time to put most of what's there into UE4. No physics yet, but that's right after all the camerawork is done.
It's a bit bright here, but I can adjust this shot.
Too bright became a general theme as I had to adjust the lighting again.
But this hot REALLY makes it worth it!
Lots of shadows had to be softened on Bowsette in order for her to not look polygonal. She looks like she has lotion on though, I should drop the specularity on her skin a bit.
This is why the lighting change! Gumi's face was a lightbulb before but this is perfect now!
Money shot. Look at that bloom. Mmm! Look at that shadow of Bowsette on the left too!
The softened shadows look much better here. Hell, I might continue to adjust.
Bowsette lands her first Taxi-fish.
-----10/18/18: Livin' in the City
What I thought would be simply turning a building into a chair turned into quite the day of touching up the city.
After LOTS of renditions, I finally ended with this throne design!
This roof section is a perfect butt crush opportunity I never thought of before. Hopefully, the physics won't jank out.
I finally figured out how to soften the shadows! I forgot how I figured it out, but probably with light source angle option. The buildings at the top left look far better, but the main goal is to make the model not look polygonal.
Here's a comparison shot of the lighting changes. This should allow Bowsette's black dress to not become crunched into complete black without boosting the bloom. Still, I need to make it look more cinematic somehow. I won't do any more adjusting, so maybe in post-editing software like Hitfilm Once everything is exported.
-----10/16/18: 16 Seconds
This has to be a new personal record on basic animation time getting done. I'll update soon, but notice that I removed the last goal tier. I'm no way ready for it yet and can't promise it for now. Still working my way to playable stuff though!
Edit: Ok, here's the update! Had a really late night so I woke up late.
I made this scene more impactful! I added a bit more size so that she could easily cross over the overpass at this point. Also, cop car is crushed. There is a wall to the left where the camera will be along with Teto and Gumi taking cover.
Love my job.
This is the look on my face when I had a different idea from throwing the taxi. Bowsette won't be getting any bigger from here, not that she needs to. So why not...
Ah yes, this again. Sometimes I feel like I animate some things on repeat, but that's fine if it's 1% of the big picture.
Although Bowsette really likes stepping on things in this one.
The destruction won't be too good here unless I somehow learn how to crumble things in 1 sitting. I know it's 1 button, but how to go about it correctly so that it doesn't explode into shards of glass like the Walk on the Park vid is the problem. Most of the imported objects in UE4 don't crumble correctly and only do it as that vid. That's what I gotta solve with destruction next. I really don't know why it happens so wrong.
-----10/15/18: A Fast Week
I can't believe that was my last picture. (Bloom boosted a bit too much) Felt like I was much further than that! I exported the textures for Gumi in the right format for the first thing off today. Will have to do that for Teto as well. It seems like it should go super well in UE4 later this week. Another thing is that I'm always thinking how to improve during the weekends. I found out that I've been using the light quality settings on PREVIEW THIS WHOLE TIME! Then again, I've been rendering in cinematic quality so that may or may not have been adjusted. But most importantly is finding a way to smooth the shadows on the models so that the obvious polygons can't be seen. Still trying to figure that out but I feel like I'm close. Now to the pictures of what I've done!
The classic boring shot of the character's reaction to a thing getting huge in front of them while a shadow looms. But in this case, I don't use it as a shortcut to cheap out on the main meal. I use it simply to get Bowsette in a standing position without animating the actual getup at all. MASSIVE shortcut from dropping VR at the halfway point.
Speaking of that, I think I'll have VR specific projects from now on. Ones where they are detailed in a completely different aspect. My videos feel like they need a specific camera view to be right. The way I've been building the potential VR videos has been completely wrong! It's, of course, the hard way. I've been thinking about animating every potential angle 100% of the time.
What if I built the VR vids in a first person perspective purposefully with little room for modification? This is a massive shortcut on the perspective of you being the main or side character. I can simplify your movements without the full effort 100%. On top of that, I can better control where you'll be potentially looking. Allowing shortcuts to happen when you least expect it. Like say a gts girlfriend picks you up and covers your surroundings, Perfect transition to somewhere else without an obvious cut. I've been thinking of VR as just the same camera viewpoints as a usual vid but with 360 stretching. HARD. This does mean that videos are built with a perspective in mind and aren't flexible. It's a start that I can handle though. Anyways, back to the pics.
With Bowsette over the overpass, she quickly forgets about the cops below and eyes her next target.
"Where do you think you're going?"
OOF. I also tried to be more careful with the destruction shape key this time and not making the wheel a weird shape.
Below is chaos entirely as well.
Gonna add Teto and Gumi in the corner here taking cover.
Playing with Hot Wheels. It's honestly astonishing that I forgot when I animated all of this. Starting to feel like someone else did this because damn is it smooth in motion. On top of that, the taxi was parented and unparented twice to pick up and switch hands. That would've been hell in MMM. Still had to reposition the car as close as possible both times in order to make sure the scale wasn't copied, but it worked out perfectly! This video features my first time finding out I can change the size of one thing while holding another thing easily.
-------------
Yay for import bugs and texture files that don't work with anything! But I did bloom-boost the lighting! 
-----
10/11/18: Bowsette 80% and Cops
Let's get right to the pictures for today! All facial expressions are caught up!
Bowsette is busy taunting the cops
Gumi decides to fire. She had enough of that bs.
Clearly, it didn't work.
Looks a bit cartoony on using a shape key for destruction. I might have to be more careful with how I move parts in the future to make it look more realistic.
-----------
10/11/18: 70% and Vertex Spikes
Switching back to regular mode is gonna be a massive speed boost so that I can hopefully have this done this week. I REALLY want to get to the Samus speedrun already.


Both Cop Gumi and Teto thought they were ready for the call, but it seems that the call was ready for them!
Here's a screenshot of what it looks like in UE4 now. (Facial expressions still need to catch up)
I also had a huge bug get in my way that could've been fatal. Random vertices were getting pulled away from Bowsette for no reason!
I solved this after losing some hair by finding that little menu on the right side. It's in edit mode of the mesh and you need to click the vertex cage button at the top left to select the loose vertex.
once selected, THEN you go to the vertex weights menu on the right and delete one of those until you find the culprit. Don't delete them all though. They're what's holding together the model!
This is the exact same problem that plagued the Neko vid! I'm glad I have a solution and still have hair!
Comments
Thanks! It's been quite a ride of problem solving things I didn't expect! May as well get through the worst of it now so all future endeavors are easier.
AZmaybe9
2018-10-16 19:49:53 +0000 UTCwow.. you really put hard work on this.. congrats bro :)
Marco Coronado
2018-10-16 19:47:37 +0000 UTC