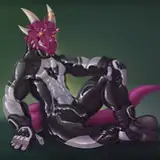

The Frogdog is an unusual quarry monster release in that it includes a variant monster (Bullfrogdog) as a part of the box (as opposed to arriving in a Vignette of Death such as the White Gigalion or Killenium Butcher). This vignette is part of the reason why the Frogdog costs $125 rather than being around the $85 that the Gorm retails for at the moment. However, it it worth noting that there is no additional variant monster miniature, which makes it more similar to how the Level 3 Gorm operates rather than the Gigalion.

I will go into the Bullfrogdog as a part of the showdown breakdown a bit later this year, but for now the key thing to understand is that once you've unlocked the Tuskworks and gained some Gular Sacks from defeating the monster a couple of times, you will have unlocked the crafting location where copper resources are spent (currently we have two types of copper resource, one of which is an Indomitable Resource that comes in the Survivors of Death I box set, and yes I do not know why we don't get Indomitable Copper in the Frogdog box).

I won't heavily retread the copper issue, as I broke that down a fair bit in the second part of the Froskrafter article. However for the sake of completeness, I'll here explain why it is a bit of an issue that currently holds this part of the expansion back.
At the moment, the main way to gain copper is by crafting the Lantern Lure. This item is how you get to place the Special Hunt Event “Noodling of Death” on a hunt phase track space. This event works in the same way as Mineral Gathering/Herb Gathering/Skyfishing, but the odds of gaining copper on the track are absolutely atrocious. The lantern has a 30% chance of archiving itself and causing a dismembered arm on each use, and I think we can all see what a “joy” it is to spend two resources and a gear grid slot on something that reads “archive this and suffer the dismembered arm severe injury). However, even if you get past that issue, the odds you can gain 1 piece of copper if you stop rolling the very moment you get one piece of copper (which you always should) is I believe 24% (20% on the first roll, plus a 40% on the second table roll if you get to it, which is in itself a 30% chance, can I mention how much I hate nested table dice odds?) The third roll offers no copper at all (and if you want to go to the third roll you have to forego gaining the second roll's copper), so the only other copper is down in the fourth roll, which offers 3 copper but also threatens a 30% chance of death. You die 30% of the time in exchange for a chance of getting 2 more copper than you could from the very first table roll. Sheesh.
This table is an astronomically awful table to roll on, and with the lantern lure self destructing 30% of the time, which is horrendous odds, we also have the additional issue that you can only get the Bioluminescent Tonsils from the L2 and L3 Frogdog, the Bullfrogdog doesn't offer any. Given the way that Collective Cognition is designed, we're able to get a maximum of 5 lanterns before we start to suffer the negatives that system has baked into it. Given that 30% of those lanterns will self destruct each time they are used, it's going to be quite a gamble to get enough copper to craft the gear from the Tuskworks.
On average one will have to accept that you can't craft everything you want from this location and you'll need to be considerate of the fact that no matter how hard you try, sometimes a Bullfrogdog Armor set is not going to get completed. A consolation here is that fortunately the copper gathering can all be performed before the Tuskworks opens up (and it can also be done vs any quarry monster), so you'll know most of what you can manage to craft in advance.
One does however have to consider that this expansion is part of a selection of monsters that will be used in “The Inverted Mountain” campaign. That means it is very possible that future expansions will offer other ways of gaining copper resources, which will greatly help alleviate this issue. However I have no insight into this beyond an educated guess and being hopeful it will happen. Even if it does, that still doesn't make up for the poor design that Noodling of Death has been inflicted with. This is honestly the worst table that's ever been released for Kingdom Death and one of the rare misses that we have had from the second generation (Gambler's Chest/Arc Survivors onwards) of designs so far. That's a shame, but to look at the silver lining, going this long without a major miss demonstrates how good the other modern KDM designs are and how much the team has grown in their design understanding. Speaking of design, lets talk about another design issue which creeps into this crafting location.
Before we get into the gear itself, there is a second factor one needs to consider, that of parasitic design. If you're not familiar with parasitic design in game mechanics, it is where an element of a game's design is incestuous, by that I mean it relies on itself to perform its functions and has little to no interactions with other mechanics. As someone who builds and plays Magic: The Gathering Cube format games, parasitic design is something one always has to bear in mind when selecting the cards for your given cube format. If the cards have limited interactions with the main themes of the cube they'll be parasitic, and therefore often of little use to most players. In fact when drafting, parasitic designs can end up ruining a player's experience because they are lured into trying to make something work that needs very specific support.
An example of a parasitic design in Magic is the mechanic of Energy Counters; introduced in the Kaladesh block expansions, this mechanic has players gaining “Energy counters” from some cards, and then being able to spend them via other cards to generate additional effects. Energy by itself has no abilities, it doesn't do anything at all without a card to provide an outlet for the counters. It's also very difficult to remove energy from players as you would need cards to do that, and very few cards can interact with your opponents energy counters at all.

Here is an example of a energy card that came out recently in Modern Horizons 3, the Guide of Souls is a well costed creature that is part of a group nicknamed “Soul Sisters” because it generates 1 life when creatures enter play (The nickname for the group comes from the original card, Soul Warden). The Guide of Souls has both Energy Generation and a way to Spend Energy built into its design, this means it is less parasitic because it's generating energy from a normal game action, that of casting creatures and able to spend that energy itself via another normal game action, that of attacking with said creatures.
For an example of a highly parasitic Energy Card, here is Territorial Gouger.

This creature is a 4 mana 2/2 trample monster at its base line. That's a catastrophically awful creature that no-one would want to play, if you want an idea of how bad it is, one would expect at least a 4/4 or 5/5 creature with some other positive ability on top of that for 4 mana.
The idea behind this card here is this creature grows as you spend energy and can become a large threat if a lot of energy is spent in a single turn. But, it has no way to generate or spend energy itself at all. Without energy counters being produced and spent by other cards, this creature is simply a terrible investment. This is what a truly parasitic card design looks like, it does nothing at all without the mechanic and it doesn't interact with any other possible mechanics.
Parasitic design is a difficult thing to negotiate, especially when you are dealing with such a modular game as Kingdom Death, so it is something to watch out for and can be mitigated by clever use of things like keywords or multi-use resources.
The Tuskworks gear has a lot of parasitic elements to it as the armor is designed to work with the weapons at a level we've never seen before. I'll explain more about this while I go through each of the eleven gear cards in this article with a section covering how parasitic they are and why that is the case. Starting with the Bullfrogdog Armor.
We'll look at each individual piece before diving into the set as a whole (which is where we'll consider how parasitic it is), but before we get onto that analysis I do want to highlight that this is a membrane keyword set, meaning that the two outfit cards from the Frogdog Armor set can be used here. We'll look at each of those during whole set assessment, but for now it's worth noting that the Frogdog Mask (head) and Frogdog Boots (Legs) can be used instead of the matching Bullfrogdog location piece.

Cost: 1x Copper, 1x Waxy Dermis, 1x Bone, 1x Leather
The Bullfrog Helm provides us immediately with some of the core concepts that this armor set is built around, it is a high armor point end game armor set that leverages heavy weapons for additional bonuses. The weapons that come in the Tuskworks are heavy, but also we can consider any other heavy weapons such the Dragon Slayer (Blacksmith) or Bone Club (Bonesmith) for use with this armor set.
The Helm has a solid down blue affinity (always happy to see those) and an associated blue puzzle ability that gives us +6 Insanity when departing with at least one heavy weapon. That's a nice bonus, especially considering that late game monsters can end up dealing 3+ insanity per “hit”, which will cut into insanity totals very quickly at times.
The crafting cost here is pretty reasonable, we're able to gather all of these pieces in advance of our first Bullfrogdog showdown and it isn't asking for a lot of copper, but it is worth remembering that this is one of the outfit slots and it's the only outfit slot that requires copper. So this should probably be the last Bullfrogdog armor craft.

Cost: 2x Copper, 2x Leather, 1x Scrap
The Bullfrog Bracers are a REALLY expensive piece of gear due to that eye watering 2 copper cost, and what you get isn't that impressive in isolation. It's a left red and down red affinity and a 1x red puzzle affinity ability that gives you +1 accuracy only for attacks with heavy weapons, something that ties into the entire picture that is the Tuskworks loadout.
I don't have much more to write here, so I'll leave it with this observation, isn't it a bit unusual how the crafting locations list arm gear above body gear?

Cost: 2x copper, 1x gular sac, 1x mossy molar
This is the most expensive part of the Bullfrogdog Armor set, as it requires two copper and the Gular Sac, which is the strange resource that drops upon defeating the Bullfrogdog. It is a very strong piece of gear, which somewhat justifies the steep cost. We get three relevant affinities and a great ability that effectively gives all heavy weapons in your grid +5 armor when departing. I think this armor card does some work towards justifying the 2x copper cost because it can be used in a mixed set with other metal armor cards.
I still think body armor should have +50% armor points when compared to other hit locations. But that's not an issue specific to this gear card.

Cost: 1x Copper, 1x Gular Sac, 1x Mossy Molar
The crafting cost on the Dress ensures that we need to hunt at least two Bullfrogdogs to complete an armor set because it requires a second Gular Sac. That makes this the third most expensive piece of this armor set. In addition to an up green, plus left and right reds; get a puzzle red, red, red, blue ability that also requires us to be Insane (something the helm helps with) and then we get the Surpass 10 ability. This is the first appearance of Surpass in this article, so we'll briefly look at it here.
Surpass X
A gear special rule. When your wound attempt total surpasses the monster's toughness by X or more, the monster suffers an additional wound.
That translates to a scuffed version of Devastating X, because it's the devastating ability to score an extra wound, but with an additional hoop to jump through.
So while rolls that exceed a monster's toughness by 10 will get to deal an extra wound. That's going to greatly depend on the weapon and survivor strength, so it's not a great ability when X=10.

Cost: 1x Tatty hide, 1x waxy dermis, 1x leather, 1x scrap
The cheapest part of the entire armor set, because it requires zero copper, is frustratingly the piece of gear you'd most consider replacing with its Outfit variant (due to the Frogdog Boots having a good ability and leg armor being the area you can afford to have lower armor points on). However, that doesn't mean this piece of gear is any slouch. We get a +1 movement token when departing with a heavy weapon if we connect the left blue and up red affinities on this armor piece.
Extra Movement is one of the strongest things you can gain in KDM because a core part of the game's showdown play is about positioning and movement. More movement means more opportunities to score damage and avoid taking damage. In addition to that, we'll see that the Armor Set bonus also wants additional movement points as a part of its pay-off. So this is a great piece of gear.

Here is the armor set in a typical generic layout; we can see that it offers us the following active gear abilities: Helm, Bracers, Boots and Cuirass. The Dress needs two more red affinities (including one of its own) to activate, which it will hopefully gain from weapons to its left and right.
The set bonus is another “Monster Movement” ability, asking the survivor to spend both [Knight] and [Bolt] to full move forward in a straight line and then activate a weapon to attack with +1 accuracy for each space moved.
Like all monster movement armor sets this means it wants to be paired with a Reach X weapon because of how much larger the number of squares you can potentially hit the monster from. We'll have to bare that in mind when we consider what weapon will be best paired with this armor set.
We also have a base 8 armor to each hit location, giving us a base of 40 armor points, plus an additional 5 armor points per heavy weapon in the gear grid. It's most likely that'll be two weapons, a shield and one for attacking. So the puzzle body piece is giving us an extra 10 armor points most of the time, but we can also consider each additional heavy weapon in the gear grid as being +5 armor points even if you never attack with it.
Overall this is a great heavy weapon orientated late game armor set; it is a nightmare to craft, but once you have it then Bullfrogdog Armor will last you until the end of the campaign. So the only areas I have issue with here is the copper one described above, plus the need to be aware that the heavy keyword can be a major problem if Cracks in the Ground is drawn as a settlement event.
Before we move on to the other pieces of gear, we'll briefly look at the armor set layouts with the outfit pieces.

This is the cheaper option, because replacing the helm with the Frogdog Mask saves 1 copper from the total cost of 6 and given how difficult gaining copper is, that matters a lot. But the problem with that is the head is one of two locations where you want the highest armor points because head severe injuries are twice as likely to kill when compared to any other hit location (Legs is the least likely to result in death and body wants additional armor because it is hit twice as often). The Bullfrog Cuirass can't even help give extra armor points to the mask because the mask isn't a metal keyword gear card.
We also need another green affinity to activate the mask, but the truth is that isn't so important because you are probably done with hunting Bullfrogdogs once you kill the second one for the gular sac. There's not too many other gas producing monsters out there, though I do think the Smog Singers would count because smog is a kind of gas. Ish.
Overall I'm not super excited about this layout and I'd probably look elsewhere for an Outfit helm if I have the options in the metal keyword.

Our alternative Outfit layout has the Frogdog boots fitting right into the space that the Bullfrog Boots were in. There's no argument that these outfit boots are significantly weaker than their variant alternative. But the “Jettie Boots” ability is great even if you can't use it more than once per showdown normally, it can prevent an entire attack, which when dealing with the higher level monsters can be a lot of armor soak. Also if you have a way of replacing at least 1 armor point onto the legs the boots become active again.
The negative is we're replacing the only piece of the Bullfrogdog Armor set that doesn't require copper, which means it's not helping us get the armor set online faster in most cases, so I can't really see this configuration being used too often.
In respect to using both Outfit cards on the same grid, I've never gotten a clear answer if you can have multiple Outfits for the same Armor Set Bonus, if someone knows the answer to that from Team Death, please let me know in the comments. It does get better if we can run multiple outfits per set, but my understanding of the Outfit rules doesn't allow for that. Still, even if you can, the boots are still not very useful and the Mask isn't tough enough.
As for how parasitic this armor set is, it's clear that it is designed primarily to be combined with the weapons that come in the Tuskworks, any heavy weapons will work here and that can matter if we're struggling for enough copper. The Bone Club as mentioned earlier is a great candidate and the Beacon Shield is a superb heavy shield that can be slotted in fairly easily.
Without heavy weapons this armor set loses most of its utility, this means when we are looking for end game weapons we will always need access to some heavy weapon with great end game stats. So it is what I would call moderately parasitic.

Cost: 1x copper, 1x prime tusk, 1x spindly paw, 1x scrap
Quick note: This is a Halberd without the Axe keyword, which does reduce its overall power a bit.
The Bullfrog Halberd is the default choice for what weapon to use with Bullfrogdog Armor. It is a solid weapon that synergies well with various things that the armor set is seeking to do. The halberd is heavy, it has Reach 2 and it wants a lot of extra accuracy because of its low base accuracy in combination with the Onslaught Ability. Onslaught is a new ability that doubles wound roll attempts if all attack rolls hit (we'll see the full text on the mace just below this entry, the full text has not been added to the Living Glossary at the time of writing this article) which means it synergizes with the Surpass 10 on the Bullftog Dress and in addition it has that left red affinity to let it fit into slot 9 on the gear grid and help activate the dress. All baked in synergies between the armor and the halberd.
The extra ability on this one is also really neat, this is a spear and spear users are incentivised to attack into the trap in order to hopefully generate a Hit Location deck reset without suffering the Trap punishment (as long as all your specialist roll triggers). With this weapon if you fall your Spear Specialisation roll you get a consolation prize of knocking down the monster and giving at least one other survivor an easier time attacking it.
I think this is the best offensive weapon to craft for pairing with Bullfrogdog Armo, but outside of that it is unfortunately highly parasitic due to needing a lot of bonus accuracy in order to trigger its Onslaught and Trap compensation ability. Without these triggers this weapon is not worth using at all and the Lantern Glaive is a better option, so it is dependant on either the armor set or the Heavyfrog Lantern, meaning it is close to fully parasitic.

Cost: 1x copper, 1x prime tusk, 1x ironclad spine, 1x scrap
Occupying the same gear slot as the Halberd, the Bullfrog Mace is our alternative option, but it is certainly inferior due to the lack of Reach 2, which makes it harder to use with the set's Focus Charge. I've tried both weapons and the Halberd, which almost costs the same resources, is simply the superior choice. Lantern Armor does provide +1 accuracy, and sharp, meaning that you could use this club in slot 9 on a lantern armor loadout, but you probably need a survivor with additional accuracy in order to make this weapon effective, 2 dice hitting on 8+ isn't a great rate, I'd want at least a 6+ which means 25% of the time both dice hit for the Onslaught trigger.
Because it is a club, this weapon is a wee smidge less parasitic than the halberd and in fact given that it's worse than the halberd when used with Bullfrogdog Armor this might be something you craft to pair with your Lantern Armor set, especially if you have an accurate survivor to use this with (Also worth noting that the Scrap Lantern from the Weapon Crafter can help with accuracy issues on all these weapons).
As a quick aside, visually this is my favourite of the possible Tuskworks weapons.
Bullfrog Scimitar

Cost: 2x copper, 1x prime tusk, 1x oily sphincter
The crafting cost for this one is absolutely eye watering, two copper is a really high price, one that I'd only consider getting if I had access to Dragon Armor and I hadn't generated enough Copper to justify crafting a Bullfrogdog Armor set. This is something which happens more than I'd like.
I wrote Dragon Armor above because this weapon really needs extra accuracy to work properly and also the Dragon Leap armor set bonus gives +2 accuracy and +5 strength in addition to requiring the prerequisite spending of a simultaneous [Knight] + [Bolt] to utilise, turning on the Sharp. However, this weapon does not have Reach, meaning that it's weaker than many other options we could pair with Dragon Armor.
It's worth noting that this is also a Scimitar, the third one we've seen if I recall correctly, and we don't have a weapon proficiency for this one yet. So at the moment it's not a good weapon and I think you'd skip on this, but we may circle back round and revise our opinion if Scimitar gets the Fan treatment with its own specialisation/mastery card.
Still, I think this scimitar is probably in the running for being the least parasitic weapon in the crafting location. It certainly feels like the attacking weapon with the most external synergies and it's less likely to use with Bullfrogdog armor because you usually won't have enough spare copper to craft this on top of a full set and will grab the Halberd plus shield instead.

Cost: 1x copper, 1x prime tusk, 1x supple nose, 1x leather
If you can activate this shield I think it is probably the best single “weapon” in the Tuskworks. It clicks really well with the Frogdog Armor set (you move the Entire set except for the Dress one to the left and fit the shield in slot 7). We get here a superb ability that can work with any Monster Movement set as long as it is active. It's a little awkward with Phoenix Armor because of the affinity issues that set has without its Indomitable Resource gear, but this isn't something to lose sleep over and is probably the best crafting option for a settlement that's struggled to get copper online enough to utilise it fully.
It's a mite parasitic due to not having an inbuilt block, but given that we have multiple options for monster movement armor sets, including Dragon and Phoenix armor it's not hard to get it working and this Deflect token is amazing for aggressive play style loadouts because having it trigger when you are performing an attack is incredible.
I really like this shield and I've been impressed with it in every tableau I've tried it out with, it's not an automatic fit for every single survivor, but it is a strong workhorse for certain builds and that's always a good spot for a gear card to be in. It doesn't push out other shields automatically, instead it offers an alternative route.

Cost: 1x copper, 1x wiry crest, 1x broken lantern
The Heavyfrog Lantern is a tool to help the various weapons listed above trigger their full effects more often. Meaning that the main use for it is reducing speed to increase the odds that the speed 2 weapons hit with all of their attack rolls. Which seems more aimed at when you use the weapons without Bullfrogdog Armor.
However, even with this concept, this still is quite a parasitic piece of gear, because currently there are few reasons to use this gear card except in concert with the weapons from the Tuskworks. That's because weapons that care about all attack rolls hitting are not super common. I tried combining this with weapons from outside the Tuskworks as much as I could find, but the vast majority of them don't want their speed reduced down to 1 because they don't trigger extra benefits and making weapons heavy is a really niche ability.
The Dragon King's Talon Knife is one such example of a weapon that did sort of work, and for the first time ever it functioned in a build where it was able to leverage Deadly + Savage for most attacks. The irony of using a Paired weapon, taking only 1 copy of it and pulling it down to 1 speed was not lost on me, but goodness I did enjoy actually using that weapon and not having it feel like a wet piece of spaghetti for once.

Cost: 1x stone noses (aka 1x endeavor), 1x aqueous eye, 1x mossy molar, 1x hide
Our last gear card is one that doesn't use up any copper, which means it's already an easier consideration for spare resources. This is a cheap one to craft, you should already have a set of Frogdoggles by the time you get to the Tuskworks, so the aqueous eye resource requirement isn't too bad.
What we get is a unique support item that offers a load of blue affinities along with the ability (when insane) to activate and get a knocked down survivor to stand along with transferring armor points from the using survivor to the targeted one. In some ways this reminds me of the Gorm's Gorn, which also stands survivors up and heals them, that gear card is mostly used for the down blue affinity and instrument synergy without being noisy.
I've found this one to be decent enough when you have a survivor who is running pure support, it's not worked out so well for “Squire” builds because those require the squire to be a lot closer to the monster and that's not ideal. If you are into Red Shirt strategies for various reasons (such as the Homicide philosophy) then this gear goes up a bit in viability and I think that's always a good spot for gear cards to be in. I prefer them to have variable value rather than be automatic includes every time. Too many staples can crowd out the weird and fun.
So yeah, cool card, unique and fun to play around with, plus all those affinities do a lot to help the gear card contribute when there's no spot for its activation to be used.
To start off, I'm going to repeat the disclaimer that this is all early experiences and based on how the Tuskworks is functioning at the moment, I can't foresee how it will work in the future with the other Inverted Mountain expansions, except to note that the Black Knight doesn't have any super relevant synergies with this crafting location. We don't find copper in the Vault and none of the armor sets feel a good fit for the weapons, even the shield which is probably the weapon with the most potential outside of pure Tuskworks builds doesn't work well here because there's no way to trigger the deflect with those three sets. So as such, everything here may end up being revised once the rest of the Inverted Mountain monsters arrive, but I think it is very important to stress that we need multiple additional methods for generating copper, not just the Lantern and the Promotional Indomitable Resource. I hope that Team Death have this copper situation planned out in a way that will work, but I get no sneak peaks or future insights.
At the moment, I do think the Tuskworks is the weakest part of the expansion because of its association with Noodling. It's driving up the physical cost of the expansion box by quite a bit due to those extra miniatures and I'm not convinced of the value because we get four of those survivor models when to be honest we really only needed two because Halberd + Shield and Club + Shield are the most likely configurations we'll ever need. I don't think right now what we get is worth the extra $40 (It's completely worth it for digital players through the KDS though, based on the past expansions it should retail for $12.50 there and that's an amazing deal for the digital players).
The single largest issue that hangs over this all as a shadow isn't so much in the gear and its parasitic nature, it is that copper situation which I keep coming back to. Those Lure Lanterns require a huge amount of investment in lantern years and can be incredibly frustrating. I've had to go back to the L3 Frogdog on more than one occasion because the lanterns haven't paid out enough before they self destructed. As someone who loves the various interactions between different expansions and values novelty it's felt really bad to end up fighting the same monster and its variant for around 10 lantern years – even in the core game it never got that bad. And from looking around the internet, it seems I'm not alone in this frustration either, I've seen others express similar feelings around collecting the resources, some of them with really spicy sentiment to boot.
This is a crafting location that can rival some of what The King's Kingsmith offers, and there are ample heavy weapons in that selection that there's some interesting cross synergies, but I do find it a shame that the King's Coin resources are not Copper keyworded (one of the first things I checked because I hoped they had future proofed this). However, it's been King Weapons with Bullfrogdog armor that's worked decently because King weapons are all amazing fun; Bullfrog Weapons don't feel so good when used with King Armor and that's a shame.
It's probable that currently the best place to use this location is when you don't have The King as Node 4 and have either the Lion God or Dung Beetle Knight instead. Because those two expansions feel more like Node 3.5 in power level and could do with the end game support/power boost that copper offers.
In the end, I find myself feeling that the Tuskworks is a tinsy little bit undercooked on the design front, but I can forgive that because it is pretty much one of the first times that the team have built such a system like this into an expansion. Based on past evidence I expect their future attempts to be better, but I do wish the location was a bit more like the slam dunk success that the King's Armory represents.
Overall, I prefer what the Froskrafter brings to the campaign, so for those of us who already have the expansion and got it for the lower price have done very well here. It's certain that the Tuskworks doesn't occupy any additional space on the timeline unless you want it to. Which means if you can afford this expansion, it's a good deal, but I'm still not sure where I'd recommend a newer player pick this up. The Gorm is cheaper and the Crimson Crocodile is in my opinion better, though both of them now have issues related to either age or cost.
The main key point to finish on here though is I am very excited for Team Death to keep exploring this concept of including variants for Node 1, 2 and 3 monsters in the box, it adds longevity to the entire affair and can create an exciting 'reveal' moment for players that creates joy, the resource situation just needs a bit more work!
Fen
2025-02-12 15:35:36 +0000 UTCHelge Thiel
2025-02-10 23:14:30 +0000 UTCFen
2025-02-10 14:30:30 +0000 UTCBjörn Kuajara
2025-02-10 00:20:29 +0000 UTCFen
2025-02-08 11:10:41 +0000 UTCniels maclellan
2025-02-08 01:33:42 +0000 UTC