If you've ever made 3D artwork for World of Warcraft, it's likely you've used item components before. These are (generally) doodads that attach to the player model in some way, such as shoulder pads, belt buckles or weapons. For simple items, this is an easy process. However, for many of them, they import as a complete mess.
In this guide, we're going to take an in-depth look at item components and specifically how to rig them properly using in-game data.
As with most of my guides, this is aimed at Blender users, however a lot of it will be applicable to other 3D software (with some Blender middleuse required). Additionally, we'll be making heavy use of my wow.export tool which you can download here; make sure you are on version 0.1.28 or newer.
Exporting Item Components
To export an item component, it's as simple as opening up wow.export, selecting the model that we want and clicking export.

In the latest version of wow.export (released on the day of writing this guide), item components are now textured automatically, with different skins being selectable from the menu on the right-hand side.
Exporting sword_1h_430oldgod_c_01.m2 is easy, but what if we want to export the House Renathal Ceremonial Dagger? In the future, we'll be able to search for these directly in wow.export, but until then we need to get a little messy.
The first thing we need to do is get the display ID for an item. To make a long process short, I've written a quick add-on for Google Chrome. Instructions on how to install it are included in the ZIP file.
Get the add-on: https://www.kruithne.net/home/files/WHIDAddon.zip
With the add-on installed successfully, navigate to any item on Wowhead and you should now see a display ID included on the 'View in 3D' button.

If you don't use Google Chrome or just don't want to install the add-on, I've written a NodeJS script using Puppeteer which achieves the same thing. You can find the source code and instructions for that here. If you go this route, skip the next two paragraphs.
For those using the add-on, this gives us a displayID for the item model, but not the fileDataID of the model itself. To get this, we need to head on over to wow.tools and search the ItemDisplayInfo table for that ID. But wait! That seems like hard work, so instead you can just CTRL + Right Click on the View in 3D button on Wowhead and the add-on will open it in a new tab for you, already filtered.
On the new tab that opens, there should only be one row in the table, which is row 188628 with the given example above. We're specifically interested in the ModelResourcesID[0] column. Hover over the value of that column, and we should see the FileDataID we're after!

With the FileDataID in-hand, 3512288 in this example, we can take that to wow.export and enter it in the model search bar. We should now see our model which we can export.

Not seeing any models? Make sure you have the new 'Show File Data IDs' option enabled in the settings of wow.export.

Seeing too many models? Surround the item ID in square brackets! You'll need to escape them if you have enabled regular expression filtering in wow.export.


As I mentioned earlier, in a future update wow.export will support the ability to search for items directly, making this entire process so far redundant. Stay tuned for that!
Texturing Item Components
After importing item components, you'll notice that there's often a lot of work left to be done; untextured or broken planes, strange gradients, uncoloured effects.

In the following chapters, I'm going to go over individual topics relating to item components rather than focusing on a specific item. Hopefully this will give you a full understanding of how everything works and how to identify and resolve issues.
UV2: We've had one UV, but what about UV2?
If you've done any 3D work you should be aware of what a UV is and the basics of how they work, so I won't go over that here. What you might not be aware of however is that most models from WoW actually use a second UV, aptly named UV2.
How do we get this magical second UV? Start by going into your settings on wow.export and enabling it.

An important note here is that since the OBJ format only supports a single UV, this data is included in the OBJ file as a non-standard property named vt2. This means two very important things:
- In order to import these OBJ files, you must use the Blender add-on included with wow.export, or write your own importer for other 3D software.
- Attempting to import these into unsuspecting tools/software will potentially cause issues as this is a non-standard property from wow.export only.
With the disclaimers out of the way, go ahead and import something into Blender with this enabled. For this example, I'm going to use the glave_1h_dualblade_d_02.m2 model (Blizzard spelt it wrong, not me).

Assuming you did everything correctly, you should now see that your model has two UV maps assigned to it. If you open your UV editor and switch between the two of them, you should be able to see the differences.

When it comes to putting the UV2 map to use, it's as simple as telling the shader which map to use by feeding a UV Map node into a given Image Texture node within the node editor.

We'll be putting UV2 maps to a lot of use as we continue through the guide, for now it's just important that you know how to obtain and use them, rather than how they're actually used in a model.
Transparency, or not?
One of the most common things I get asked regarding wow.export is "Why does this texture have transparency when it shouldn't have?" Most image files are composed of four channels: red, green, blue and alpha (RGBA). Put simply, the first three channels define the strength of each of those colours for a pixel, and the alpha channel defines how transparent a pixel is.
When it comes to textures in WoW (or most games), transparency isn't always needed in a texture, but the channel still exists. So rather than waste it, it's re-used for other data. The most common use is as a specular map. Instead of defining pixel transparency, it defines which parts of the texture would reflect light.
When we export these textures from WoW to PNG, we keep the alpha channel in-tact so people can use the data as needed, but obviously Windows (or whatever you use to preview the image) doesn't know any of this, so still treats the alpha channel as it's common use: transparency.
Let's take a look at the glave_1h_dualblade_d_02 (again, Blizzard spelt this wrong, not me) texture in Blender.

As you can see, the edges of the blade are all transparent. By default, Blender treats the alpha channel as transparency too, but as mentioned earlier, it's commonly used as a specular map, which we can safely assume is the case here given how the edges of the sword are affected.
We can fix this by going into the Shader Editor for the given material, selecting the Image Texture node and setting the Alpha setting to None.

This tells Blender that we don't want to use the alpha channel at all here. Simply removing the alpha connection from the Image Texture node to the Principled BSDF would not be enough, due to alpha premultiplication.

Immediately our glaive looks better.. at least in the middle. It turns out we actually do need transparency from some of the texture, but not all of it. Let's take another look at the texture and how it's divided.

While the blade texture itself doesn't use transparency, the scrolling glow texture on the right (blue) and the gradient mask in the bottom-left (pink) do. How do we know? In this instance, it's a case of deducing it from how the texture is laid out, and how prominent (or 'non-broken') it looks with transparency.
To resolve this, first let's duplicate our material. To do this, add a new material slot to the object and then assign the same material to it.

Now with the new slot selected, click the confusingly named New Material button below it. This will create a duplicate of our material in the second slot.

To help keep things organized, replace the .001 on the end of this new material with something more descriptive. In this case, I'll append '_Glow' instead.
Back in the Shader Editor with the new material selected, we can't just enable the alpha channel again, because while this is a separate material, the underlying image is shared. This is indicated by the [2] on the Image Texture node, meaning there are 2 "users" (nodes) sharing the image. To create a non-shared duplicate of the image, simply click the users button, in this case the [2].

Now that the underlying image is duplicated (indicated by the .001 prefix on the image itself) and no longer shared between the two materials, we can enable the alpha channel once again. This is done by simply reversing what we did earlier.

Great, but what do we do with this new material we've created? We need to find where it goes. Looking at this particular model, it's not too hard to deduce where the transparency might be needed. Hint: It's the big green bits.

Enter Edit Mode for the object and select the green bits. There are actually four green parts to select here, the two obvious ones, and then two smaller ones inside those. Make sure to get them all selected! Once selected, selected our new material and hit Assign.

If you followed everything correctly: congratulations, you now have some weird looking jello on your glaive! Don't worry, we've still got work to do. The first problem is that by default, Blender clips transparency, but we want it to blend instead. This can be easily changed under Material Properties -> Viewport Display -> Settings. Simply set Blend Mode to Alpha Blend.

This is looking a lot better, but this still isn't how the glaive looks in-game. If you take a look at the UV mapping for the glowing green bits, you'll notice that they're mapped to the tiny gradient in the corner.

Unless you skipped the last paragraph about UV2 (in which case, go back and read it now), you've probably already figured out where this is going. If we take a look at the second UV, we can see that these green bits also map to the scrolling glow texture on the right.

The little block of green texture in the corner is a gradient mask (the name varies depending on who you ask). It's a safe assumption when encountering these on textures that they're not actually rendered, but rather used to mask and/or colour another part of the texture. Let's put that into practice in the Shader Editor on our second material.

What we're doing here is taking the texture mapped out by UV2 (the scrolling glow effect) and masking that with the alpha value of the gradient mask mapped by UV1. It's important that we factor in the alpha from both components, so to do this we simply multiply the channels together. Additionally, I swapped the Principled BSDF for an Emission node, since the effect is supposed to glow!

You might notice some green artifacts in the far corners of the model (especially when animating later). To solve this, set the UV Extension on the UV1 texture (not the UV2 one) to Clip rather than Repeat.

Our work on this model is not completely done yet. Check out the chapter on animation below where we'll animate this very glaive!
Ready, Steady, Animate!
Following on from the previous chapter where we set up the warglaive, let's look at how we can add the final touch: animation.
Animation on WoW items is generally achieved by scrolling UV maps. For this glaive, the UV2 map is given a linear scroll on the Y axis. Let's implement that. Start by setting the End Frame on the Timeline panel to 30.

Now, with our glaive selected, add a UVWarp modifier and set the UV Layer to UV2Map.

On the Timeline panel, make sure we're at Frame 1 and then enable Auto Keying. Over in the Transform section of our modifier, enable Animate Property for the second offset.

With that done, move the timeline cursor over to frame 30 and then adjust the offset value (the one that we enabled animation for) to -2.

If you did everything right up to this point, if you click the Play button on the timeline, you should have an animated warglaive!

The exact methods of animation will vary between items, some slower, some faster, some in other directions; the general concepts should remain fairly similar however!
Culling (of Backfaces, not Stratholme)
You've probably seen an effect in the game on various items where the outline is glowing, similar to the example shown here on Archmagi's Will. In this chapter, we're going to achieve this effect.

If we import this model, staff_2h_artifactantonidas_d_03, into Blender, the effect is quite obvious to spot as it's usually solid colours wrapped around the mesh that it outlines.

Let's start by selecting the solid green parts of the mesh and then assigning them a duplicate copy of our base material, the same way that we did in the last chapter with the glaive. Don't forget to disable the alpha channel!

In in the Shader Editor with our cloned material selected, we want to mix the base texture with transparency using the Backfacing value of a Geometry node as the factor. Additionally, I've swapped in an Emission node so the effect glows!


That's it! That one was pretty easy, huh? Make sure that you keep the Blend Mode set to Alpha Clip for this one (which it should be by default).
Attaching Item Components
I touched on it very briefly in my character model guide, but here seems like a good place to go over how to attach item components to a character model. For this, you're going to need a character rig with armature ready to go. Check the aforementioned guide for setting one up!

For this chapter, I'm going to assume you've read the former chapters in this guide as well as the sections on importing item components from the character model guide.
Start by bringing in your item components, for this example I'll be using the collections_armor_explorer_d_01_huf model as it includes a wide range of things to weight.

Most item components, such as shoulder pads or belt buckles, will come as separate individual meshes on their own. For more advanced components, such as "collections", you'll need to split things apart yourself. Since we're using a collection in this example, let's do that first. If you're not, skip the next two paragraphs.
Enter Edit Mode and start by selecting a group of faces that would stay together when animated. In this example, we'll start with one of the boot rims.

With that selected (make sure to get all of it), separate it from the mesh (P -> By Selection). Repeat this for each section of the mesh, keeping in mind which parts would be together when in motion. In total, I separated the mesh into 12 unique parts, shown below.

Now that we're done de-grouping our collection, let's start attaching our item components by weighting them onto the armature.
Before we start that, quickly select all of the objects you intend to weight, switch to Edit Mode and double-tap A to ensure that everything is selected. This saves us a lot of time in the next few steps.

The first step to this is to assign the armature by adding the Armature modifier and setting the target object to the armature of our rig.

In Object Mode, select both the armature and the component we're going to weight and then switch into Weight Paint mode. It's important to select them in that order, otherwise it won't let us switch.

In weight paint mode, the first thing we need to do is select which bone we want to weight this component to. This is where a bit of trial and error comes into play, but once you've done it a few times it becomes second nature.
To select a bone, simply right-click on it and it will highlight blue. To make sure I always have the right bone selected, I often press R and wiggle it, then press Escape to cancel the rotation. This helps quickly decide which bone to use based on what wiggles.

Ensure that Paint Mask is enabled and that your Weight is set to 1. Now apply the weight by selecting Weights -> Set Weight. This will set uniformly weight this component to the bone we have selected.

If you give your bone another wiggle (I know, I know) you should now notice that the item component is moving with your character.

If you mess up and weight something to the wrong bone, don't panic. Just set your Weight to 0 and do Weights -> Set Weight again to clear the weight for that bone.
Repeat the process for all of the item components you've got, and then you're all set. The item components should animate with your character. Throw in some proper skinning, enable the correct geosets and hurrah.

This method of full-weighting is good for 97% of item components. In a scenario where you need more finely-tuned weight, you'll have to manually weight-paint as necessary - which is not something I'm going to cover in this guide.
Additionally, make sure your item components are positioned and scaled correctly for your character before weighting them. This is especially important with shoulder pads.
Billboards
An effect used commonly in video games is called billboards or sprites; the exact terminology varies between engines. Basically, it's a 2D (mostly, not always) plane that always faces the camera.
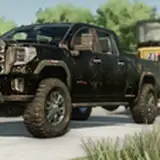
There are many creative use-cases for this effect, however it's primarily used in particles. One example is the decorations on the Winter Veil tree. If you run around the tree, they'll always be facing you. Another more recent example is Cyberpunk 2077.

You see all those cars on the bridge down there? They're not really cars. They're actually just 2D pictures of cars that are always facing the camera, which helps keep the perspective. Due to being a static 2D picture, looking at them from above breaks the illusion as you end up with sideways cars sliding down the motorway.
Anyway, back to the topic. Why am I mentioning this effect right now? It's actually used a fair bit in item components. One example is the staff_2h_artifactaegwynsstaff_d_05 model. In the center of the staff, there's a piece of sand..

.. But there's only half of it there. This is a more outstanding example, but the same effect is often used in dangling 2D sprites on shoulder pads too. How do we achieve this outside of the game engine?
The answer is actually quite simple. First of all, you need to separate that part of the mesh to be it's own object (Edit Mode -> P -> By Selection). Then add a Track To constraint under the Object Constraint Properties panel.

Set the target to the be the camera, and adjust the axis depending on how the component needs to track. In this example, I'm using a Locked Track since the X axis doesn't need to move.
All Together Now
In the above chapters, I've touched on the most important parts of item components which should give you everything needed to rig them properly. To close out, let's run through a more complicated item step-by-step using what we've gone over in previous chapters.
For this walkthrough, I'm going to use the staff_2h_artifactaegwynsstaff_d_05 model, which when imported, looks something like below.

Don't worry if your model looks a little different, I've already gone ahead and disabled all of the alpha channels just like we covered in the "Transparency, or not?" chapter.
Let's start by taking a look at what the staff is supposed to look like.

By looking at this and looking at the assigned materials from wow.export, we can see that we've got three main materials to put to use: staff_2h_artifactaegwynsstaff_d_05blue, aurarune_03 and runestrip_desat. Additionally, there's caustic_medfreq and sand_scroll_light for the overlay effecfts.

We don't need to worry about finding/exporting any textures as everything should be included when importing from wow.export. Let's start with the circular rune effect in the middle.

Looking between the reference and the model, we can see where the two planes are for this rune. Let's create a new material and assign it to them.

The rune is clearly the aurarune_03 texture, so we'll use that as our first Image Texture node. Simply slapping the image texture on doesn't work, but a quick inspection of the UV2 map reveals the answer.

Returning once more to the reference, we can see that the rune is both faded and a different colour. We'll focus on that first bit for now, the fade. Conviniently, if we look back at how the staff originally imported, we can see the mask we need to achieve that effect.

To put this together, we want to mix together the alpha channel of the rune texture using UV2 with the mask from the staff_2h_artifactaegwynsstaff_d_05blue texture using UV1.

A note of difference here from our glaive is that we're using the colour value of the mask rather than the alpha channel. This differs between items, and the quickest way to figure it out is to try both and see which one matches our reference better.
Now we've got the fade effect on our rune, we need to colour it. To do this, we add in a Mix RGB node between the Color output of the rune, mixing in the colour output of our base texture from UV1. Set the blend mode to Color with a full threshold.

Let's move onto the runes next. There are 17 runes floating around the top of the staff. Rather than creating a new material for them, we can simply reuse the mat_runestrip_desat material that wow.export has created and assigned for us.

The first part is straightforward, simply mix an Emission node with a Transparent BSDF using the alpha channel of the texture. Don't forget to re-enable the alpha channel and set the Blend Mode to Alpha Blend.

Just like with the center rune, we need to bring in some colour. Taking a quick look at the UV2 with the runes selected, we can see that they use the same colour masks as the rune did from the base texture.

Bringing in the base texture and setting it to use UV2, we can use that to mix in the colour to our runes just like before with another Mix RGB node.

Moving on to the large cresent halo at the top of the staff, we can see there are two different parts to it, a larger one and a smaller one. Comparing the textures we've got on the model with the reference, we can see that the smaller one uses sand_scroll_light and the larger one uses caustic_medfreq.
The process here is exactly the same as the steps before, the UV1 provides a mask from the base texture which we use to both colour and mask the releative texture mapped via UV2 onto the mesh.

Let's compare what we've got so far with our reference picture. Everything's starting to come together nicely now, however we can see that glass in the middle is meant to be transparent and has an overlay effect to it.

There are two parts that make up the glass sphere in the center. The first piece only has one UV and requires a simple transparency blend.

The second piece of the glass sphere takes the base texture with UV1 and then uses the alpha channel from caustic_medfreq as a mask.

Putting it all together, we're left with a pretty nice looking staff!

If you skipped over it, be sure to check out the section on billboards to find answers to why the piece of sand in the middle of the staff appears to be half missing.
Closing Notes
If you've made it this far, I'm impressed. Generally I set out to make these guides simple and concise, and they often spiral down many rabbit-holes. It's for that reason I've purposely not covered every single variant of item component that I could, but I've aimed to cover the broader points so that going forward the rest shouldn't be impossible to figure out.
If you find yourself stuck trying to piece together an item, or have any questions about this or anything WoW 3D related, feel free to ping me in the #champion-lounge channel on my Discord; it's there just for you!