WIP Panel Breakdown PG 221
Added 2022-06-25 19:00:06 +0000 UTCHere's some work-in-progress shots I took of the top panel for page 221.
First up, here's the thumbnail sketch for the entire page. This is where I always start and I usually thumbnail out a whole scene at a time to keep the flow. It's easiest to change layout at this stage and work out if something really isn't looking good or if I can do it better or keep it tighter, etc.

Next, some GIFs of the progress then a more thorough breakdown of the steps with JPGs.

This shows the progression from the thumbnail sketch, to the rough sketch, then the line art (and when I decided to change Ramble's pose so it wasn't a mirror to Swift's. I changed the raven for a similar reason-- the original pose was kind of close to the last panel and I wanted to mix it up.)

As usual, I work from the background out to the foreground after laying down flat colors.

^Inks to flat colors. I also decided to make it a fullbleed panel.

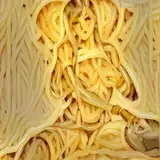
^Working on the mountains in the background..

^Finishing the sky, then using a semi-opaque layer sampled from the the sky color to "push" the mountains further back. Your background elements will always fade toward the color the sky to where they will disappear. You can see this effect really clearly in mountain ranges or city skylines.

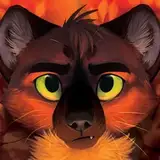
^This next part is working on the characters and foreground elements, putting in shadows/highlights, from back to front.

^The final panel, with some level adjustments.
Questions on anything, feel free to ask and I'll do my best to answer!
Comments
Thanks for showing these and your work progress!
Amethysmus
2022-06-26 02:42:36 +0000 UTC