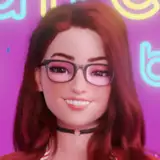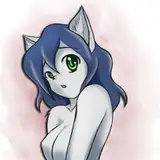
Step 1- Collecting information and chat with commissioner. Uncover details, what they desire for the commission, how they feel about the smooch receiver, what their character means to them, and specific details the commissioner wants to be included, then come up with a pose that reflects those wants and adds in a few of my own desires for the art!
Step 2- Collect references! In order to keep things consistent it's best to have consistent inspirations and really only change up the specific details unique to each new commission to ensure a consistent result: Lighting, pose, composition, etc. are my variables, and the others are things I've done before and inspirations from my living folder from the following artists: Darek Zabrocki, Honovy, Taran Fiddler, Marco Bucci.
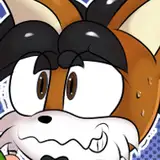
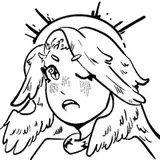
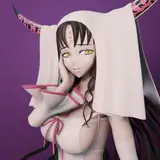
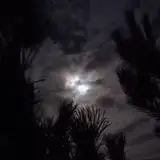
Step 3- figuring out the value structure! Here I'm mostly thinking about primarily how my light and dark shapes communicate an accurate depiction of the characters with the most basic value structure involved: light and dark. This allows me to make corrections as fast as possible while working towards a statement I want to make with my values. In this example I wanted the light to be coming down from above as though they were towering over the viewer to sell their monstrous qualities!
Step 4- Lighten and color the black and white shapes to basically create an underpainting. And select your colors.
Step 5- Reduce the opacity of value layer, adding in lines to adjust specifics of form, paying attention to accuracy of form and interest of shapes!
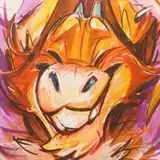
Step 6- converted the original black and white layer to the shadow layer and put a midtone in the background while implying what the background will be (bursting out from the background because big beast rawr!) added one highlight value to help sell the top down light source more.
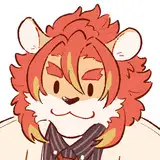
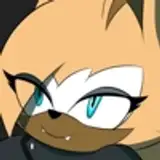
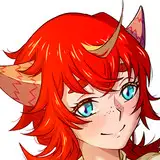
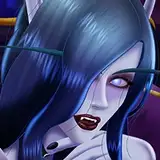
Step 7- slapped down some colors! Left the shirts blank and let some of that underpainting shine through~ Mmmmh~ Love those yellows peaking through and how they interact with the local colors!
Step 8- So I flattened all the layers down to one after making copies of them and making them invisible so I could continue forth with confidence (which is to say if I make an irredeemable mistake, I can always bring back the colors. To be honest, I didn't get as much out of this one as I did with the Bamwuff's painting, and I think that's a product of the lines being flattened down as well. This makes it so I have to zoom in in order to get rid of those sketchy lines as much as possible, making it so I hyperfocus, overdetail and ultimately ruin my otherwise nice brushwork and colors. Notice the difference in energy between Step 7 and Step 8. Step is a lot more energetic I'd say. It can be overcome with time and effort but I think flattening down my lines to the layer I'll be painting on rather than having it be a layer I bring back in order to keep the shapes I planned out is more a hindrance than it is a benefit especially to my time! So I'll be doing that going forward!
But yes on this step I went in with various brushes and painted over everything to get rid of the lines. The pressence of any sketchy lines remaining looks and feels like a mistake to the viewer at least where the contrast is too great making them stand out.
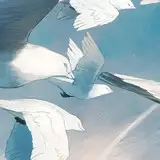
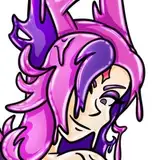
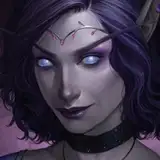
Step 9- exit plan. Just having them in a void isn't ideal. Even just a color works. Since they're so big, I had them warping the frame they're in!
Aaaaand that's it!
Step 10- Let it cook. I came back to it later and realized it just felt.... incomplete! Half done in some way. So I changed the bottom to blend better into the bg!