It's very surprising how much info you just sorta memorize while drawing but when it comes to explaining, it's actually a lot lol. So this'll come in parts!
A) Basic layer buttons
1) New Layer: create a new layer. A new layer will appear on top of the current layer you're clicked on. If you are clicked on a folder already, the layer will spawn into the folder. New layers are transparent by default (aka completely empty. The white background is not actually there, that's just to help you see what you're drawing). Some programs can create colored backgrounds for new layers but I keep my options to transparent.
> Double click on a layer to rename it.
2) Linework Layer: create a linework layer. Upon spawning, it will replace your current brush options with linework specific options. These can only be used on the linework layer. When drawing using these particular tools, you can edit the lines after you draw them by moving around their vertices unlike normal brushes that do not have any of these options + it has automatic correction and will straighten out lines for you. I will cover this further in another tutorial but personally, I don't use the linework layer much.
3) Clear Layer: will completely erase whatever is on a layer without deleting the actual layer itself. Good for restarting work quickly. If you have anything selected while you click erase, it will erase whatever is in your selection only.
4) Delete Layer: as described. Will permanently delete a layer. Can be undone.
5) Layer Window: when creating a new piece, by ctrl+n or "file new" will create a new canvas and you will start with layer 1. Clicking new layers will add more and consecutively count upwards - ex. layer 1, layer 2, layer 3, etc.
> Click and hold to drag layers above and below each other. Naming will not affect their positions. A subtle line will pop up showing you where you're about to place your layers.
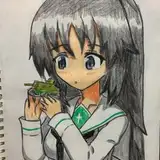
> Layers that are on top of each other will display first, such as the dog face being above the purple squiggle. This is good for coloring as you can have your line art on the highest layer then color below on a different layer to avoid coloring over the lines. Use the selection tools such as the magic wand to only select the inside of your line art and never worry about coloring outside the background.
B) Layer folders
1) New Folder: creates a new folder. Folders can help organize your layers, especially if there's a lot of them and you never name them like me lol.
1.1) Click and hold to drag layers in and out of folders. When the layer appears indented or tabbed away from the rest of the layers, it has been successfully moved to the folder. Folders can also be dragged and moved around like layers, just be sure you are clicking the folder itself and not a layer inside it.
1.2) Click on the folder to close and open it. When closed, it hides all layers within and is useful to save up space when you have a lot of layers or just want to separate parts of an image.
1.3) When a folder is clicked, a new button appears in the layer dialogue (the folder with an arrow pointing to a box). That is flatten folder. If clicked, everything in that folder will flatten into a normal layer and will behave just as any other layer. Be wary of clicking this option as certain layer effects will not work properly if flattened or end up with unintended effects.