This one is from last year, but it's still a favorite of mine, so I want to talk about it a little!
1) The thumbnail, which was drawn in Procreate on an iPad 9.7". Originally she actually had bunny ears, too, but since bunny ears are so tall, they pushed the composition too far down, so I erased them. You can also see that my initial thought was to have the bunnies coming out of something like a jar of cottonballs - but it occurred to me that the visual of a jar packed with bunnies that were sleeping (but looked dead) was probably not as cute as I'd thought lol...
2) The pose ended up changing a lot. While the thumbnail had the girl standing up straight and looking forward as the rabbits did all the work, I felt like it looked way too static, so I loosened her up a bit and made her an active participant in the dress up. Having her participate also makes the situation feel a little more mundane, like this is something she does often, which created a nice contrast with the more magical side of it.
I wanted the rabbits to be a little more interactive and playful, too, and thought that it'd be cute if they were braiding her hair. Adding more rabbits also helped balance the different points of visual interest, plus it gave me an easy way to guide the viewer's eye through the image. (More on that at the end!)
Also, for her blouse, I remember looking at a lot of photos from lolibrary, a website that documents lolita fashion across different brands. It's wildly helpful!
3) I have a lot of trouble with detailed inorganic objects, so I went ahead and made a separate, cleaner sketch for the makeup, since the initial sketch was too vague for me.
4) The lineart, which was done in Paint Tool SAI. It pretty closely followed the sketch. For a deeper look into how I handle inking / the tools I use, feel free to refer back to my lineart post! As a side note, the rabbits are drawn on their own layer.
5) Flatting, which was done in Clip Studio. I wanted this to feel like a dreamier version of morning light, so I went with warm pinks, creams, and oranges. I used pure white for the rabbits to make them more eye-catching. The rabbits are also colored on their own layer here - their color layer sits above the lineart for the rest of the image. For a better look into my entire color process, this post goes into more detail!
6) Since the colors and lines for the rabbits are separate from the rest of the image. I'm able to easily thicken their outline to help them stand out more. To do this, I duplicate their lineart layer, use Clip Studio's "Correct drawing line" option, and thicken the lines a bit. I only want their outer lines to be thicker, though, so I slip the duplicate layer beneath the rabbits' color layer. This way only the thicker outer line shows.
7) Line coloring! As usual, I use a lot of reds. For more info on how I color lines, you can refer back to my lineart post. For reference, these are the colors used in this image:

8) Since I want this to feel bright and soft, I very, very lightly paint in the highlights rather than the shadows.

9) I start adding in some additional detail with "Tone scraping." I add backlighting to the hair to make it feel like the room is filled with light. I also add blush to her face, some slight highlights to the makeup containers/mirror frame/her fingernails, and a little powdered blush to the puffy...makeup thing (I don't know what they're called lol...) that the rabbit is holding to her cheek. You can get a better look at this detail at the end of the gallery above.
10) I slightly thicken the lines by duplicating the lineart layer and shifting it up and to the left by one pixel, then merging. I also add a red underlayer, which is also explained in my lineart post.
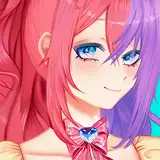
11) Some notes on the composition - the most important one is the flow of the bright white in this image! The brightest parts of this image are the rabbits and the girl's eyes, which work together here, since the rabbits immediately grab your attention and pull you directly into the highlights of the eyes. Another thing that helps frame the face as the focal point is the bright orange of her hair, which is again reflected in the color of her eyes. Basically: the rabbits are the brightest part of the image, the hair is the most saturated, and those two colors not only lead you to and frame the face, but they're also present within the eyes.
12-14) A better look at the colored lines, plus some 100% zoom detail shots.
And that's it! If you have any additional questions, just let me know!


![Someday*[サムデイ]](https://saketami.com/istorage/107168.jpg)