
1. Optimize for Speed (Prototyping or Quick Results)
Sampler: Euler
Scheduler: Simple
Why: Euler + Simple is the most lightweight and fast configuration. Euler’s focus on speed, combined with a Simple scheduler, is perfect for when you need quick feedback, such as generating rough drafts, low-res images, or testing variations quickly. This combination is less concerned with fine details but excels in efficiency.
Ideal Use Case: Rapid prototyping, early-stage concepts, or generating batches of images for review.
2. Balanced Approach (Good Quality with Reasonable Speed)
Sampler: Deis
Scheduler: Beta
Why: Deis (Denoising Implicit Score) paired with Beta strikes a great balance between quality and speed. Deis samplers often offer more denoising control than Euler, which results in crisper images but still keeps the process efficient. The Beta scheduler allows for controlled step transitions, ensuring smoother outputs without going overboard on the number of iterations.
Ideal Use Case: Mid-resolution renders, where both time efficiency and decent quality are important. This could be for intermediate previews or general production where high-quality visuals are needed without too much computational cost.
3. Maximize Quality (Final Renders or Detail-Oriented Results)
Sampler: Heun
Scheduler: Beta
Why: Heun provides more accuracy and better handling of fine details over longer runs. It can stabilize outputs, leading to better coherence across iterations. When paired with the Beta scheduler, it allows for adaptive steps, ensuring that even complex details are captured efficiently. While it’s slower than Euler or Deis, this combination is worth it for final outputs or highly detailed generations.
Ideal Use Case: High-quality final renders, complex scenes with intricate details, or when refining outputs for client delivery. This is the best option when quality is a top priority, even at the cost of longer processing time.
----------------------------------------------------------------------------------------------------------------------------

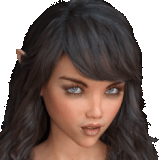
(Sampler + Scheduler changes produces varied results despite same prompt and seed. Notice text accuracy varies)
Additional Research Findings + Tips:
Adjust Step Counts for Fine-Tuning: While these sampler-scheduler combos will guide your workflow, the number of steps you choose is critical. For example:
Heun + Beta, using around 20 steps can yield very smooth, high-quality results in Forge.
Euler + Simple, even 8 steps can be sufficient for decent outcomes, especially when speed is key.
Experiment with Noise Levels: Depending on the complexity of your image (e.g., if you're generating detailed backgrounds or simpler portraits), you might want to tweak noise levels at different stages of the workflow. Reducing noise early on with Deis or Heun can help maintain clarity as the image progresses.
Batch Processing: For batch workflows where you need to generate multiple images at once, consider using Deis + Beta. This allows you to run bulk generations without massive computational overhead, while still maintaining reasonable image quality.
Custom Workflow Automation: If you’re using ComfyUI or Forge, integrating these configurations into automated pipelines where the workflow switches between Euler + Simple for previews and Heun + Beta for final renders can save significant time.
Suggested Workflow Implementation:
Initial Preview Renders: Start with Euler + Simple for quick testing. This will allow you to iterate faster and experiment with different scene compositions or styles.
Intermediate Refinement: Once you're satisfied with the initial drafts, switch to Deis + Beta to refine and get closer to your final output.
Final Render: For your final output, use Heun + Beta with a higher step count to ensure maximum detail and fidelity, particularly for high-resolution images or projects requiring a polished finish.

UPDATE (9/1/24):
When generating illustrations or realistic photos, here’s a simplified guide for achieving the best results using the Flux model.
Top Samplers:
DPM Adaptive
DPM++ 2M IP
DDIM
UniPC
Euler (needs more steps for fine details)
Top Schedulers:
SGM Uniform
SGM Simple
Heun Beta
Steps:
Start at 20 steps: Images will be mostly formed.
25-35 steps: Provides cleaner details and reduces noise.
40-50 steps: For the most refined and fully converged images.
Note: If you're working on detailed portraits, aim for 35+ steps to avoid issues with small features like jawlines and cheeks.
Top Samplers:
Euler
DPM Adaptive
DDIM
Top Schedulers:
SGM Uniform
Heun Beta
Steps:
15 steps: Good for simpler, clip-art style illustrations.
20-25 steps: Brings out more refined, digital illustration-style details.
35+ steps: Adds realism, but might stray from the illustration look (use with caution).
For Realistic Photos: Use DPM Adaptive or DDIM with SGM Uniform or Heun Beta at 35-50 steps for the best results.
For Illustrations: Use Euler or DDIM with SGM Uniform at 15-25 steps to maintain a clean, artistic style.
Feel free to experiment with different combinations, but these settings should give you a reliable starting point!