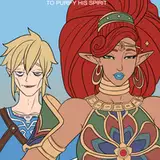
Video 91 Let's Draw Female (Side Eye) Part 4
Added 2025-07-08 19:45:10 +0000 UTC✍️ (Advanced) Practice: Let’s Draw Female (Side Eye) – Part 4
By Pogzart
In Part 4, we apply the final polish and emotional refinement. This is where your portrait becomes a living character — not just a drawing. Through thoughtful value control, focused linework, and subtle details, we guide the viewer’s eye to the gaze, amplify the mood, and create a unified finish that feels elegant, clean, and intentional.
🎯 Objective
Finalize the portrait with expressive focus, light clarity, and subtle emotional storytelling through detail and edge control.
Develop:
Lighting consistency with soft and clear hatching
Facial expression nuance (especially in the eyes and mouth)
Edge softness vs crispness for visual hierarchy
Emotional tone guided by light, line, and contrast
🧱 Step-by-Step Final Refinement
Step 1: Reinforce the Gaze
Return to the eyes — ensure the irises are centered within the eye sockets and the eyelids frame the glance naturally.
Make the near eye slightly bolder in line weight, while softening the far eye for depth.
Add just enough highlight or hatch contrast to make the eyes the focal point of the portrait.
Step 2: Clean and Balance Light
Darken key shadows: under the nose, below the chin, beneath the cheekbone, and where the hair overlaps skin.
Softly build midtones with curved hatching — especially around the temples, jaw, and neck.
Avoid flat areas — even subtle planes (like the upper lip or neck curves) deserve light attention.
Step 3: Final Edge Control
Sharpen your important edges:
Eyelashes
Edge of the near iris
Lip curves
Hair strands framing the face
Soften and fade unimportant areas:
Far cheek edge
Bottom of the neck
Outer hair silhouette (unless catching light)
This balance creates depth and focus without over-rendering.
Step 4: Add Final Texture and Character Details
Light skin texture (pores, faint freckles, blush marks) can be added with delicate stippling or broken hatching.
Use line breaks in the lips, brows, and jawline for breathing space.
Optionally, add a collar, scarf, or simple tone in the background to support composition.
💡 Mood and Emotion Control
The angle + side eye = subtle emotion. This gaze can feel distant, shy, curious, or calm. Use expression support:
Slight lip curve
Brow angle
Lash softness
Let these choices reinforce the story behind the eyes.
✔️ Tips:
Use minimal line to say more — each stroke should support form or feeling.
Avoid symmetry — a slight offset in brow, lip, or jaw brings life.
Use contrast to lead the viewer’s eye: don’t make every part equally sharp.
🎨 Stylization Guidelines
For semi-realistic anime:
Merge strong shapes with soft rendering — stylized clumps, realistic flow.
Clean form over clutter. Let simplicity bring clarity.
Use facial rhythm: eyes → nose → lips → jaw — your hatching and contrast should follow that path.
🧠 Optional Challenge Ideas
Create three alternate finishes with different moods (neutral, flirty, melancholic).
Add side lighting or backlight for a dramatic rim effect.
Try removing all outlines and finishing with only hatching and shape clarity.
🔁 Practice
Finish two versions of this same portrait with different hatching styles.
Review older side-view portraits — refine them using what you’ve learned.
Flip your drawing to check balance and focus.
This is your final pass — your last chance to speak through the drawing.
Every shadow, every edge, and every highlight carries emotion.
Don’t just finish it. Feel it.
– Pogzart