Samus Scroll 2: Slip n' Slide
Added 2019-02-10 23:04:12 +0000 UTC2/26/19: Slip n' Slide

After spotting Green dude run out, Samus teases that he backtracked for his friend. Whi she then flicks at him to try and stop him from moving. At this point, she just wants him as the main prize.


Him, being the quick guy he is, dodges the attack. Angering Samus greatly. So she decides to go for complete intimidation.


Those trees lining up for the shot came out accidentally amazingly well!
She tell him to run here in a completely flat and fed up manner. This shot TOOK HOURS because it needed to FEEL right in every single ounce of her body. Meanwhile, the dude took a minute to animate in the exact same scene.

And run he does, but oh he's not going anywhere now is he? I had a hard time editing the ground to stop having its texture move when the whole building moved. on top of that, the windows are actually an incredibly small scale texture with emissive latched on. This is because I don't really want to go through the web of blueprints holding those material instances together. I plan on changing all the buildings to look like this since it just looks so much cleaner.

I've gotta try adding physics to the objects on the building as it's tipping over. Yup, Samus has lifted the entire building!

This is another 2nd pov shot of the same scene. This video will be full of those in the right places. Thus padding out the time to potentially 4 minutes! WHAT!? But also look at that terrible building window texture. Eugh! I like the new one I will soon apply.

Samus is taunting him the entire slide down. There will be falling objects, of course! This scene was so damn hard to time since the building is moving and the camera in Blender isn't. Had to use UE4 to check every few seconds of animation on green guy. Not only that, changing the roots of everyone to be paired with the building AND dealing with everything being slightly off position from what I exported from Blender took a few hours to fix.
BUT IT CAME OUT AWESOME! And that's all that matters.

Well look who came back to save green! No way am I killing these guys off. Too much potential for the future.

Ohh, but then losing his weapons might be bad.

And you can tell here why I wanted to be careful with how close the camera got to Samus. Model doesn't hold up completely. BUT, this scene still looks alright for being the gang's worst nightmare. Those will be outputting electricity as they fall too.
And now begins the city power outage scene that I've yet to animate!
-----
2/22/19: Off-Script
I'm actually surprised with where I am today based on when I updated last. I guess I did more work than I thought this week.

Before, this scene was completely empty and just had Samus kinda fall over. Now it's fully animated with the guys escaping to the side.


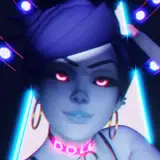
Samus's facial expression here really helps make you look where she does. Which sells the WILD transition to here.

Not easy to have someone's eyes be ready for a scene like this.

But let's take a step back for a moment. The overpass crush scene could use some more angles of the same shot. So i'm going to add more cameras to edit to of what's going on in the streets behind her. This will be fully done in the polished wrap-around.

Now back to one of the harder scenes to animate. (In which I found a mistake while taking screenshots where the guy's arms clip through himself for a moment)

This guy had to run like hell for what felt like a city block. instead of animating each step, I opted to animate him videogame style. I had him run in place for a full cycle of running, then copy-pasted that cycle. Then I moved the root bone to hopefully match his running speed. It works well here because you barely get a chance to see if his feet match up, but it's close enough that nobody will notice.

Oh hey, this is just before his hands clip into himself. Anyways, he stumbles as Samus drops her hand to the floor. Right at the stumbling moment is when I switch off of using root motion to move the character and use my regular groove offset animation.


Door is supposed to be closed but this shot is older than the above one. This scene was surprisingly complex. I kept thinking I had to adjust Samus's speed again and again to be just a bit slower. Then I was worried about having to adjust the trees to get smushed at the right time. It turned out that Samus was going at a perfect pace and the green guy just had to run faster. Also, the camerawork needed to be just right to display everything. Otherwise, the scene would look EXTREMELY fast. I did try slowing it down, but the intensity was lost.

And here we have the sole reason for everything going so off-script. This man was supposed to run with the green dude. But him having a limp when Samus spots them going around the corner completely changed everything. Not only does he not get away, but he gets picked up. Because that's just what Samus would naturally do.

Same guy scraped across the ground twice in one night. Not a good night for him.

The gas mask and weapon he had disappeared and would be far from his body in UE4. I just said, "fuck it" and had him take those off in the car.

It's at this part where I cut off Part 2 and now we're officially in part 3! Whoo!

I had to have the camera at this angle due to her knee constantly moving around when positioning and the clipping glitches that ensued when she sat down. MMD model meshes don't flatten or move around like normal human skin does. Just clips on through. At this point, I had to end for the night and figure out just where the hell this was going.
Here's the plan:
Samus rubs the guy between her thumb and finger until the green dude runs out to the roof of the Bowsette building. We see this from a side-of-her-face perspective and zoom in on the green guy as her hand moves out of the way.
Samus then maneuvers to flick purple guy into green guy from that distance. (I was seriously thinking of a MKX transition where you see the bones cracking, but nah)
Purple dude is flung and green guy dodges him just in time.
Samus, absolutely frustrated, finally stands up.
Here we get to see just how massive she is in comparison to the building.
Green guy begins to run back inside when suddenly the entire roof tilts towards Samus.
She's picked up the building and everything is bouncing off her as she tries to capture this one guy who's barely hanging on.
Just as green guy slips off the roof, purple guy catches him and green guy's weapons slip off to fall into Samus's mouth.
At that point, she puts the building back down and begins to become EXTREMELY electric. Massive growth and sucking power from every building nearby.
She begins floating up for the game over scene and the screen flashes.
Not a time jump, but the lighting has changed since there's no lighting anywhere in the city anymore. The sun has a nice morning effect. We see the Bowsette building when Samus's heels land just in front of it. Crushing buildings, yadda, yadda. Screw the street. The heels are around the same height of the building and the camera ZOOMS out to show her full form.
At this point, let's just go with the classic gts stomp ending. Although from different angles.
I WAS gonna do the police thing, but that ain't happenin' at that size. Not satisfying enough.
-----
2/20/19: Back to Blender Physics
Today, I didn't stream the absolute boredom and frustration that is physics testing. Not worth seeing me suffer to try and figure things out anyways. As much as I want UE4 to do the physics, there's a ton to watch out for.
"Density/Mass" options are flat-out bullshit. I've had better luck applying dampening to Samus's hair. Now the results DID come out pretty damn good when they worked, but anything moving and/or scaling too fast could easily lead to the physics glitching.
I CAN'T record the physics for certain areas and that might be the #1 reason I'll drop doing character physics in UE4. I'd have to keep swapping out models at different times in the animation, like Bowsette, because of the constant scale changes and that's not straightforward.
I hate workflows that aren't straightforward.
This is a MASSIVE decision since it means the ENTIRE scaling in the Blender scene will have to be small again to fit its physics constraints. This also totally changes the import/export process and is why I've held off from making tutorials.
BUT this does fix any problems I could potentially have physics wise in animations since I'll be able to record portions and they'll always be that same recording in UE4.
The absolute sucky part will be setting it all up in Blender and recording. Good news is that I don't need to make a whole outer cloth mesh like I did with Bowsette. Bad news is that every bone in a skirt or super long ponytail might have to be individually parented to an empty axis that's following a unique separate bone-cloth. What this solves is what broke the Bowsette video that I spent weeks trying to learn.
As you'll see in the video below, the bones in the hair are moving along with the body rather than just the mesh. (Which you can't export mesh physics to UE4 or any game engine. I harshly learned that after spending 2 weeks learning and trying to record mesh physics of Bowsette's skirt)
So being able to record the bones that are modifier-following a simple bone-mesh cloth that's parented back to the main character with a simple invisible collision mesh version might be the way to go. This should lead to the best artistic control over body physics. Especially since any glitched keyframes can be deleted and manually animated over. (Which is what I did in MMM)
https://www.youtube.com/watch?v=NpuhgbSbXEE
(An easier written tutorial)
https://blender.stackexchange.com/questions/41235/how-to-make-rig-that-reacts-to-gravity-or-seem-to-behave-physically-correct
All this and I did try to get the regular mmd-import physics to work. I tried for 3 months on that front. The ONLY character with working physics was UwA's Micha in my Ferrous birthday present video. I still have barely somewhat of a fuckin' clue how those physics worked and I studied them under a microscope!
I believe the way her ponytails were linked to a unique IK ball that scaled with the head as a parent AND that each bone along the hair was set to follow all transforms rather than just rotation led to it working perfectly. Except that didn't work with a Haku model I recreated it on. Anyways, the mmd-import technique has LESS control compared to this "new" one I found. They're around the same amount of hell to set up, so let's hope this one absolutely NAILS it! It certainly feels like it.
-----
2/14/19: Extra Power
(Removed chair post to get back to what this patreon is about)
Today was about tackling the polish of the electric railway growth scene.


To my surprise, the thing that took up the most thought process was the camerawork! I wanted it to move with her butt so we could feel the weight of its movements. Took quite a few tries to get right!
Here, I added the crashed car early so that she'd have reason to look around the corner since that shot was cut. It was also at this point that I found out Samus doesn't quite line up correctly with the environment I made in Blender. That could be dangerous in screwing up a lot. But the good news is that I can move her in UE4 within the cuts so you don't notice.
Here, she used to be inside the building on the right despite Blender showing me it was as you see. I moved her in UE4 right after the cut from the previous shot so that she lines up well enough. Hell, I might have to do this PER SHOT if it gets bad enough. To be added to this shot are the escaping dudes running to the alleyway.
-----
2/13/19: A Bit Too Much
Everything was going just fine until the electric nation attacked. Samus was crawling under the overpass, crush some street lights, swat away a car. The usual. 


She didn't watch just how high her butt reached and it collided with the Railway above. Now it took a LOT of trickiness to animate it without the legs moving all over but also including her butt not being stiff, but it worked. (Better than the hair physics at this time, which swing around like a yo-yo)

That flat part on the left side will be either fixed or hidden by train rail.
But I guess I was so enamored with trying to get this part right, I wasn't watching the rest of her size throughout the street. So now...

Now I gotta plan the rest of the animation differently. She obviously can't squeeze into an alleyway anymore, but I think her hand can. Not only that, I think I can get a cool street shot of her falling to the ground and spotting one of the dudes escaping. IN FACT! I think that shot of her looking at the camera could be looking at their crashed car!
-----
2/12/19: Under the Overpass
Although I can totally write that the street lights are also just point lights parented to them. Turns out the lights have their own lighting textures. Ah well, there's multiple ways to get things done! Anyways, they required some serious toning down since the brightness of the bloom is super potent with the way I have it. They're around 0.5 emissive.
On top of that, the car is animated in UE4 with a reference in Blender. I don't want to export yet another mesh from Blender since I'd have to parent all the point lights to the car again. It's basic animation, so why not leave the process that way?
-----
2/10/19: I have an Inspiration!
First of all, I'm going to name the NSFW version the 100% Mission Complete version.
Which is in line with Metroid games taking more armor off the better your score.
But here's the big inspiration.
I can't do a model swap too easily by having the nude Samus model grow out of her own WiiU self and shred it up close. That would look EXTREMELY weird.
But then I remembered that she's using electricity-based growth. So having her go back for the malfunctioning stun gun and crushing it should create a blackout in the whole area as she sucks up everything. Something I now know I can do thanks to the parameters setting I found in UE4 to change the building textures. Combine shredding clothes through mega growth, electric outage, and Metroid references. The ending result of how it will go should look like this!
But above a city can look super beautiful.
Now, due to this power outage, I'm gonna change to a new level that's copied off of the city strip I already have, set the time to a nice sunrise, make it look all apocalyptic for the end of the strip she was at, (not the whole city) and then start with Samus waking up lying down on her back. She's going to be WAY bigger than the original vid will be and I'll get to fully test out my simple destruction idea to see how effective it could be. (Raising rocks and rubble in place of the ground. Generally moving/bending stuff around til I figure out the simulation part)
I can have this start off where there's a bunch of city parts lying on top of her that she can wipe off or blow away. On top of that, I can get her turning to her side to examine everything. Then rolling to her front to get up when she spots the building those guys were hiding in. All these are perfect moments for destruction and views from multiple body parts. Including breathing out to create a gust of wind down a street. For butt/breasts, I JUST found a tutorial on spring joints that might make them actually work for proper jiggle. For indentations, I found that I can use shape keys to manually place those. (The nude model is a far higher quality model after all and I want to use as much as I can. It can't change scale well at all)
Lastly ends with her stepping on the target building after standing up. I can do a zoomed out shot, like from Samus's perspective, to see how that goes.
Now back to the vid's progress.
First thing to notice is that somehow the background STILL feels dead despite the neon and gorgeousness. So I took a note from Japan and made the trees glow.
This was achieved by putting a little point light inside there. I tried making the leaves actually neon, but the effect never came out in a detailed matter. It made the trees look like plastic because there was no shadow anymore. Not only that, adding emissive material to the leaves made the the trees overpower shots.
Here's another comparison that's completely changed the look of some shots.
Now I do LOVE the ominousness of this shot, but also feeling a bit dead in the back like it's not a cyberpunk city.


That's gonna be an interesting call to the insurance company.
Interesting thing about this interaction. I did the motion of Samus in Blender, but the car in it was only used as a reference of where she would get hit. I animated the car (VERY basic moving objects stuff) in UE4. Which has an AGGRESSIVE interpolation smoothing system. Had to workaround that thing when it came to the sudden jerking to the side by the car. Also, she's stealing the electricity from that car. I was only able to capture the tail end of the effect, but it's easily viewable a frame before. (If I want to capture effects, I gotta press screenshot as it plays out)
I wanted her to look more pissed off, but I think I like the more-closed mouth version. Will adjust.
BUT THIS LOOKS JUST RIGHT! I'm gonna have traffic building up on her as she walks here. Pretty much brute forcing her way through it. This is a massive shortcut and change from the ballerina style dance through traffic. I thought about it and it felt like Samus thinks she's armored up here. Ready to take any shot coming.
You wanna know what would be really SCARY COOL!? If each car she crossed has that green electricity jump out and go to her, then the car would fall down due to the battery being used up! I'M SO DOING THAT!
Speaking of shots, the purple light coming from behind her is actually a spotlight that's parented to her groove bone. (That way she can do all the crouching motions with her back and the spotlight just follows without moving with her back)
I've planted quite a few spotlights around. Not because they'd make sense, but only because it makes the shot look amazing!
The electricity will still be happening through this whole part, even the train scene. It's just that it takes a moment to process the screenshot and I'd have to restart from her crushing the car. Which is when the effects were first turned on.

Looks SO MUCH better with the face light and back lighting! I also put some lights on the train in the back.
I boosted the hell out of the purple back light. Although I found that I'll need to lower it a bit since it somehow goes through the right eye? It's not in this shot, but it was weird alright.
I actually quickly lowered the intensity of the light here since it could blind your eyes reflecting off of Samus's face. You can see the limits of using low poly models here. I need to learn how to fix up my own models to be super smooth if I ever want to continue and be pleased with what character I have.
I need to use a better effect that lasts a bit longer so that it conveys the car getting hit by the train. I don't care how it looks, sparks are not gonna cut it.
Comments
It definitely looks greater now! And the nude version is a really good idea. I think it would be funny if you added at the end of the video a small score card, like the games. Kinda like this: Time: 137 hours Items: 100% Rank: S "You have unlocked Birthday Suit Samus"
Sayer Raider
2019-02-11 13:40:37 +0000 UTC