大まかな手順
Faceオブジェクトを選択した状態で編集モードに入る
Faceのすべての頂点が選択されていることを確認(されてなければAキーで全選択)
オレンジのとこで右クリックして分離→マテリアルで
分離できたら一旦オブジェクトモードに戻る
Face02/Face03を選択した状態でシェイプキー追加
追加後編集モードへ移行
メッシュ表示がオレンジ色になっていて、瞳孔のみ選択されていればOK
されていなければFace02/Face03オブジェクトを選択しなおして、ビューエディタエリアでAキー
選択が適切なことを確認して、ヘッダメニューの頂点→シェイプキーからブレンド
作業コマンドウインドウで「シェイプキーからブレンド」のプルダウンメニューをクリック
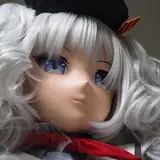
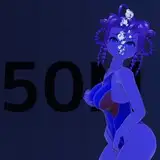
Fcl_EYE_Surprisedを選択し、その下の「ブレンド」を最大値にする。このとき見た目も画像のように小さくなっているはず
確認できたら3Dビューエディタヘッダメニューでモードをオブジェクトモードに切り替え
今後の予定
・SwimsuitとBodyが分離されてないアバターの改良
(VRoid Studio→unity→blender作業)
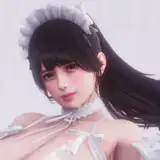
・女子アバターに↓を使ってまずVroid Studioで乳首追加
(可能ならBlenderで乳首勃起シェイプキー追加)
・全アバターに↓使ってunityでハート目追加
これら工程をこの記事の流れに沿ってオプションとしてやっていく
その後絡みモーションを作っていきたいが、これは先々の課題が山積と思われるので、少しずつ探っていく。
それと背景用プールシーンの設定で必要な作業
・PostProcessVolumeをプールの各段の大きさに合わせて複数設定しGroupでまとめる
・↓の水面効果をなんとか四角い平面にする(駄目ならカメラアングルでごまかす)
あたりをなんとかしたい。
という感じでぼちぼちと次作準備を進めて参ります。
Rough procedure.
Enter Edit mode with the Face object selected.
Check that all vertices of the Face are selected (if not, select all with the A key).
Right-click on the orange area and select Separate -> Material.
Once separated, return to object mode.
With Face02/Face03 selected, add a shape key.
After adding, switch to Edit mode.
If the mesh display is orange and only the pupils are selected, OK.
If not, reselect the Face02/Face03 object and press the A key in the view editor area
Make sure that the selection is correct, then select Vertex in the Header menu -> Blend from the Shape Keys.
Click on the Blend from Shape Keys pull-down menu in the Work Commands window
Select Fcl_EYE_Surprised and set 'Blend' below it to the maximum value. At this point, it should look smaller, as shown in the image
Once confirmed, switch mode to object mode in the 3D view editor header menu
Future plans
Improvement of avatars whose Swimsuit and Body are not separated.
(VRoid Studio -> unity -> blender work)
Add nipples to female avatars using ↓ in Vroid Studio first.
(If possible, add nipple erect shape key by Blender)
Add heart eyes to all avatars using ↓ in unity.
Do these processes as options following the flow of this article
After that, we want to make the entanglement motion, but this is considered to be a mountain of work ahead, so we will explore it little by little.
And the work needed to set up the pool scene for the background.
Set multiple PostProcessVolumes according to the size of each tier of the pool and put them together in a Group.
I want to manage to make the ↓ water surface effect into a square plane (if not, I'll cheat by using camera angles).
I want to do something about this.
I will be preparing the next work slowly and steadily.