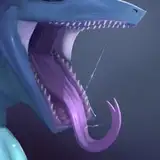
As we start the new year it is time to begin moving towards a review of the Frogdog; which I will say at the moment is an expansion I do not have a completely clear final set of thoughts on. Usually when I am in this position, working through all the individual elements with detailed analysis helps clear things up and often tips the scales in one direction or the other. So we are going to start this breakdown with a look at the two crafting locations that come in this expansion box, beginning with the Froskrafter.
This location is our Era I (aka Node I) crafting location and is unlocked upon your first victory against the Frogdog, excluding any prologue victory. I'm a little disappointed that we've moved backwards from the Crimson Crocodile on this front, that monster gives you an unlock of the Crimson Crockery from the prologue victory and I very much prefer the play patterns that unlock offers over this regression back to the Catarium unlock. This means that the Crimson Crocodile remains the most interesting and engaging prologue fight and makes me less interested in running a campaign with the Frogdog being the antagonist for the opening skirmish.
Therefore the Froskrafter will be available from the second lantern year's settlement phase and it is a busy location with 16 different gear cards to be crafted, that means I will probably have to slice this analysis into two segments, something I prefer to avoid, but time is always at a premium and I can only get so much done in a week.
The location's weapon types are:
Dagger
Club
Axe
Scythe/Whip
Shield
Thrown
This is a somewhat interesting selection of options; the existence of an axe makes the Bone Axe significantly less valuable and having an early shield option is always good because it lets us get the Shield Mastery chore over with faster. Thrown weapons are pretty much irrelevant as a weapon type at the moment, but as a ranged option it is helpful to have something like this available early on. Similar reason to why Bone Darts are great.
The Scythe/Whip is an interesting option here, but there are a lot of limitations and caveats that need to be navigated in order to avoid this being a 'Lion Beast Katar in the core game' situation. Whips and Scythes are like Thrown weapons in that they are massively under-supported in the current game environments, so you if you want to use those two weapon types you need to be careful with your selection of quarry monsters.
For whips; the Crimson Crocodile and King offer progression during the mid and late/end game portions of your campaign (the Leather Worker's whip is not worth bothering with, the Blacksmith's Ring whip is a decent mid game option though). Scythes on the other hand are a do nothing weapon type unless you own the Dragon King expansion, which not only includes the next step in Scythe progression, it also includes the weapon specialisation/mastery card. The exclusion of that specific card in this expansion is a mark against the Frogdog expansion as a whole, reprinting that card here would have been a smart pro-consumer decision.
It is also worth mentioning that there are additional Scythes with the Crimson Crocodile; in the Erza of Dedheim box and more significantly in the Lordsruin Indomitable Survivor. Therefore if you're looking to support scythes it is my opinion that the Crimson Crocodile, Dragon King, King and Lordsruin white box are the current essentials along with this release and the Sunstalker is just a good shout to support both Scythes and Whips. Not ideal for newer players or those of us on a budget. We're already beginning to see that the Crimson Crocodile and Frogdog make excellent options for quarries in the same campaign, and having a total of three node 1 & 2 quarry monsters is still something I very much recommend for players who thrive on variety or surprising synergies.
So, with that pre-amble over and done with, let us get into the gear, starting with the Frogdog Armor Set.
Frogdog Armor as a whole entity has a solid thematic design, but that thematic design doesn't cleanly transition to the mechanics. What we have is an armor set that seeks to sacrifice armor points in exchange for aggression and mobility. That creates a very high risk playstyle, which is not something conducive for a close range damage dealer because they need their armor points in order to soak the consequences of their attacks.
That immediately moves us towards range and reach as our core weapon choices, which is a little unfortunate because most node 1+2 monster armor sets are reach orientated (White Lion, Screaming Armor, Gorment, Crimson) due to how reach weapons interact with melee 'monster-movement attack' abilities.
Fortunately, Frogdog armor carves out a niche because its monster-movement also interacts with Range, is niche area that it can carve out into an identity of its own. As such my greatest success with this armor set has either been leaning into all of its green affinities for a tank build and later on leaning into the range synergies for a bow build.
Let us look into how I came to that conclusion with a break down of all the individual elements.

Crafting Cost: 1x Waxy Dermis, 1x Organ
Designed literally as a silver bullet for fighting the Frogdog (though really a good old butt cheek stabbing works fine most of the time), having a 50% “dodge” against Fart Cards isn't terrible, and because the other parts of the set can support the green affinities this works quite well.
It's also not a bad option in mixed sets (sets that use pieces from different armor sets along with the Arc Survivor armor set bonus 'Clothed & Satiated), as it can be switched in when fighting the Frogdog and left at home otherwise. I've used this with Leather Boots/Skirt/Gloves quite nicely because of its green affinity design in combination with that extra gas protection. I do think however that this Mask should have +1 armor points if it is to be a real competitor for the two generic option of Rawhide and Leather.

Crafting Cost: 1x Tatty hide
Not much to cover here, a cheap pile of protection and affinities, this is a solid piece of gear and probably the best single gear card in the entire set because it's performing “on rate”. By that I mean this is what I expect to get for the cost of one specific monster hide resource, 2 armor points and some mix of affinities or an OK ability is an acceptable price.
Good stuff sometimes is just good and there's not much more to say than "Price cheap, affinities good, protection good for cost".

Crafting Cost: 1x Gaseous Bladder, 1x Hide
As the single most expensive portion of the armor set, the Frogdog Vest almost passes the sniff test. It has a good amount of well orientated affinities and a situationally useful ability, however like most armor sets in this game it fails to take into account that Body Armor is covering two hit locations (Body 1 and Body 2) on the dice. As such this is another armor piece that's a point or two of armor short of what I'd prefer, but that is consistent across most armor sets.
I do like the Inflate ability a lot, it's better than it looks early on due to how effective gaining +1 armor is vs. Damage 1 monsters and you can literally tank with this set by standing around and inflating yourself real hard like someone with an out of control inflation fetish. Survivor Armor breakpoints matter in KDM and 1 point can make all the difference. Also, this gear card supports the boots, more on that later.
In all, I think this piece of gear is close to where it should be, and the negative that we have here is a general failing in Team Death's armor design understanding rather than a specific one that applies to just the Frogdog Armor set. I'll talk more about this in an upcoming video on armor and armor sets that should come out for the Pillar Patrons next Wednesday and everyone else the week after that.

Crafting Cost: 1x Waxy Dermis, 1x Hide
This is probably the most overpriced part of the entire set and therefore is the last one you'll craft a lot of the time. I do think that the ability we have on this armor set is fine, and in truth the entire design of this suit is correct, it is however nearly double the cost that it should be. This is more a 1x Waxy Dermis + Bone or Organ piece of gear rather than costing two entire hide resources.
That's unfortunate, but once crafted the ability on this one works very well, providing not just a synergy with sets own playstyle but also reducing the need to encourage the wearing survivor onto their feet. So it does a lot, once you have crafted it you're going to find a lot of scenarios where this piece of gear pays off.

Crafting Cost: 1x Tatty Hide, 1x Mammary Gland
The best individual piece of the armor set, the Frogdog Boots not only have the second highest crafting cost in the set (very justified here), they also demand affinity support from two additional gear cards outside of the armor set in order to connect both puzzle affinities and want the Frogdog Vest's ability to keep maintaning this. We have options for the affinities given to us both via the Lucky Charm and also via a two of the weapons in the armor set.
This ability is an incredibly powerful one, it's an additional Dash at the cost of armor points rather than survival, but it can be used even if you do not have Dash in the first place AND it can be used in combination with Dash if you do have that. I've written a fair bit about Dash-Cancels in the past and how powerful they can be to blank a monster's entire AI card; this is all of that and some extra.
These boots are a big part of why I recommend using the Frogdog Armor as a tanking set early on. Many Node 1 and 2 monsters can't keep pace with this kind of movement if you're combining that with a reach weapon and because you can simply Inflate the legs as your activation you're able to indefinitely maintain this ability. With careful positioning and good monster target control you can in fact trivialise the threat a monster represents. It's a seriously strong ability and if you're not activating it every single time you use Frogdog Armor, you're missing out big time.
I really like mechanics designed like this in this game, there's a cost, kind of a steep one, but the pay off is powerful and rewards skilful positioning. Positioning in Kingdom Death: Monster is one of the skills that separates players who die lots in the opening years of the game and those who can make the monsters look like chumps. It's a hard skill to develop, and a hard one to teach.
Though if you do want to improve it, playing with the “training wheels” of the monster AI deck's top card always revealed is a good house rule to help you learn just how significant positional play is in handling what the monster is doing (Also you could use the Frogdoggles, which we'll discuss next week). Oathsworn is also a really good game for teaching you the importance of positioning because the monster's upcoming AI card is always known information in that game's battles.

Crafting Cost: 1x Gaseous Bladder, 2x Waxy Dermis, 2x Tatty Hide, 1x Mammary Gland, 1x Organ, 2x Hide
First of all, as we've noted above, this armor set falls into the same trap that every other Node 1 armor set falls into, it's too expensive. We have here a set that costs 6 hide, 2 organs and 1 hide/organ resource. Considering what you get when compared to either Rawhide and Leather the armor set is overpriced, and because you cannot start crafting it from Lantern Year 1, we're incentivised to ignore it initially and work on Rawhide set 1 (and to be honest Rawhide set 2). This is a problem that ties all Node 1 and Node 2 Armor sets together (except for Crimson Armor, Singer Armor which are powerful for their costs and Silk Armor which has its own woes).
The green affinities are a nice attempt to present that the set is worth the 9 resources you pay, and yes it does perform defensively on a similar power tier to a rawhide set due to Monster Grease giving +2 evasion when combined with this set. But it doesn't perform better than having two rawhide armor sets, and given that the entire Frogdog Suit costs around one and a half rawhide sets and needs monster specific named resources. It's a hard argument to push that this armor set is a high priority, but as I've noted above I think that the armor set is close to being correctly balanced, shave a resource or two from the cost and/or add a couple of armor points to the head/body and we'd be in a perfect spot. However we're not here to house rule the armor set at this time. Instead let us look at how we can utilise this armor set as printed.
If we are aiming to use this armor set as a front-line tank until a better tank/off-tank set (such as Crimson, Singing or Leather) comes along and then switch it onto a bow damage dealer then there's a good argument to craft this due to its high synergy with Monster Grease and ability to regenerate soak. In fact I currently rate it as the third best Era I armor set (Rawhide and Crimson are overall better) but it does have a major slot issue in that its best ability is located on the Frogdog boots and the armor set doesn't activate that without support from two more gear cards. This is all similar to Gorment Armor, but Frogdog Armor does pull ahead because of its large amount of affinities and incredible “monster-movement” ability. In fact when we look at Frogdog Armor from a tanking perspective you can see a lot of parallels between it and Gorment Armor. It looks like a design from the same person, refining what Gorment Armor did and improving it to suit how the players utilise gear.
On the side of reach/range, I think Bows are absolutely the best spot for using this armor set in the mid game, being at a longer range to start with makes the Boots a more effective 'jetpack escape' and archers naturally need less protection than other survivors because they have meat shields between them and the monster most of the time. The tricky part of course is getting access to bows, because they're a rather rare weapon type, however as mentioned above, the Sunstalker is an excellent source of bows and I really like how the Sunshark Bow plays in combination with Frogdog Armor in particular. It leans heavily into the short range light skirmisher playstyle that the Sunshark Bow supports when used as a damage dealing weapon. I'll get more into expansion recommendations in the wrap up that'll be at the end of part two.
As I wrote above, I currently rate this as the third best Node 1/Era I armor set in the game and I think that it's only slightly underpowered due to its expense being a smidge too high and protections a smidge too low (Blame Rawhide for setting the bar so high in the early game). Despite that, it is still something I've come to appreciate as it has enjoyable play patterns and more than one different way to use it, plus it has synergies with some of the weapons in the Froskrafter itself. We'll look at four of them in the back half of this article and the remaining 7 gear cards next week.

Crafting Cost: 1x Mossy Molar, 1x Bone
With a portmanteau that gives us one of the all time best weapon names in the game (we know this name came from Anna) the Vertebrayonet is a very interesting early game dagger that leans into Luck based strategies without utilising Deadly. Daggers floundered for a long time in the early portion of Kingdom Death because they never really supported their core identity of hit location precision and backstabbing, instead they were a high speed, low accuracy and low strength weapon. That didn't work out very well for the weapon type and Team Death had to pivot in order to give the weapon some relevance and thematic coherence.
The Vertebrayonet is simply a really solid early game weapon, it has atrocious accuracy, meaning that you're always going to be aiming to attack from the blind spot which is a great example of mechanics forcing thematic play. On top of that we have the slightly under rate 2 strength being boosted by that huge luck bonus vs. Persistent Injuries. Persistent Injuries can at times be absolute game changers by disabling AI cards or weakening the monster to be below key break points for toughness or movement.
I think that this weapon is perfectly designed for its spot in the game, it's a great tool to utilise alongside Rawhide Armor in particular because of how easily it combines with that armor set to activate a lucky charm. You can also easily get it active in combination with Frogdog Armor, but I've already written above why a close range, melee, backstabbing weapon doesn't really jive with what the Frogdog Armor set is aiming to do.

Crafting Cost: 1x spindly paw, 1x organ
It's a club. It's got Reach 2. It's a Long Club!
The Long Club is one of the weapons in this selection that is clearly designed to synergise with Frogdog Armor. This weapon in combination with the Spiked Buckler is the loadout I'll take when I'm using Frogdog Armor for early game tanking/off-tanking. It's a solid, reliable weapon with decent stats, especially the accuracy. The Reach 2 makes it easier to 'jet away' with the boots when you're looking to Dash-Cancel and overall this is a solid weapon with the only real negative being the two-handed keyword. The Stinky Keyword is worth mentioning here because it synergises with the Frogdoggles (though most of the time you'll use Monster Grease for that keyword).
About the only real negative I have here is that the affinities are not particularly relevant, but having affinities even if they're not useful is not a drawback beyond the aesthetic issues. It's a simple weapon, for a reasonable cost and about the only real problem it has would be it's not as good as the Bone Club, but it's also a lot cheaper and more flexible.

Crafting Cost: 1x wiry crest, 1x bone
The Crest Axe is quite an interesting little proposition to navigate, while you are insane this weapon is an absolutely incredible Era I axe option that's beaten only by the sheer power that is the Greater Gaxe. However, when you are not insane, this is an absolutely terrible weapon that'll just get you killed.
That means survivors who make use of this weapon need to have some way of gaining insanity during the showdown and/or limiting the brain damage they take from intimidates. There's no real options for us in the Frogdog suite of gear cards, though it is worth noting that there are multiple 'If Insane' gear cards we can craft from the Froskrafter.
Looking outside of the Frogdog options though we see things like the Mindlock token on Crimson Armor or the Screaming Horns from the Screaming Armor set that can support this weapon. With tools like that being able to protect or increase your insanity and maintain being insane, the Crest Axe can be a very powerful craft that'll work into the start of the mid game. However, if you are playing with the Gorm as well, there's little reason to craft this over the Greater Gaxe. But not every weapon has to be essential in every campaign, so I think the Crest Axe is well designed as a situational early game axe option until you have the Counterweighted Axe in your hands.
I've not mentioned the affinities much, the blue one connects to the Boots, which is nice, but the red one isn't super exciting for most builds and would have been better either facing left or down.

Crafting Cost: 1x mossy molar, 1x spindly paw, 1x scrap
Last weapon for this article is the aforementioned Whip/Scythe weapon, I won't repeat the issues/limitations surrounding the weapon types and instead consider this weapon in a game where it has solid progression and support.
The affinities on the Grapple Claw are clearly designed to support the Frogdog Boots as they can connect to either side of the puzzle affinity. They also give us our first 'cookie cutter' Frogdog Armor build which is Frogdog Armor + Grappleclaw + Spiked Buckler for a front-line Whip/Shield Tank.
The weapon itself has a reasonable, if not amazing stat line. (2/7+/3) is a little bit behind what we want for accuracy in a front-line weapon, but that can be supplemented with the Frogdoggles + Monster Grease (+1 Accuracy when stinky). Also I'm willing to forgive a slightly worse accuracy when it's combined with Deadly 1, critical wounds are a powerful combat mechanic.
The gain reach ability is weird, it feels like it was supposed to be a [Knight] (Movement) ability, but instead it's an Activation [Bolt] ability, meaning that it does nothing at all unless you have surge. Spending a survival + surge to gain +5 range may well be useful in edge cases, but most of the time it's better to move up closer and surge for a second attack. I've rarely used this reach ability because I've rarely found myself in the position where I need to. I can't easily combine it with Dash-Cancels from the Boots either, because that requires spending an activation to replenish the leg armor point. It's a weird thing and for the most part it means that this weapon isn't really a Reach weapon at all. I kind of hope it gets errata'd updated to swap the bolt icon for the knight one, that not only works better as it's effectively giving the weapon cumbersome in exchange for +5 range, but it is also thematically sweet.
In part two we'll go through the remaining seven gear cards, and follow that with a detailed breakdown of the best other expansions to combine with this crafting location and also wrap things up with a summary of thoughts about everything we've been through here!
Fen
2025-01-13 15:33:17 +0000 UTCMeeKey
2025-01-13 05:37:29 +0000 UTC