Before we get into this, I'm going to start with a Patreon only “editor's note” that explains why it takes such a long time to review things that involve nemesis content – this won't be present when I post this review on BGG.
When reviewing any KDM content, the kind that is encountered more often and earlier in the timeline is faster for me to get to review. This is because get to choose when and how often I hunt them. This means I can get enough repetitions in with a quarry monster at all levels more rapidly. On the other hand, if the content is late game (like The King), a Core/Finale Monster or a Nemesis monster; it takes a lot longer because they have set points where their turn up in the timeline. With late game content the issue is the sheer length of time involved in getting there. In the case of The King, I've not broken it down yet because I want to experience the King in other campaigns (spoilers, it's a mess in People of the Lantern because you need to delay waking The Watcher in order to handle The King and get the Armory).
The issue with Core/Final nemesis monsters is pretty self evident, they turn up once per campaign each and if I want to try out the showdown with a different load out, that takes a long time to get there. Nemesis Monsters have a similar issue, even the Node 1 Nemesis monsters take most of the campaign to face every version, and I want to do that multiple times. The Heart Flute can help, but it distorts the picture because of its design (and it doesn't work with The Black Knight at all).
This means, until I get The First Hero expansion there's really no good way to review these things without taking a fair amount of time. I don't want to do a “hot take” based on a single campaign as these campaigns are sitting at 30 lantern years worth of increasingly complex showdowns and settlement phases. The Hunt Phase used to be a place of simple respite, but Encounters have changed that also.
In short it is a lot of time and work to reach review stage, I'm sorry I don't get to these full reviews quickly, but I am not doing this in order to rush out and be the first person to get a review/opinion out there, I'm here to try and dig deep, tear things apart, inspect the cracks and then admire what's there for what it is. At times the first experience isn't an accurate picture of what an expansion is doing and who it is good for, but it is always a delight to have that blind run (something that was REALLY HARD to do with the Frogdog because of how long it took to get to me).
Anyway, I hope this little additional note helps explain why I do things the way I do, I wish I could be faster, but it's not in my nature. Let us now get to the review!

All the way back in November 2015; there was a release of an unusually attired female warrior, wearing a knightly suit of armor. This knight, called Percival after the Welsh/Celtic character also known as Peredur, was bedecked in an armor style which was far more sophisticated and complex than the usual kind seen on survivors. Percival received a plastic release a little more than a year later in December of 2016. Percival's design and artwork along with her position as one of many Arthurian influenced references in KDM managed to cement her quickly as a fan favourite.

Here is her lore text:
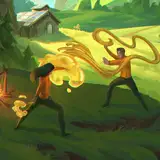
Percival is a member of a small order called the Black Knights. The Black Knights were founded by a militaristic settlement that hoped to conqueror the darkness and provide a safe haven for humanity. A great crusade called the Black Knights into action and Percival left her home, never to be seen again. Before leaving, though, she commanded her loyal companion, a young puppy, to wait for her safe return. He still waits to this day.
In February of 2016 there was another resin release, this time of the Black Knight. A monstrous warrior, standing around twice the height of Percival, this sculpt echoed and referenced her through its armor and weapon design. The links between this model and Percival was noted and I, amongst others (I'm not sure who put this idea forward first, but I did figure it out by myself); posited the idea that this Black Knight was the very dog referenced in the above passage. This dog was not a dogpole, but something different from a bygone time and when it was pitched in the Kingdom Death 1.5 campaign as a new expansion many of us were very excited.

They say if you take a lantern that never lit down the trail of corpses and past the whispering stars you will find an ancient figure atop a crest of determined faces. Treasured by a hidden cult of loyal squires, the figure will awaken for only the most honorable of challengers. -- Black Knight Lore
For generations, the Black Knight has unknowingly defended a settlement of people hidden in the ruins of it's home. They have become self-appointed loyal squires, creating a position of honor that wears the heraldry of the knight and secretly toils in its service. When invaders appear, the squires watch from the shadows so they may treasure the lessons of their master. -- Black Knight Squire Resin "Owen" Lore
When their guardian falls unconscious from exhaustion the Squires emerge from their hidden dwellings to maintain the knight's time-worn equipment. They work methodically, timing the most noisy parts of their activity to their sleeping protector's snores and dreams. -- Black Knight Squire Resin "Elle" Lore
Flash forward to 2024 and The Black Knight expansion landed on our doorsteps. In this expansion, the Black Knight is established as a reoccurring Node 3 Nemesis Monster; making it the first monster capable of replacing The Hand (Though The Hand is still present in The Gambler's Chest due to its narrative links as the main Protagonist). The Hand is absolutely one of my favourite characters in the current Kingdom Death pantheon; and the showdown is a super narrative flex from the designers. But the truth of the matter is, The Hand's showdown, while thematic and cool as heck in how it presents an incredibly powerful individual pretending to have a fair fight with mere mortals; is not the most gripping experience over repeated plays. This makes The Black Knight a vital refresh for players who have had enough of being toyed with by The Scribe's left hand man.
All of these factors, in combination with the demos of the showdown at Gencon mean that this expansion has been one that was keenly anticipated, carrying with it a promise of refreshing a tired portion of the game's construction and potential confirmation of a community hypothesis. Which means the Black Knight has a lot of anticipation and promise to live up to, let us see if it can measure up to the hype.
I am going to review this (and all future expansions) under the following structure, I'll list everything that comes in the box, take a look at that packaging and the overall presentation/construction quality of the content. Then look at the miniatures with an eye towards storytelling, detail, assembly and usefulness. This will be followed by a spoiler light overview of the showdown, with consideration towards the tactical depth, themes and how engaging it is. Finally there will be look at the Gear/Settlement/Hunt Phase additions (if any). I'm going to avoid any direct spoilers on stuff like rare gear that requires specific actions to unlock.
At the end of all that I'll grade this expansion on the following elements:
Quality – The construction of the product. KDM brands itself as a luxury boutique product. So does it meet that self imposed standard or does it have issues that should have been caught by QA?
Narrative – How good it is at providing lore, storytelling, themes and other thematic elements both written and visual.
Engagement – How engaging this particular expansion is, both initially and over time. Does it make a great impression, hold that over time, or is it like a fine wine that gets better the more time you spend with it?
Difficulty – Who is this expansion for? Does it make a campaign harder, easier or have an overall neutral impact on the campaign. Not every expansion/monster is for every type player and more experienced players may outgrow what a particular element offers.
Value for Money – How much game are you getting for what you pay?
Expansion Contents

KDM Store Image of components
3 x Black Knight plastic sprues
29 x Black Knight AI cards
24 x Black Knight HL cards
3 x Dividers
3 x Disorder cards
16 x Citadel showdown tiles
3 x Fighting Art cards
2 x Rubble terrain tile sheets
2 x Secret Fighting Art cards
11 x Rare Gear cards
4 x Armor Set Bonus cards
2 x Tactics cards
3 x Settlement Event cards
3 x Innovations
4 x Terrain cards
15 x Black Knight Armor pattern cards
15 x Black Knight Armor pattern gear cards
4 x Squire vignette cards
4 x Squire Suspicion cards
4 x Squire Gear Grids
3 x Mountain Lion AI cards
2 x Seed Pattern cards
2 x Seed Pattern gear cards
1 x Collective Cognition Reward card
3 x Knowledge cards
There is no doubt at all that since the first Generation of releases (pre-Gambler's Chest) the presentation of Kingdom Death has stepped up several notches; in addition to providing durable, high quality boxes rather than the plain, easily recycled, versions of old; miniatures have been scaled up with a larger size that allows for more crisp detail. Card stock is thick, the rulebook is embossed and has a far superior paper quality than the older expansions and everything is cut/printed in a fashion that matches the Gambler's Chest standards.

However, there are a couple of omissions and errors that were not caught. In the squire gear grids there is an alignment error on Elle's grid where the Toolbelt layer was set too high up. There is also a lack of a divider for storage of the Squire Campaign cards, which is quite awkward because this means you need to source your own divider in order to keep them stored without losing track of where they are. This is an issue that is also shared with the vignette boxed sets, each of them really could have benefitted from their own divider.
Also there is a small assumption about the player owning the Gambler's Chest, because without it you'll have some cards that do not go anywhere in particular or have limited use. This one is not so much a flaw, in that it is just something to be aware of going forward, if you don't have The Gambler's Chest Expansion (GCE) there will be elements of future expansions that don't have appropriate storage solutions and in some cases you won't be able to use them at all without that large box expansion (Knowledges in particular are like this, Seed Patterns/Patterns still work without the GCE).

I very much like the style of the miniatures we get in this expansion; the Black Knight has been scaled up from its resin release and is an imposing miniature on the board. The four squire miniatures are all unique, characterful and distinctive, though only Cain's miniature has much use outside of the Squire Campaign.
We also get three narrative sculpts of the armor sets that come in this boxed set. This is an improvement over the situation with the Lion Knight, which has three unique armor sets and no sculpts for those armor sets. However, we only get one of each armor type; meaning that if you want a female Earl or Count survivor you do not have an appropriately armored miniature. The Marchioness Armor set appears on the Squire miniature Cain, so he provides a male version of that model, but it is a huge shame that the other two do not have such counterparts in this box.
The gear carried by the three narrative armor sculpts is a little perplexing; the Earl's spear and trumpet and the Marchioness's sword do not seem to currently have any gear cards (I expected them to be seed patterns). They may appear in The Inverted Mountain campaign in the future though, so this may just be a temporary blip and even having them right now on sculpts is not a major issue.
The big weird one is the Count miniature (Front left of image), this armor set is an aggressive weapon focused one, but the model is holding a pickaxe and sickle, both of which are explicitly not weapons, they are tools in the game's mechanics. This is a weird choice and I cannot figure out at all why this decision was made because it had to be a result of specific art direction given from Team Death to the sculptor. Perhaps it is future proofing for something that turns tools into weapon keyword gear cards, but I think even then there are many other stronger options that could have been chosen here including a set of Katars that comes in this very box.
Also, while most of the miniatures are great to assemble, the Black Knight is not. Whomever did the tooling for this miniature did a very poor job, because when it is put together there are multiple glaring gaps, some of them incredibly deep and at this stage it is not unreasonable to expect better from the production side. Especially for the iconic title character of the expansion and given how expensive it is to produce the molds for these plastic pieces this is a problem which will likely remain for the foreseeable future.
All of this means on the physical side of things it is hard to give this expansion the highest level of praise; there are a lot of amazing things here, but there are also some glaring errors and omissions which I do not think should have made it to the production stage.
The Black Knight is still an absolutely stunning miniature though.

My Black Knight, complete with hairs from our little black/brindle dog Pamcha

The Black Knight's showdown is striking when compared to other monsters, this is because it eschews the usual showdown board in exchange for a sixteen tile grid laid in a four by four pattern. Two of these tiles are preset and present in the same place each time; the Black Knight's starting tile in position #6 and the survivor's starting tile in position below it in position #10. The remaining tiles start the showdown face down in randomised positions and orientation. Meaning that while the environment is constructed from the same sixteen tiles each time, the actual layout and tactical options will vary a great deal.
These tiles are only revealed when the Black Knight moves onto them, a survivor is knocked back onto them (more on that later) or a survivor spends an activation when adjacent to an unrevealed tile to 'shine a lantern' into it and see what is there – something that is of valuable use because knowing the layout of the “corridors” in the map can make all the difference.
The concealed tiles are an important part of the showdown puzzle for a number of reasons; the largest of these is because they have pre-printed terrain on them; terrain that can be utilised by the survivors for an advantage, provide obstructing “walls” to be broken through (either by knockback or survivor action) or elastomer statues.
Elastomer statues, which are based on a real world polymer type, are one of the main tools utilised by the Black Knight outside of pure damage. The Black Knight is a heavily knockback focused monster, smashing survivors into the various bits of pottery on the tiles (which get replaced with broken rubble tiles) and eventually knocking them off the edge of the board and into the void. A situation which can mean sudden death for the survivor in question. The statues are very bouncy and the Black Knight will fling/push survivors into them, causing them to bounce around like pinballs on chivalrous bumpers in a ceramic pinball machine.
These statues are normally impassable for survivors, but when thrown into them they'll ricochet off in a direction that is ninety degrees from the originating direction. Their knockback is also increased a bit, which means they are more likely to collide with another piece of terrain or end up flying off the edge like Hans Gruber.
Even when a survivor doesn't experience a terminal velocity they can end up separated from the rest of the group because they have bounced into a tile which doesn't have a route back (because the statue they passed through is impassable). When this happens they'll have to start breaking through other terrain to rejoin the group.
On top of this, some tiles also feature a bell which can be rung to reduce the Black Knight's toughness for the showdown. The Black Knight is unique in that a portion of its starting toughness is deployed via a number of toughness tokens rather than being built into the base stat line. As it levels up it gains more tokens rather than a direct increase to the base toughness. Ringing a bell can result in removal of one of these tokens, making the showdown easier to complete (you can also sometimes break armor off the Black Knight to reduce its toughness). This mechanic is interesting and also has some fascinating spoiler implications which I will not be going into in this review.
All of this means that more than any other showdown in the game, the environment is its own character; this is a claustrophobic, tight dungeon fight where correctly placing survivors in the right places can mean the difference between life and death. I'm not a fan of instant death mechanics in board games as they are cheap and unearned, but the threat of a potential death due to getting bounced off the sides of the board is both earned and fair. There is always a line you can take to avoid that knockback, even if sometimes the answer is simply 'make sure you have already move away and stood next to a pot to get knocked into it'.
Despite there being no additional random terrain, the showdown here doesn't need it because of how it is designed. Frankly, this is the single best positional based showdown in the game to date, and it demonstrates just how good a well designed dungeon crawler using Monster's core mechanics could be as long as the monsters are designed to be symbiotic with the environment they are in. There are also wonderful narrative elements such as the monster's interaction with red haired survivors calling back to Percival.
We haven't even got into the Black Knight and the twin engines which lurk at the heart of every monster in this game; the AI and HL Decks that beat inside the monster dashboard. The Black Knight's behaviour is an incredibly well expressed presentation of a monster that is trying to mimic how a knight would battle, but doesn't properly understand it and at times falls back to a feral form. We've seen this before with the Dung Beetle Knights who attempt to mimic the Flower Knight in their combat style. Both monsters sometimes manage to fight in imitation of their inspirations, but more often than not they fall back onto less sophisticated actions. The Dung Beetle Knight obsessively throws its ball around, utilises its extra limbs and even spits hot resin; likewise the Black Knight tends to wield its massive sword like a club and sometimes forgets to even do that, falling back instead on more primitive canine behaviours.
There's a real sense of a “beast out of its depth” here during this showdown and the intricate lacing balance between the Knight, the Dog and the Environment all come together to make probably the best Nemesis showdown we have seen to date. This monster is an engaging challenge with an appropriate level of difficulty and multiple opportunities for smart, skilful play.

Nemesis monsters have varied ways of providing gear when compared to Quarry monsters; the Butcher sometimes allows for the unlock of a mask crafting location, the Manhunter provides rare gear drops, the Lion Knight's settlement endeavours give routes towards crafting combinations of existing base monster armor sets into new armors and the Slender Man drops a resource that allows for quarry-like crafting.
The Black Knight follows this trend, with victory against the monster resulting in it retreating for a time to regenerate from its wounds. During this time, the survivors raid the Citadel's workshop for patterns; giving a randomised number of them, but most of the time the players get to pick which specific patterns they want to take. This selection rather than randomisation is important because the patterns gained during this moment all relate to three different armor sets and there is a limited number of Black Knight patterns you will gain during each campaign. Typically it is hard to get even two complete sets of armor, so often you'll have to pick one and stick with it, that improves re-playability though if you do not manage to get games in on a regular schedule it may take a long time to explore all three sets. I would have liked it to be more common to hit two out of three sets in a run, but it is not a major issue.
These three armor sets each land within the typical trope archetypes for character roles in party based dungeon crawllers (Tank/Damage/Support); the Count Armor is an aggressive attribute token based damage dealer with interesting synergies if you have Gourmandism Arc Survivors from the GCE, the Marchioness Armor is a front line Riposte based Tank (take a hit, retaliate play style) and the Earl Armor is a support set designed around the Encourage survival action for its synergies. On average you are not going to get one of these put together until after the L2 Black Knight showdown, so they trend towards being late game armor set options (especially the Earl and Marchioness Armor sets).
The other gear cards include the Black Knight Tactics badge, a badge that provides access to Tactics cards and a +1 strength token (baked in synergy with Count Armor); which is a guaranteed reward upon the first victory. The two new tactics cards are thematic and interesting without being as overpowered as some of the older options – honestly this system is not great without multiple sets of Tactics cards in the deck due to it lacking variation, which requires other expansions that include tactics cards such as the Dung Beetle Knight, Flower Knight or Lion Knight. The Tactics system itself is a very solid and enjoyable one however, so if you do have more tactics cards (and really you only need one or two extra expansions to get sufficient variation) then it comes together well.
Rare Gear is either locked behind specific events (therefore spoiler territory which I won't go into but both of them are really great story beats) or specific to the Squire campaign. So I will leave it for now, though I do wish that the Squire campaign stuff was also printed with Seed Patterns; I think not having the short campaign gear useable elsewhere is a bit of a shame and more Seed Patterns is always a welcome thing due to the Seed Pattern deck being fully exhausted before the end of most campaigns I play. The Seed Pattern system is an immensely enjoyable one, providing both extra texture and randomisation to the development path of a settlement and also short term goals that can help focus players.
Seed Pattern gear offers two weapons; the first of these is a pair of late mid to end game level Katars called Piercing Claws. This paired set of Katars that has a lot of power due to being able to remove tokens from the monster (giving them power vs. the Black Knight, but also utility everywhere). This happens if you hit 3+ times, which generally requires the weapon to be used paired. I like mechanics like this which reward using additional speed, because speed is a mixed bag attribute that has both positives and negatives as you increase it. I love this weapon a great deal. So much that I wish they had been modelled onto the Count Armor Narrative Sculpt rather than the Sickle/Pickaxe combo we got.
The other Seed Pattern can be crafted in triplicate (first of its kind iirc) and it is the Clasping Shield. This is a solid Block 2 shield that has an incredibly rare and useful left facing Red affinity (this affinity is often on redundant early game weapons or armor sets, so any place where it is on a shield or item is precious). The shield also provides a really cool addition to the Black Knight showdown where if a survivor would collide with you, instead of them passing by and knocking you down they land standing in the nearest unoccupied space. This gives survivors a way to save knocked back victims who otherwise might go over the edge. With smart positioning or a Dash during a survival opportunity you can catch the otherwise hapless survivor, more player agency and positional play rewarded. Needless to say, this shield is super sweet and I do hope we get more scenarios in the future where the 'catch' that this shield provides is a potential lifesaver (The Screaming God is one such expansion that has the potential to provide space for this shield to shine).
Overall I think that the gear in this expansion is nicely designed, bringing something new to the game experience plus it has some fun thematic and mechanical interactions across not just the Black Knight showdown, but in other places as well.
This expansion brings us some new settlement events, disorders, innovations and fighting arts along with a new synergy for the core game's Honorable disorder. The three settlement events feel a smidge weird because they are added in from the start and they reference the bell which is in the settlement but not referenced until LY13 where a story event brings it into focus and it becomes an innovation. I drew “It Rang!” and “Jousting” quite early in my first ever play through and they felt disconnected due to the lack of anything earlier referencing the bell these cards mention. However, the cards themselves are interesting and very flavourful, offering unique experiences, penalties and rewards. Plus I always appreciate having more well balanced settlement events because they add to making a unique emergent story for the settlement.
The Black Knight Knowledge seems to be a direct reference back to Percival, adding onto her story by suggesting that her departure from that little puppy was not done from wisdom, but instead because of duty and it is what got her killed (we know she's dead as this is both confirmed by Adam and her body is found during the hunt event which came with her white box). It is a solid Knowledge that I found to be thematic and reasonable without being overly strong (I also like how it interacts with the Records innovation).
Next we have the three new Fighting Arts; now Fighting Arts have a troubled existence these days because Arc Survivors essentially obliterate them from the game. So unless you play without Arc Survivors you are rarely going to experience these. This is a shame because two of them are really interesting and unique (the third is thematic, but generic). This is not the fault of the Fighting Arts though, and for players who do not have the GCE or have turned away from Arc Survivors due to the increased bookkeeping or fatigue from mechanical complexity they may have more space to shine.
The three new disorders are very thematic and either interact narratively with the Black Knight concepts or mechanically with how the showdown plays out. I am a little amused by the fact that Dishonourable is not mutually exclusive with Honorable, but there is no mechanical clash between them, it's purely a thematic oddity to have a Honorable Dishonorable person. That tickles me almost as much as a Shieldarang Immortal Arm survivor launching their fist at the monster does. ROCKET PUNCH! (TV Tropes link here)
The Squire Campaign is a five year narrative campaign that follows four specific individuals from the Black Knight's Citadel. During this campaign these characters will encounter not only the Black Knight, but also a few specific monsters from the core game, a Phoenix, a King's Man and a modified White Lion.
This campaign has a few minor branching paths, mostly based around choices that players make during the “settlement phase”, but the order of the showdowns is fixed as Black Knight → Mountain Lion → King's Man → Phoenix → Black Knight. At first I really enjoyed this campaign, but after just a couple of playthroughs the lustre wore off somewhat and this has become something I'll only break out if I want to demonstrate a campaign experience for veteran gamers who can quickly grasp the mechanics.
The reasons for this turn around are down to the way that if any Squire other than Owen dies it is a campaign Game Over, how easy it has become to pick an optimal path for your endeavours (thereby making those decisions rote), the way that one squire can be permanently eliminated right before the final showdown (making the last showdown awful if you're playing with four players) and the method that happens is through a mechanic that is explicitly designed to encourage players to use it. Plus the Mountain Lion, itself an exceptionally well designed modification to the White Lion, is too punishing for when it turns up and that can create a really fast off ramp moment. An off ramp is where a player turns away from your game and doesn't want to return because something has frustrated or disengaged them so severely, you need to avoid it as a game designer and if you are going to build frustrating moments into your game they should happen later on where players are already hooked and instead of wanting to give up they'll feel determined to try again.
The mountain lion situation can be solved by resetting the showdown and trying again, or restarting as per the official rules. But for newer players, the kind of players I want to showcase a campaign like this with, this lion is a point of frustration that is turning up too early (before new players are really invested) and I end up having to prepare people's expectations that this showdown is going to be a struggle to get through.
The short campaign concept is still a great one, but a fixed order of monsters is not a great choice to encourage replayability, this campaign would have benefited more from letting the players select the order which they will face the Lion, Phoenix and King's Man. Leaving only the Black Knight fights as fixed bookends. It is early days for this new structure and it may well evolve over time the way that all the other designs in Kingdom Death: Monster have.
I am going to be grading this expansion as a whole with more weighting towards the Black Knight as a Nemesis monster, the Squire Campaign will be a smaller portion of this weighting because it is where the vast majority of my mechanical quibbles and criticisms are located. I don't think it is fair to tar the Black Knight Expansion overall for the sins of the Squires, but they do need to be considered because that mini-campaign has increased the price of this expansion when compared to others.
Quality - There is no doubt that the quality of production has been stepped up, the rule book is more comprehensive, the miniatures cards and tiles are all gorgeous and the box everything comes in is both useful and good looking. However, there are issues that should have been caught by Quality Assurance and for the price I do expect those kind of things, especially the tooling on the Black Knight, to be better.
Therefore, B+.
Engagement – The Black Knight as a Node 3 nemesis is a massive step up in all aspects when compared to The Hand. This is a challenging, characterful, unique monster with a showdown that offers a lot of space for positional skill to be employed and grow. I cannot however give this one full marks because of the Squire Campaign's weaknesses. Therefore it gets an
A-.
Narrative – This is a place where The Black Knight excels, it demonstrates the same level of finesse, depth and texture that the Killenium Butcher vignette showdown also managed. While it isn't quite on the same level as that Butcher vignette, it is not far behind and this box contains multiple super cool lore moments and world building.
A+
Difficulty – The Black Knight is absolutely right in sweet spot for challenge; this has the perfect mix of stick and carrot between its showdown fight and rewards. I think it is the best Nemesis monster we have seen ever, even surpassing the Killenium Butcher in quality. This is a showcase of how impactful a well designed fighting environment with tight spaces can be for a boss battler. It also offers varying paths and asks difficult questions of the players in respect to gear. Only the Squire Campaign falls short on this because its difficulty curve, despite having a flatter power level for the squires, peaks really early with that Mountain Lion fight.
A-
Value For Money – The missing Narrative alternative sculpts do hold this expansion back a little bit, for the sake of just two or three miniatures more (if you consider Cain the Male Marchioness Armor which I think is reasonable), the lack of the seed equipment being sculpted onto at least one of the narrative miniatures and the limited use of the Squire Campaign gear (not making it also Seed Patterns) this expansion is held back from feeling complete which is painful for a $150 expansion.
I can't bring myself to give it an A grade, but it certainly isn't just the above average grade of C, so I'll settle on a B here because I think we've seen better value for money in other expansions released in the second generation.
Honestly? This one is for everyone who plays enough to regularly reach The Hand's showdown fight in Lantern Year 13 and feel disengaged by that showdown fight due to its linear nature. Even if you are not able to utilise the Seed Patterns or Knowledge cards because you do not yet have the Gambler's Chest you will at least get to experience the Fighting Arts for a bit before they get semi-retired by Arc Survivors.
As a Knight the Black Knight also links up with the other Knights due to having Tactics and Parry as a part of the Knight package that comes with that category of monster. So it plays great with many of the first Generation expansion monsters and fits into most campaigns very well, I think this has reached the same level that the Lonely Tree has for myself, in that it is going in every single campaign I play until we get another Node 3 Nemesis monster, because The Hand, as much as I love as a part of the world of Kingdom Death, doesn't hold a candle to this goodest of dogs.
Make no mistake, while I have listed a few criticisms during this review, that is only because I have gone over this expansion with a fine tooth comb and held it to the standards which the franchise and price expect. This is one of the best releases we have had for the game and is an absolute essential in my opinion. There are areas where it could be improved, but for the most part what this expansion is bringing to the game is new ideas, new challenges and exciting, engaging content.
This would not be my first expansion purchase as a newer player, but I think that it should be an early consideration. For players who already have everything up to and including the Gambler's Chest this is the next purchase I would heartily recommend.
A very good dog indeed.
David Fornas Garcia
2025-01-01 11:26:12 +0000 UTCJames
2024-09-08 16:34:32 +0000 UTCFen
2024-09-04 17:10:58 +0000 UTCJames Marshall
2024-09-04 16:59:36 +0000 UTCMagallian
2024-08-30 19:35:29 +0000 UTCMatthew Nola
2024-08-30 15:02:58 +0000 UTCBrad Lacke
2024-08-30 14:25:04 +0000 UTCa warm, awful feeling
2024-08-30 10:12:44 +0000 UTC