This image was the first time I tried making something look a little like an old newspaper clipping, and it took a bit of trial and error! I've included what I learned here so you can do it with fewer trials and and fewer errors! Since this image is otherwise pretty simple, I'm going to mostly focus on the effects portion this time.
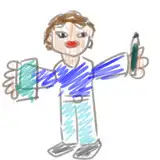
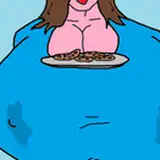
For this image, I wanted to make something that conveys that sense of precious importance when you're picking something that you grew yourself, where each one feels so dear that you don't even want to eat them. For the sake of this image, pretend you don't eat them after all.
1) The thumbnail sketch, drawn on an iPad 9.7 using Procreate.
2) The sketch, drawn using Paint Tool SAI's airbrush.
3) The lineart, drawn using Paint Tool SAI's brush tool (Spread: 82, Noise: 38). I wanted to keep it simple, so I worked quickly and didn't bother with too many details.
4) The colors, which I wanted to skew toward warmer hues. Since I was already using red and green, I naturally gravitated toward yellow as a nice inbetween. For a more in depth look at how I color, I wrote a process post here!
5) To color the lineart, I lock the layer's opacity, which allows me to color the lines without altering their shape. I mostly utilize red and dark red for this image.
6) This step is a little weird! Duplicate your lineart layer twice so that you have three of the same lineart layer. Hide the original - you don't need it to be visible, but it's good to keep around in case you decide you need it later, because we're going to pretty much destroy the other two.
Now, of the two visible ones, take the top one, go to "Filter -> Correct drawing line -> Correct line width" and increase the line width by more than seems necessary. Change this layer's opacity to 50%. Now take the bottom layer of the two and lock its opacity, then color the lines completely red. Increase its line width like you did with the above layer, but don't increase it quite as much. Set this layer to 30% and then shift it down and to the right until it's just barely peeking out from below the layer above it. Above is a visual of what the original lines look like, what the two edited layers look like, and then what they look like together.
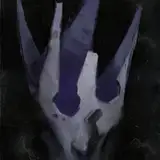
7) Time for the most exciting part - let's make it look old!!! This uses three different textures:
The main, most important texture is the halftone, which I made myself using this guide. I didn't go as far as the guide does, though - I just made a single Clip Studio asset that I can drag and drop instead of making a whole range of brushes. This texture goes below the lineart layers and is set to overlay at 60% opacity.
The second is the white speckled texture. This is from this texture pack, which I got in a big cheap bundle of texture packs on Black Friday. The original, shown here, is actually black speckles, but I used Clip Studio's "Convert brightness to opacity" function, locked the layer, and painted over it with white. This layer sits above the lineart layers and is set to overlay at 30% opacity.
The third is a paper texture. This one is by the same creator as the speckled texture, but I can't remember exactly which pack. Either way, you can find some that will work just as well in the previous pack! It sits at the very top of the layers and is set to multiply at 85% opacity.
And that's it! Once you get the hang of it, it isn't so bad. As always, if you have any questions, please feel free to ask!